2024 Workshop Dates

18 Dec

I’m so excited to finally announce my 2024 workshop dates!!

I currently offer two workshops, let’s talk about them! (Scroll to the end of this post if you just wanna get to the dates, or holler at my WORKSHOPS page!)

👖SEW YOUR OWN JEANS WEEKEND WORKSHOP👖

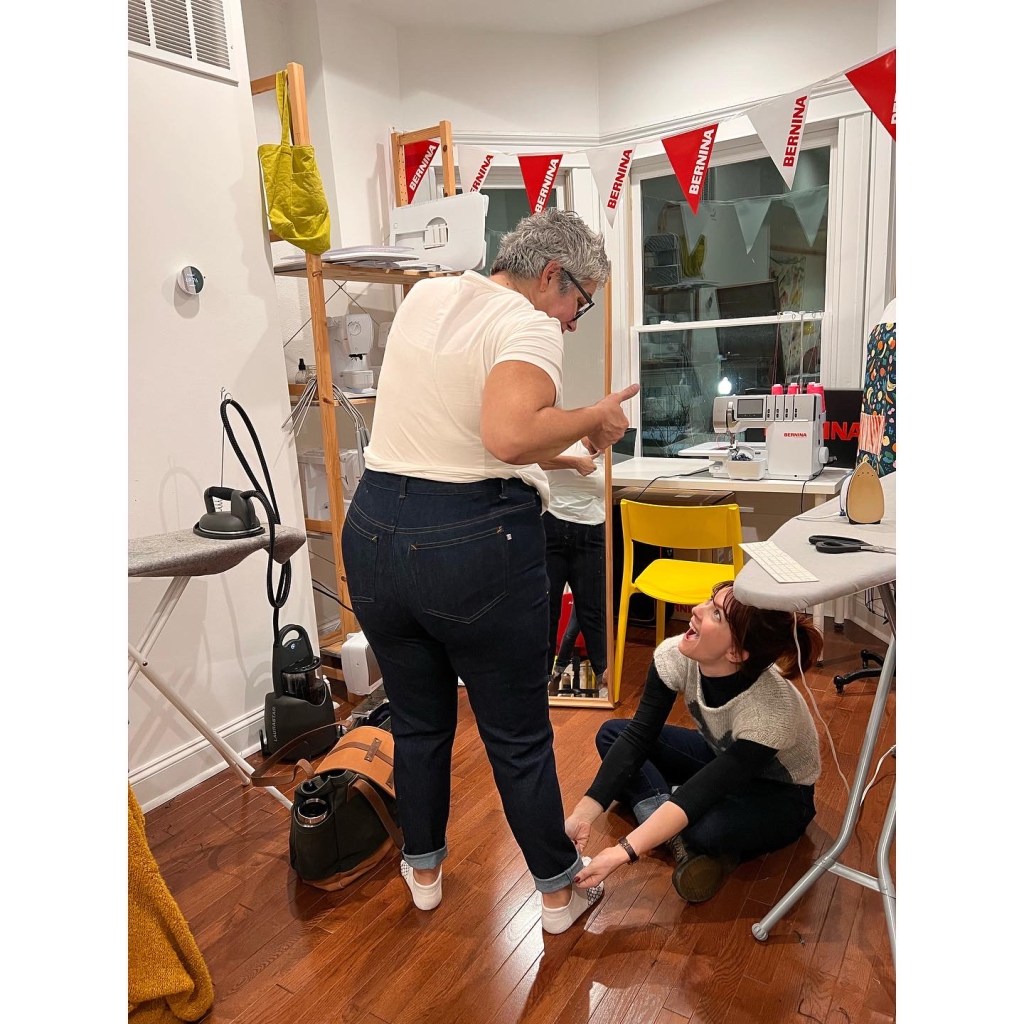
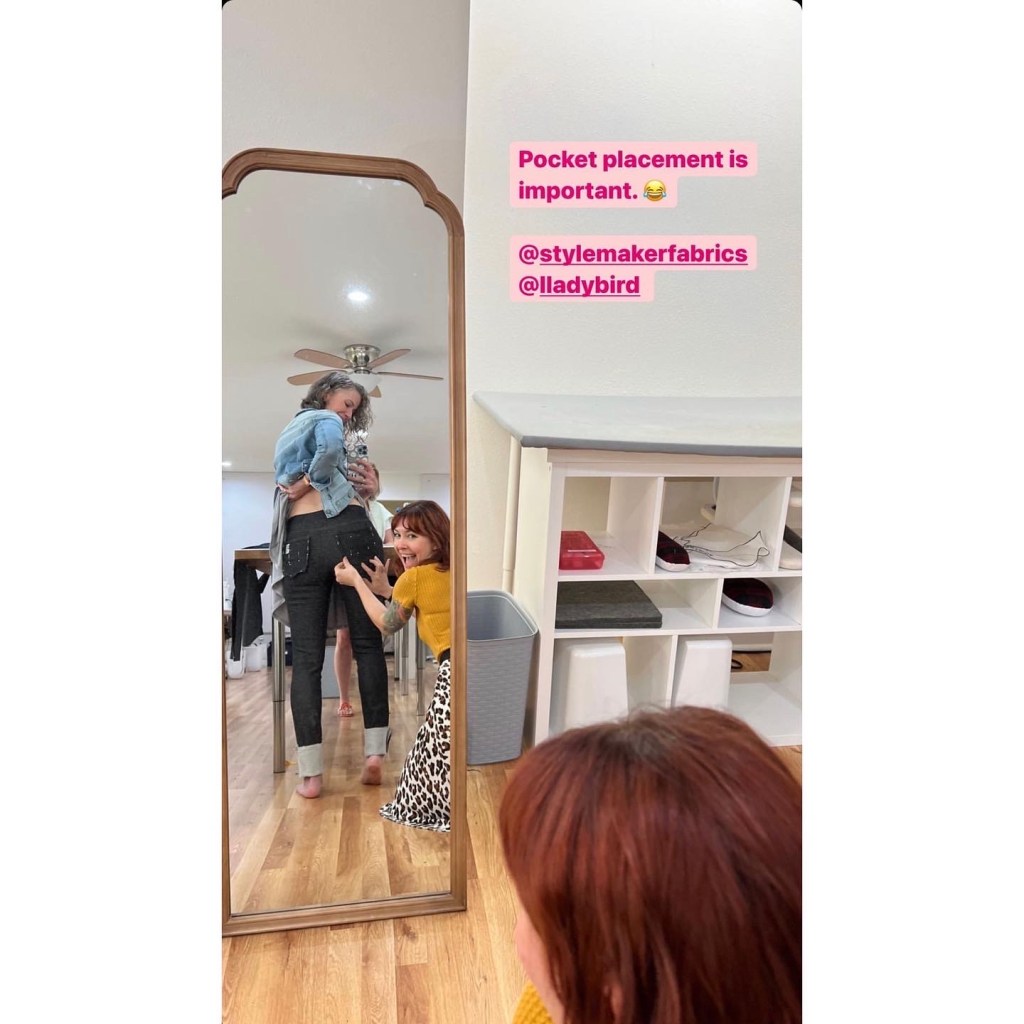
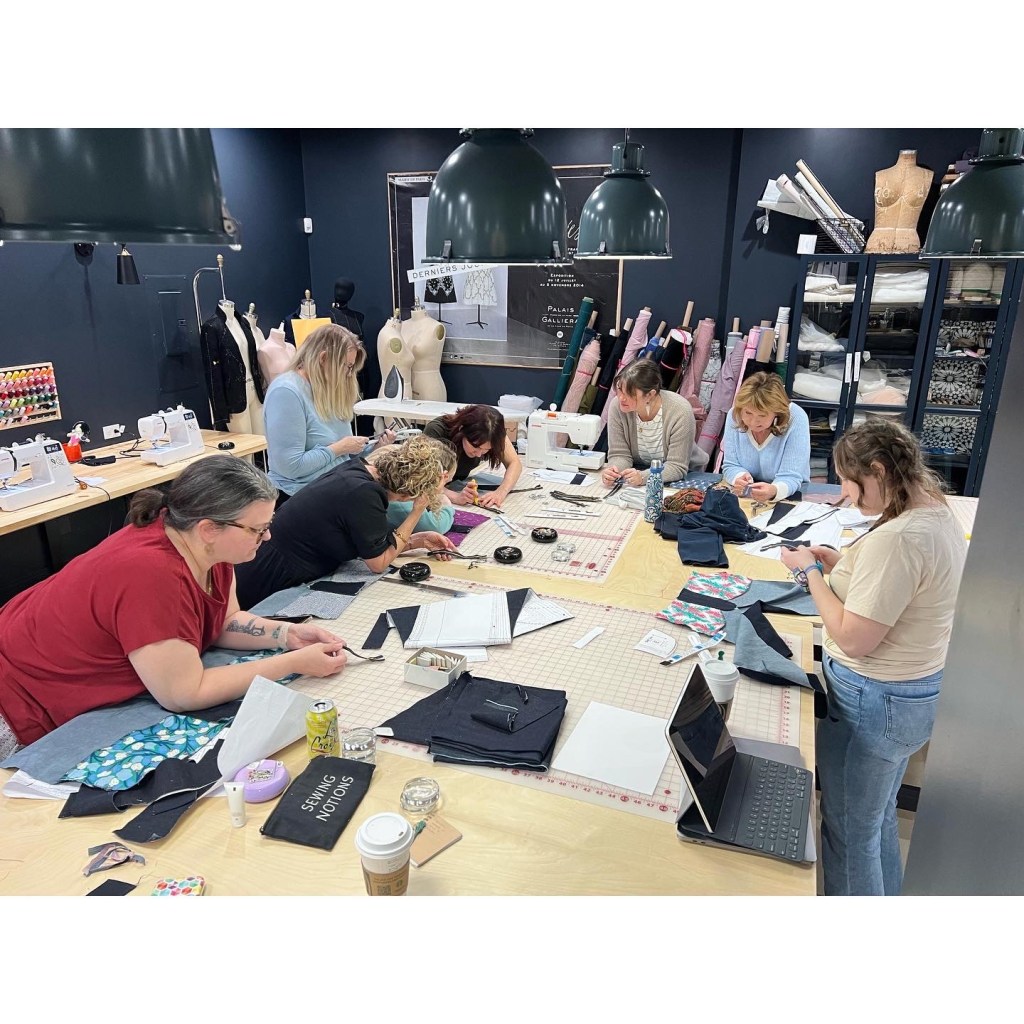
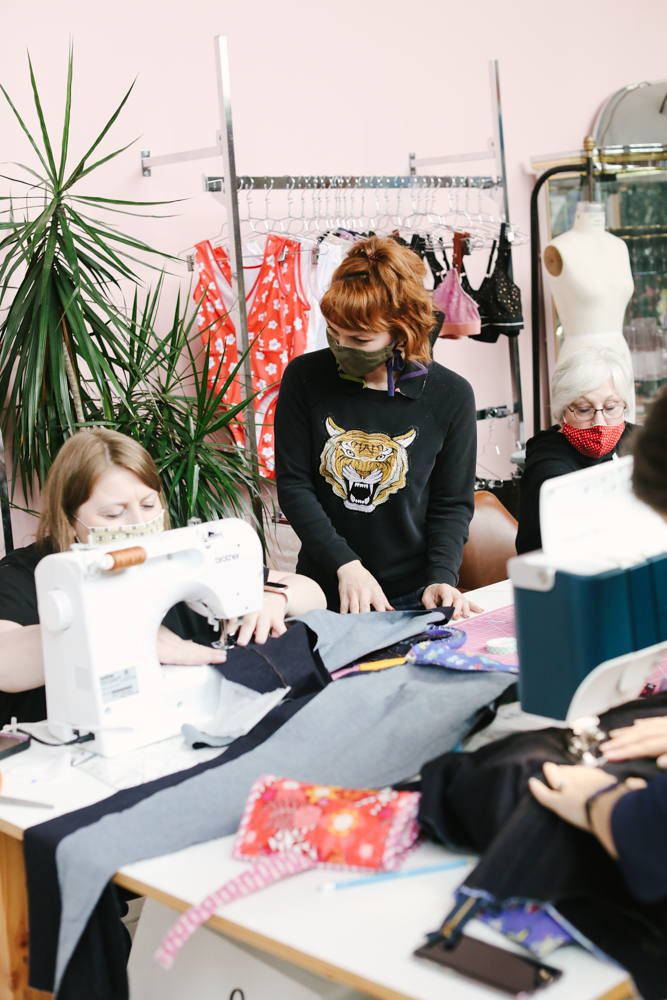
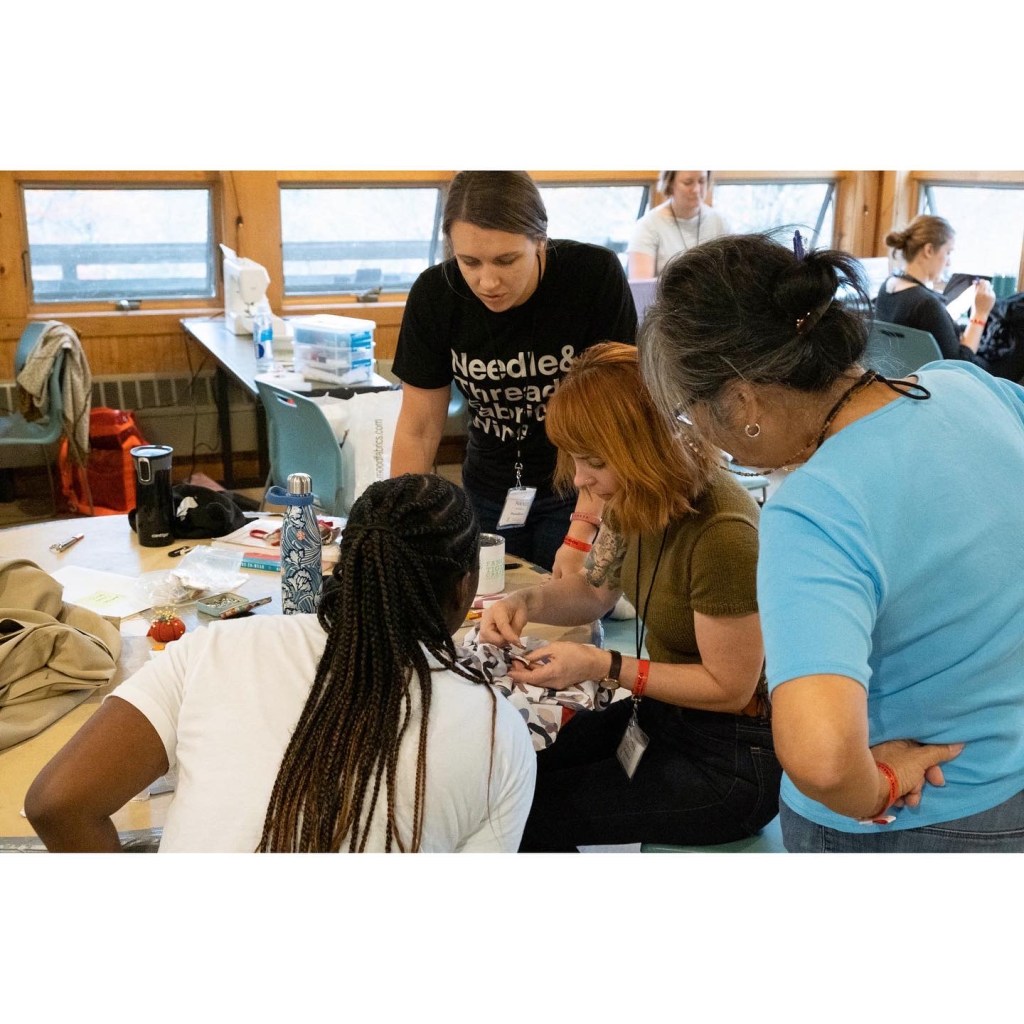
Ready to be your own personal denim designer? Join me for a 2 1/2 day workshop and I’ll show you all the secrets to sew up the jeans of your dreams! We will kick off the weekend with a half day to fit and cut – there will be samples you can try on to determine your size and any fit adjustments. Saturday and Sunday will be dedicated to sewing, and we will go over aaaaaall the details – front pockets, zip fly, killer topstitching, secure bartacks, serged seam finishes, creating and attaching a waistband, hardware installation, and stress-free buttonholes (yep, those exist!). Students can expect a fun, energetic, and fast-paced environment that focuses on learning and creating. You will leave with not only a new pair of jeans, but also the knowledge and empowerment to make more on your own!

✨JEANS WORKSHOP FAQS✨

What can I expect to learn in this workshop?

My Sew Your Own Jeans Weekend workshop primarily focuses on construction – you will learn all the details that go into making a pair of jeans, including order of construction, seam finishes, topstitching, inserting a fly zipper, attaching a waistband, and loads and loads (and loads) of little tips, tricks and best practices sprinkled throughout the weekend (seriously, so many little tips!). The knowledge you obtain isn’t just jeans-specific – you can use what you learned to apply toward all sorts of future sewing adventures (Denim jackets!! Rad pants! Skirts! Dresses! Bags! Your possibilities are endless!). You will leave with a great pair of jeans, plus the confidence to go home and make more!

Does this workshop cover fit?

We will go over fit, although this is not a fit-focused workshop. The first half day is devoted to choosing our size (including trying on samples!), adjusting our preferred fit, and preparing our fabric for sewing (cutting, marking, etc). We *will* go over minor fitting adjustments as needed for each individual body. We will *not* spend a long time fussing over fit, nor can I guarantee that your first pair will be ~the most perfectly fitting pair of pants you’ve ever worn~. There simply is not enough time in class to allow for us to make multiple muslins for a perfect fit – and to be completely honest, this is hard to obtain without wearing the pants around for a few days to really get an idea of what needs to be adjusted. I don’t say this to discourage you, but rather, to set the expectation of what you will get out of your weekend. We will tweak the fuck outta your pants throughout the weekend (if it needs it – most students find they get a great fit right out of the envelope! #magicpants) and you will leave with something lovely and wearable that I promise you’ll be proud of. Should you need future adjustments, you will be armed with the knowledge to make it happen!

Is this class suitable for plus sized sewists?

Hell yeah! The Closet Core Ginger Jeans pattern is available in sizes 0-32 (up to a 63″ hip). Need a bigger size than that? Holler at me and I’ll get it sorted. This class caters to EVERY size, no butts left behind!

I’m a dude / don’t wear lady pants, can I take your class?

Hell yeah you can! The Ginger jeans pattern can be adapted with minor tweaks for more androgynous fit, or we can adapt a men’s jeans pattern for you. Please contact me in ADVANCE of the workshop so that I can be sure we’ve got the perfect pattern ready for you!

What experience level should I be at in order to take this workshop?

Beginners, rejoice: You don’t need to be a sewing superstar with years of experience under your belt to take this class. The prerequisites for class are that you should be comfortable threading and operating a sewing machine, and have experience sewing at least one sewing pattern. That’s it, that’s all you need to take this class!

If you are a very experienced sewist with lots and lots of sewing (and maybe even jeans making!) under your belt, I still believe you will learn a lot in this workshop! I have had a vast array of skill levels in my classes – from the total beginner to the seasoned professional – and everyone leaves with more knowledge than they came with.

**For all skill levels** Please note that this workshop moves really fucking fast. 20 hours of instruction sounds like a lot, until you realize that I talk through most of it and our actual sewing time is quite limited! You will feel like an absolute warrior when the weekend is over, and also very very tired. If you are a very timid or slow sewist, I encourage you to practice working quickly and confidently to prepare for class.

I don’t like that pattern, can I use a different one? Can I modify it?

I hate to be a fun sponge, but we really don’t have time in class to make huge design changes to the pattern or try to work with something entirely different. That being said, there is a downloadable pattern for the Ginger Mid-Rise Jeans that you are welcome to bring to class. We can make additional small fit tweaks as needed, but plan on saving the major changes and additional patterns for your home sewing practice!

Will you ever offer this workshop as an online class?

Probably not! I don’t wanna do online classes! Sorry!
🪡ALTER + REPAIR YOUR GARMENTS 1 DAY WORKSHOP🧵

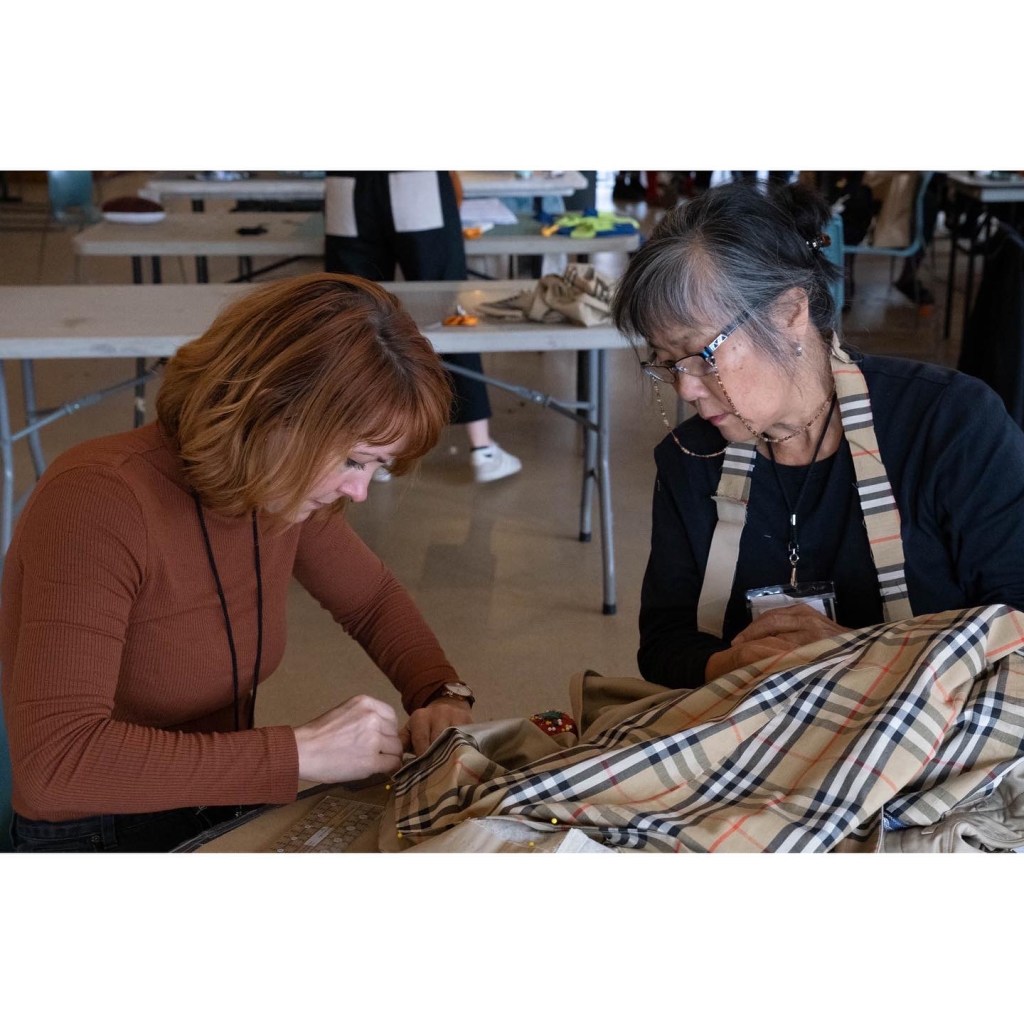
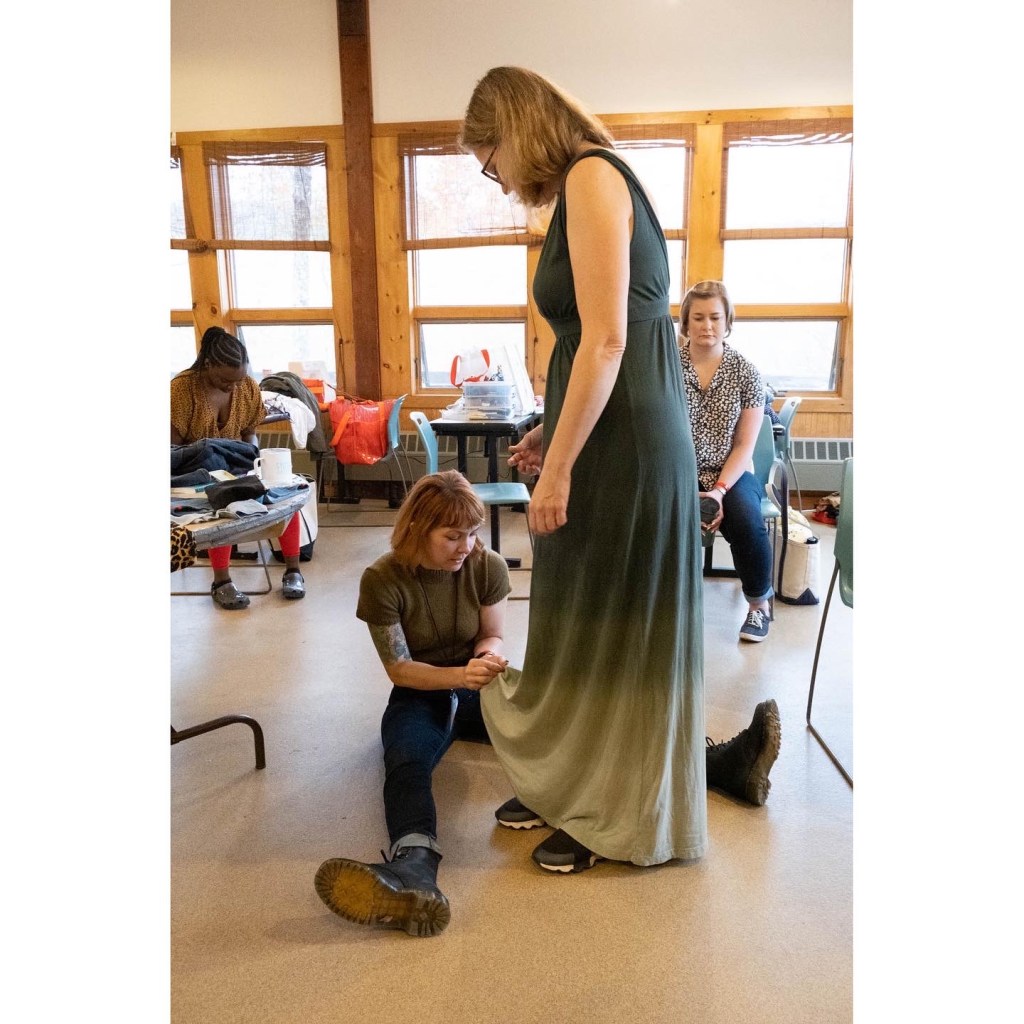
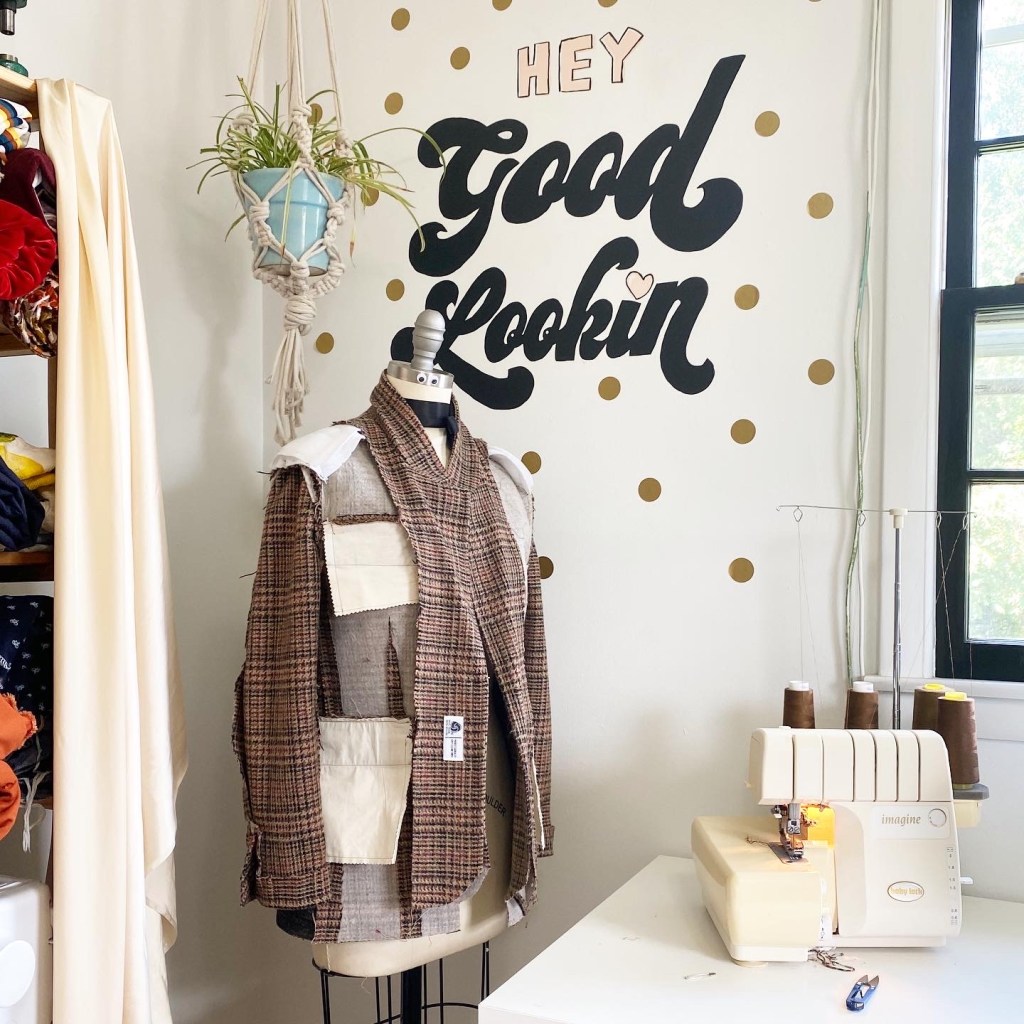
What about those garments that aren’t quite right? Whether they need basic adjustments or a full-on overhaul, we all have pieces that we want to keep but don’t necessarily want to wear. Garment alterations are a truly empowering way to level up your own sewing skills and expand your wardrobe options. This one day workshop is a fantastic opportunity to dip your toes into the world of alterations and garment repairs, while having a knowledgable teacher on hand to throw around ideas, show you the ropes, and get you out of any trouble that might arise! Students will work on garments of their choosing, meaning you won’t be stuck learning techniques that you aren’t interested in. Bring those pieces have been languishing in your closet – whether handmade or RTW, vintage or new – and let’s elevate them into pieces that give you real joy!

⚡️ALTERATIONS WORKSHOP FAQS⚡️

What can I expect to learn in this workshop?

My Alter + Repair Your Garments workshop is an absolute wildcard in terms of what you learn – that’s entirely up to you, the student! Since you will be bringing your own pieces to work on, it’s really a matter of what do YOU want to learn? In general, students can expect to learn a variety of basic alteration techniques such as pin fitting a garment, transferring the fit adjustments for sewing, techniques for successful seam ripping, and how to make adjustments and repairs to your particular garments.

Does this workshop cover fit?

Yep, that’s kind of the whole point of alterations! 🙂

Please note that this is a fitting class that focuses entirely on COMPLETED garments only. We do not work with muslins, or handle flat-pattern adjustments (this is likely something already offered by your local sewing shop!). We fit for style, for comfort, for wearability. You will learn new fit techniques and be able to see fit from a different perspective, which will aid you will your personal fitting quest!

What experience level should I be at in order to take this workshop?

This is a truly “all skill levels are welcome” sort of class. Since we work at a slower pace, there is plenty of opportunity for help with the beginner students, and more advanced students will not be bored. Students will get loads of one-on-one time, as well as a healthy of amount of self-guided sewing. For this reason, I do recommend that students have *some* sewing experience taking this class – you should know how to use a sewing machine and understand basic clothing construction (including how to press) – as you will get a lot more out of the experience.

The thought of doing alterations makes me want to die, why the hell should I take this class?

Hey, I get it – alterations are a bit unpopular in the sewing world. Hemming someone else’s pants for free ~just because you know how to sew~ is not how any of us want to spend our free time! And maybe you don’t want to work as a tailor, that’s understandable! But beyond boring pants-hemming, there are so many other benefits to understanding how to execute successful alterations. You will be able to fit and wear clothes that have alluded your body in the past. Your handmade items with weird issues that you didn’t notice during muslin (or maybe you skipped the muslin, you little rule-breaker!) can be rectified. Your understanding of fit, and how to execute it, will explode. You will learn interesting things about clothing construction that can be applied to your own handmades. Alterations are the most sustainable way to sew, and quite a bit faster than making an entire garment from scratch (I like to refer to it as “micro-sewing” 😉). And let me tell you – just because you know *how* to do something, doesn’t mean you *have* to do it for someone else. And that includes hemming pants. You can absolutely be smug about it when you tell people no 😘

🗓️ 2024 WORKSHOP DATES 🗓️

So, about my workshop dates! Next year is going to be a little different from previous years. I’ve scaled back my travel a lot (by choice; I’m tired and I’d like to focus more on my freelance alterations business) which means I’ll only be offering one jeans workshop per shop for the calendar year. So if you aren’t able to get in this year, you’ll have to wait until 2025! For this reason, I recommend signing up as early as possible, as my workshops tend to sell out!

Additionally, based on student response, I’ve added a couple weekends of Alterations workshops that are not connected to a Jeans workshop (scandalous!). My Alterations workshop has been suuuuper popular, and especially so in a couple particular cities. So if you’ve been trying to get in one at Pintuck & Purl or Stitch Sew Shop and have been stuck on the waitlist, I would recommend checking out those options as there are finally more of them (hooray!).

More information is available on my WORKSHOPS page. Please note that while dates are confirmed, not all workshops are listed yet! I have included links where the listings are active and currently accepting registration. For all other workshops, you will want to visit the website of the hosting shop for information on when the class will be active, and how to sign up.

Alter + Repair Your Garments
February 29, 2024
Former + Latter Fabrics / Edmonton, AB Canada

Sew Your Own Jeans Weekend Workshop
March 1 – 3, 2024
Former + Latter Fabrics / Edmonton, AB Canada

Alter + Repair Your Garments
March 23, 2024
Stitch Sew Shop / Alexandria, VA

Alter + Repair Your Garments
March 24, 2024
Stitch Sew Shop / Alexandria, VA

Alter + Repair Your Garments
May 18, 2024
Pintuck & Purl / North Hampton, NH

Alter + Repair Your Garments
May 19, 2024
Pintuck & Purl / North Hampton, NH

Alter + Repair Your Garments
June 6, 2024
Old Spool Sewing Studio / Brielle, NJ

Sew Your Own Jeans Weekend Workshop
June 7 – 9, 2024
Old Spool Sewing Studio / Brielle, NJ

Alter + Repair Your Garments
July 11, 2024
Sew On Central / Evanston, IL

Sew Your Own Jeans Weekend Workshop
July 12 – 14, 2024
Sew On Central / Evanston, IL

Alter + Repair Your Garments
August 22, 2024
BARN / Bainbridge Island, WA

Sew Your Own Jeans Weekend Workshop
August 23 – 25, 2024
BARN / Bainbridge Island, WA

Alter + Repair Your Garments
September 12, 2024
Pins & Needles NY / Mt Kisco, NY

Sew Your Own Jeans Weekend Workshop
September 13 – 15, 2024
Pins & Needles NY / Mt Kisco, NY

Alter + Repair Your Garments
October 3, 2024
Domesticity / Baltimore, MD

Sew Your Own Jeans Weekend Workshop
October 4 – 6, 2024
Domesticity / Baltimore, MD

Alter + Repair Your Garments
October 24, 2024
Pintuck & Purl / North Hampton, NH

Sew Your Own Jeans Weekend Workshop
October 25 – 27, 2024
Pintuck & Purl / North Hampton, NH

Sew Your Own Jeans Weekend Workshop
November 15 – 17, 2024
Papermaple Studio / New Orleans, LA

Alter + Repair Your Garments
December 5, 2024
Stitch Sew Shop / Alexandria, VA

Sew Your Own Jeans Weekend Workshop
December 6 – 8, 2024
Stitch Sew Shop / Alexandria, VA

A note on locations: I know that there are plenty of requested cities that ultimately did not make this list. Please know that I took all suggestions seriously and I reached out to a lot of shops! However, a lot of them aren’t able to host for many reasons – or they just didn’t respond to my inquiry. If you’d like me to come to your town, my best advice is to talk to your local shop/studio and tell them you are interested in taking my workshop! My success rate in scheduling a workshop is far higher when a potential student expresses interest, as opposed to me emailing out of the blue. For 2024, though, I am fully booked and no longer accepting any more dates. 

⚡️👖🧵🪡✨

This last year was such a blast, and I’m looking forward to 2024! Slingin’ denim, ripping into all the clothes, working wardrobe miracles, touching endless butts… I love what I do so, so much! Will you be joining me next year?

Completed: Ginger Bootcut Jeans

3 Oct

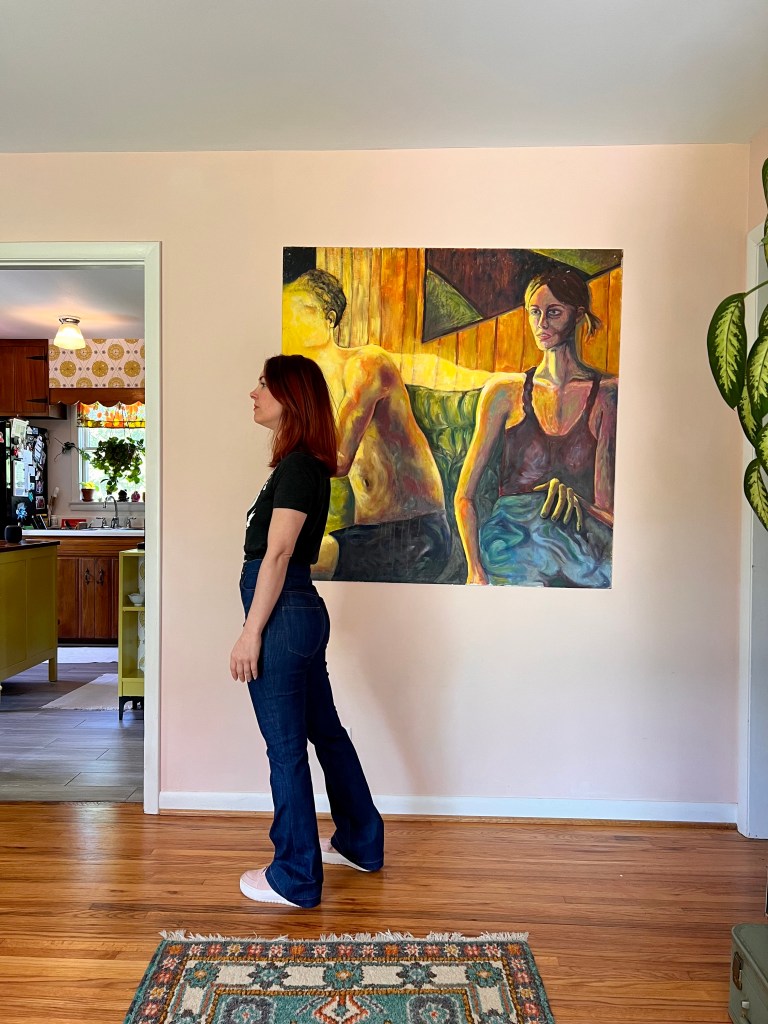
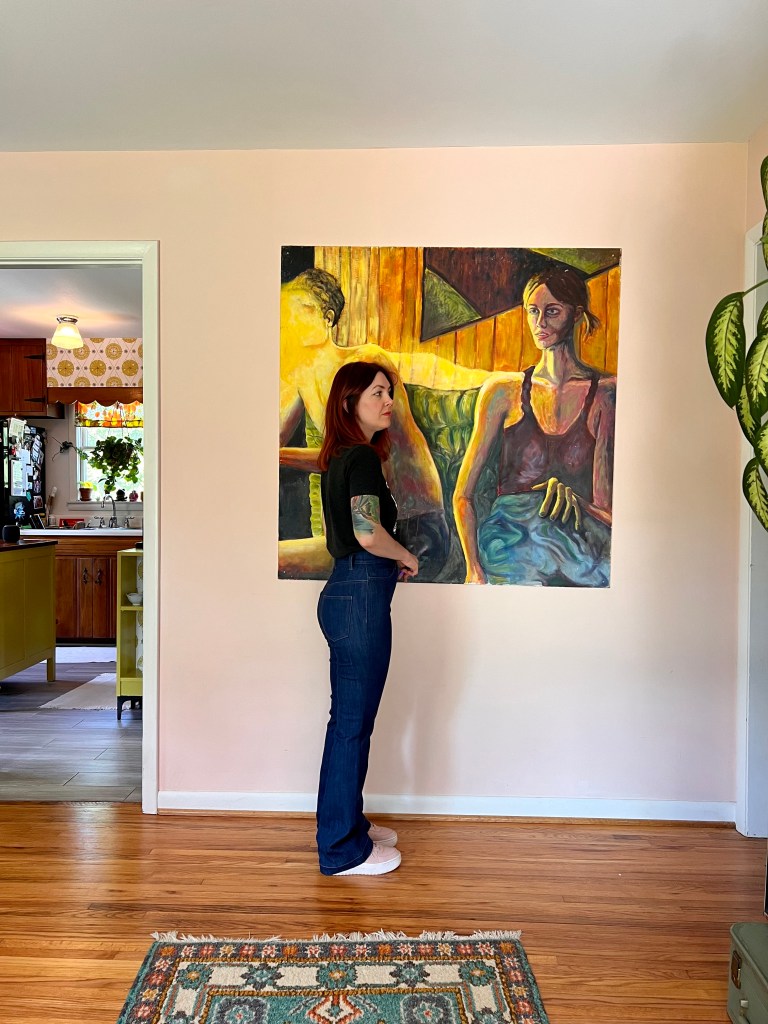
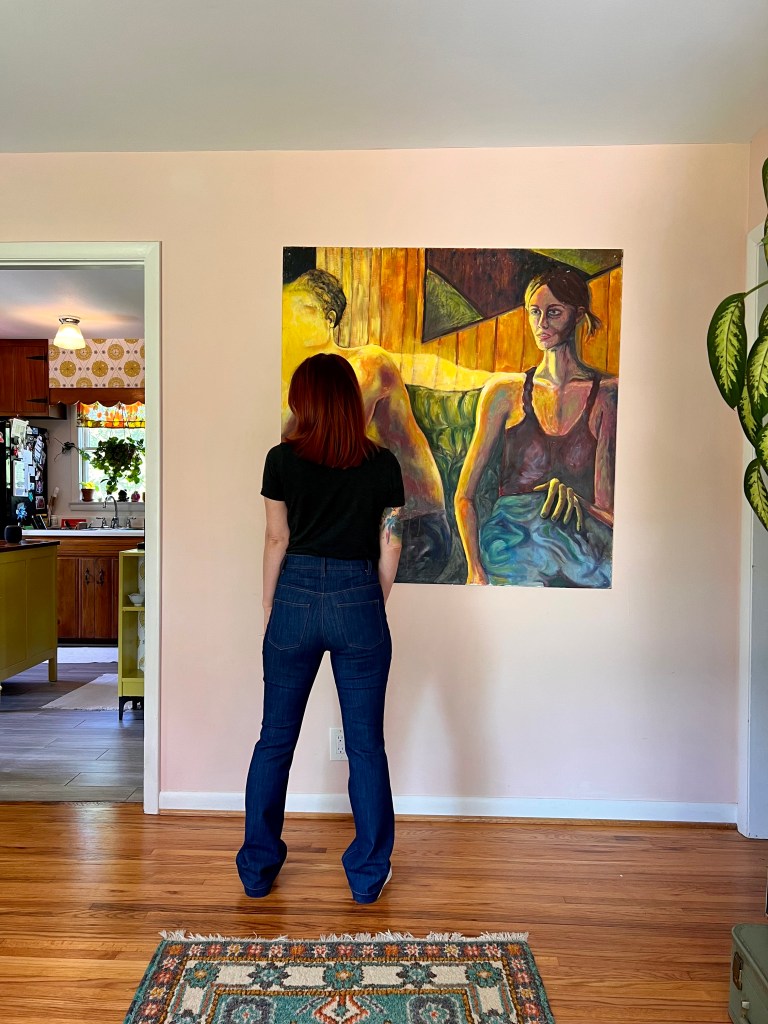
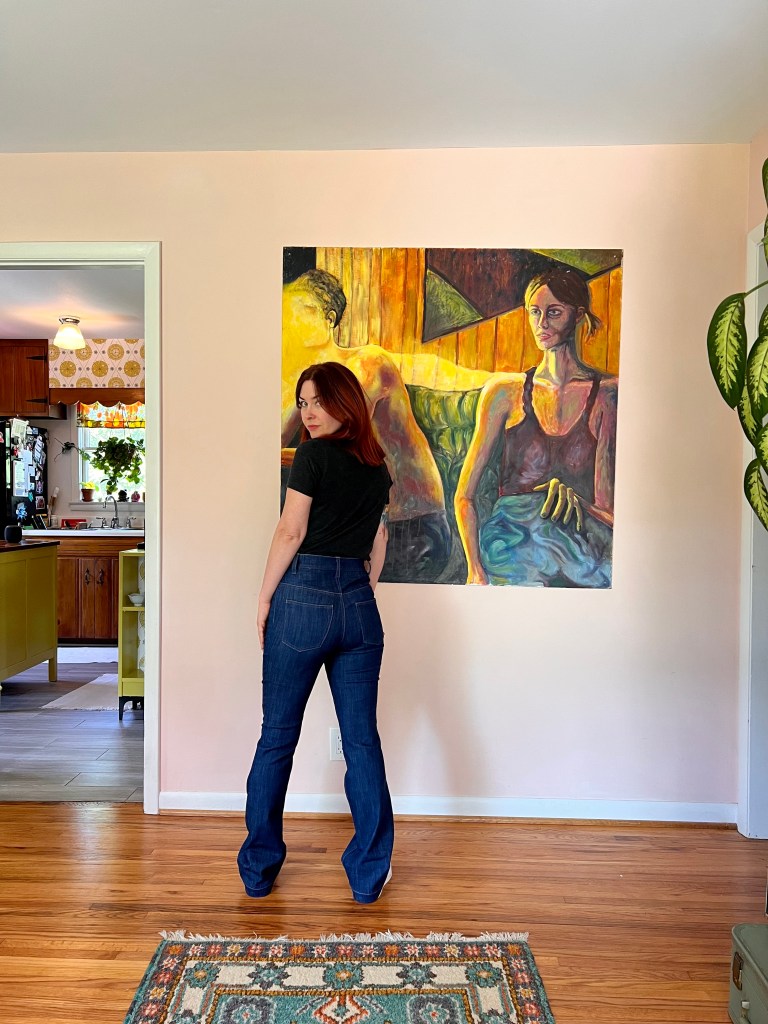
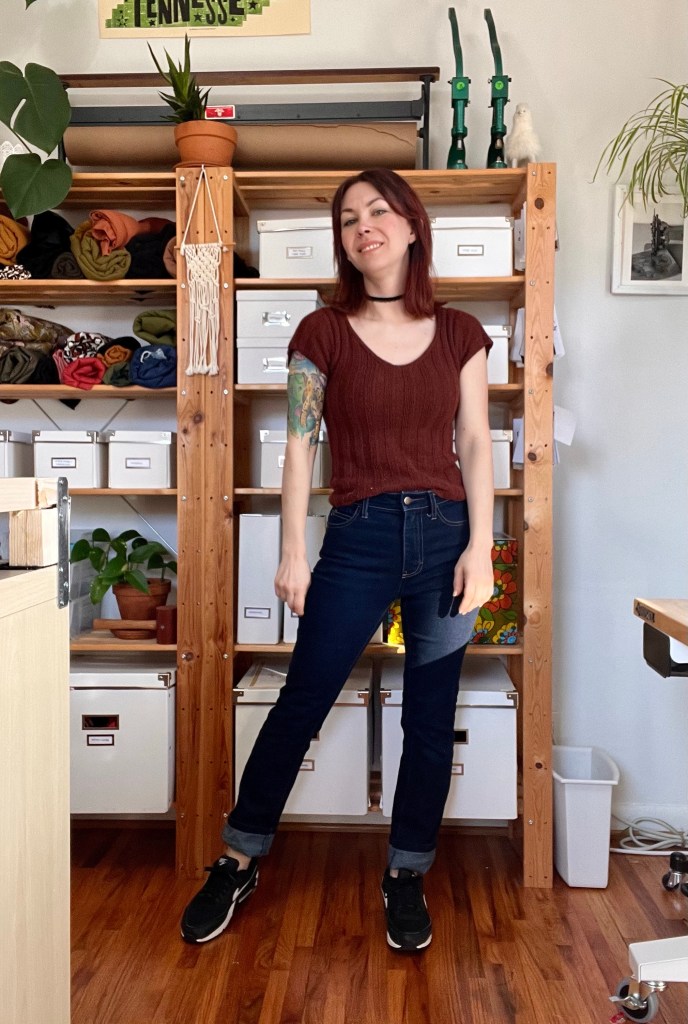
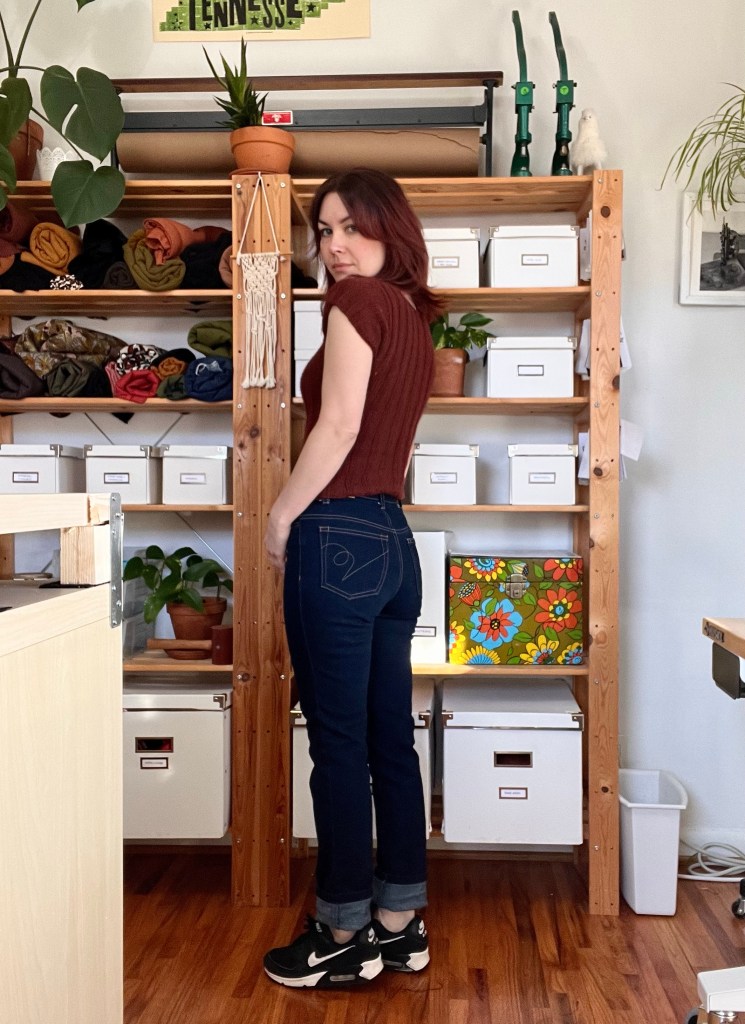
Look y’all, new jeans!

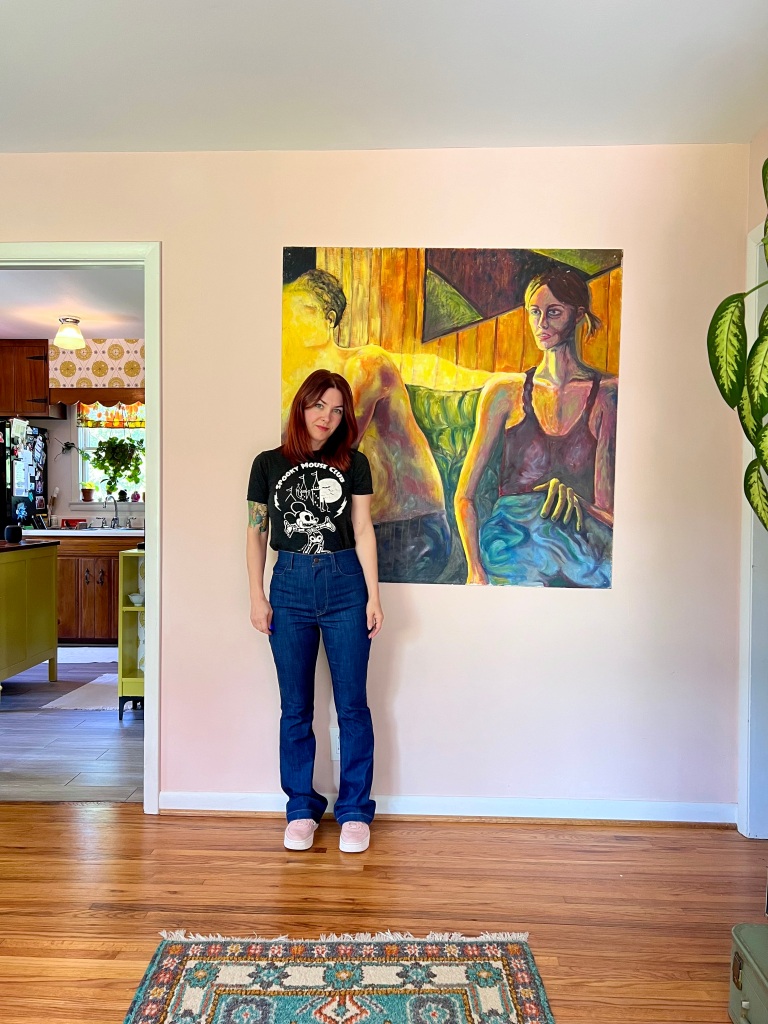
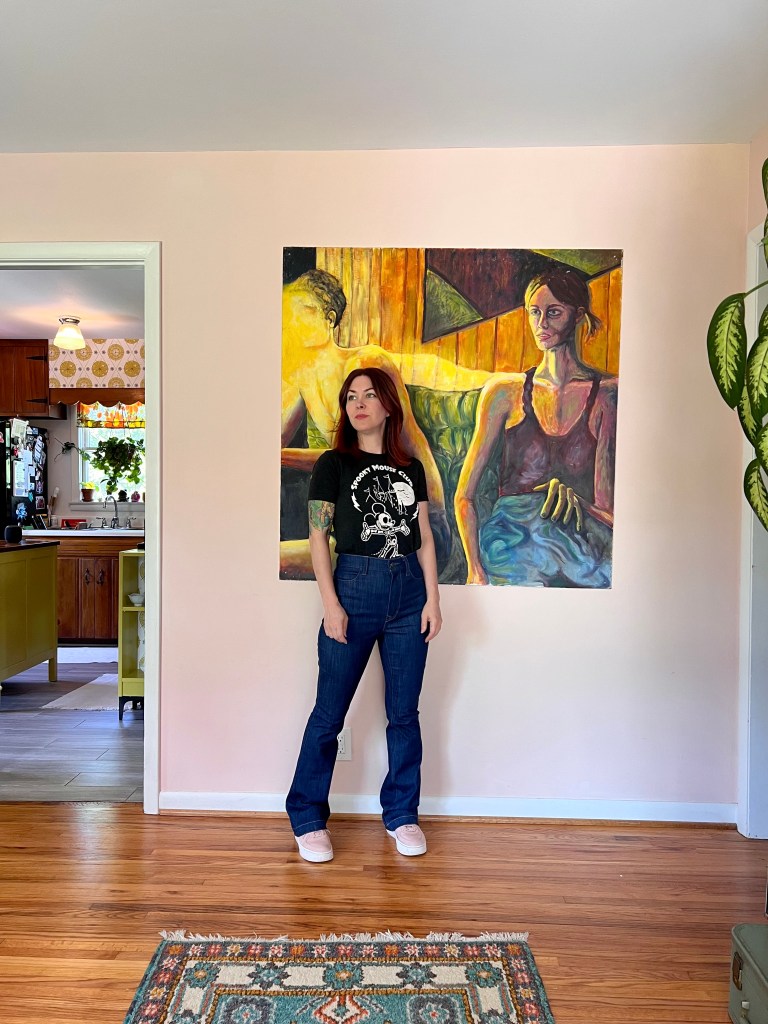
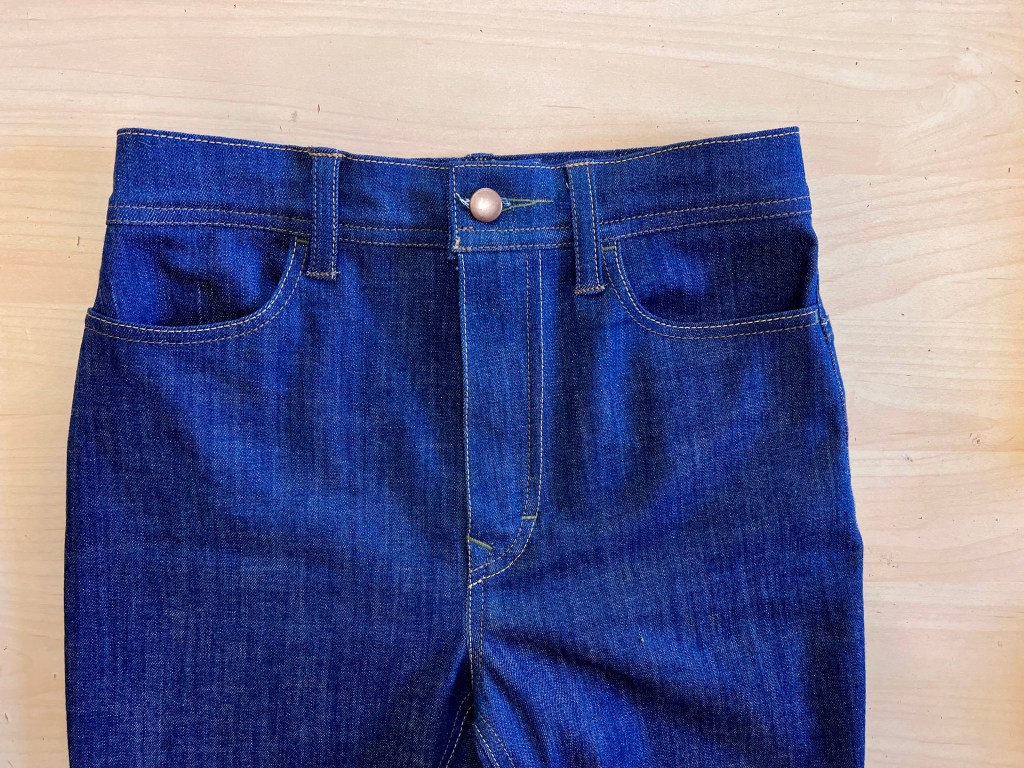
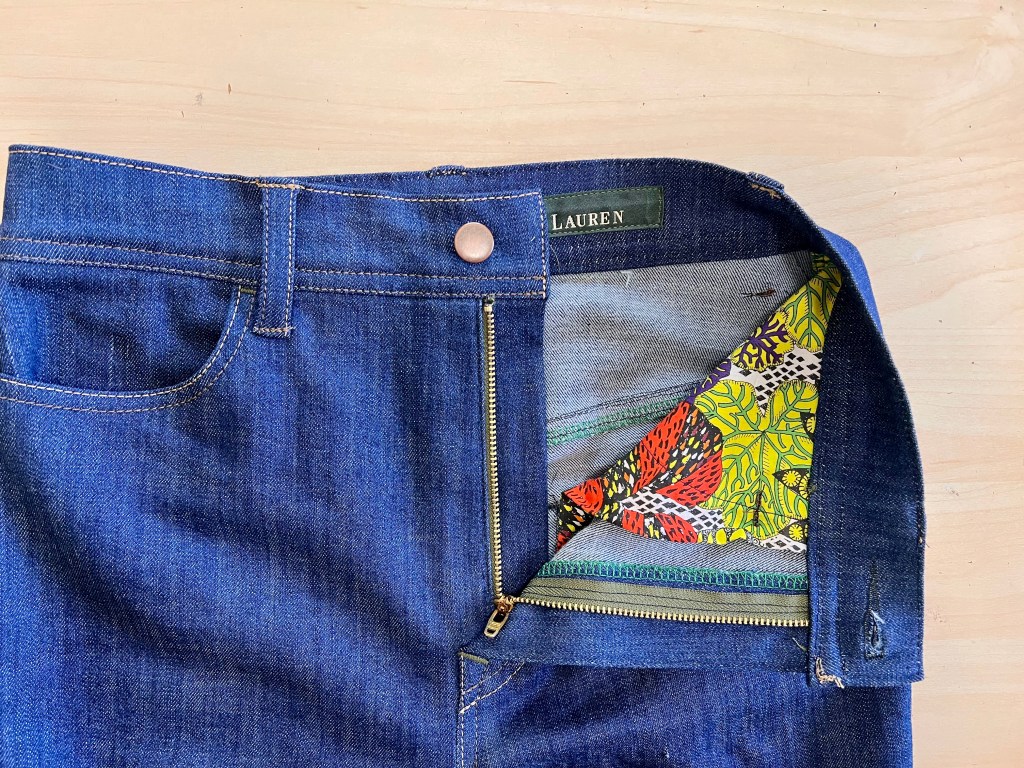
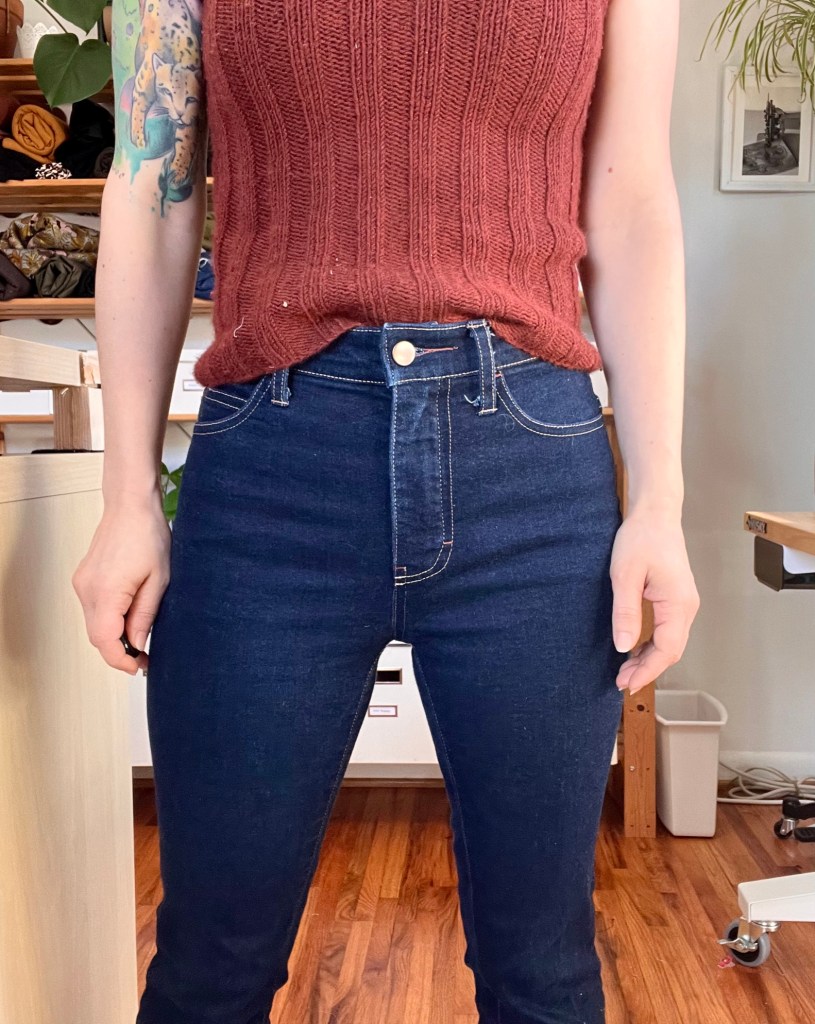
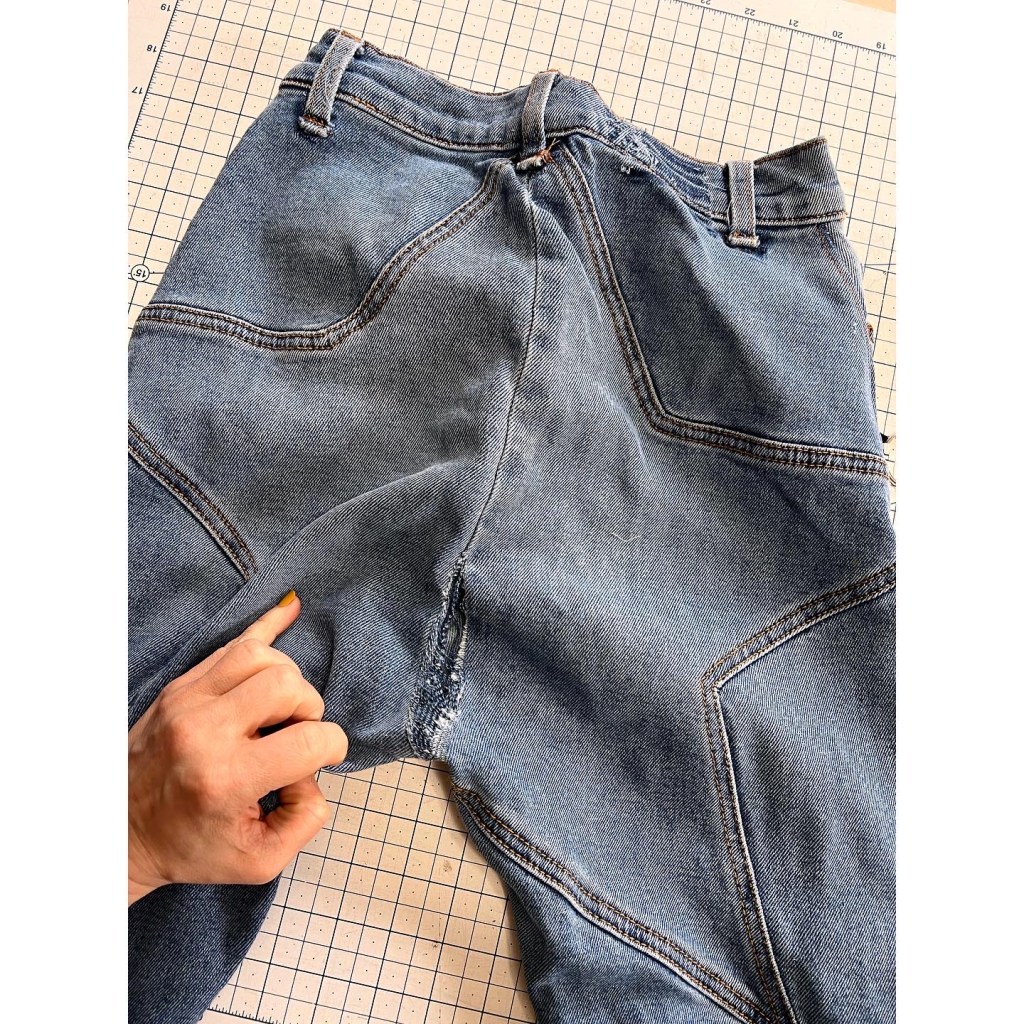
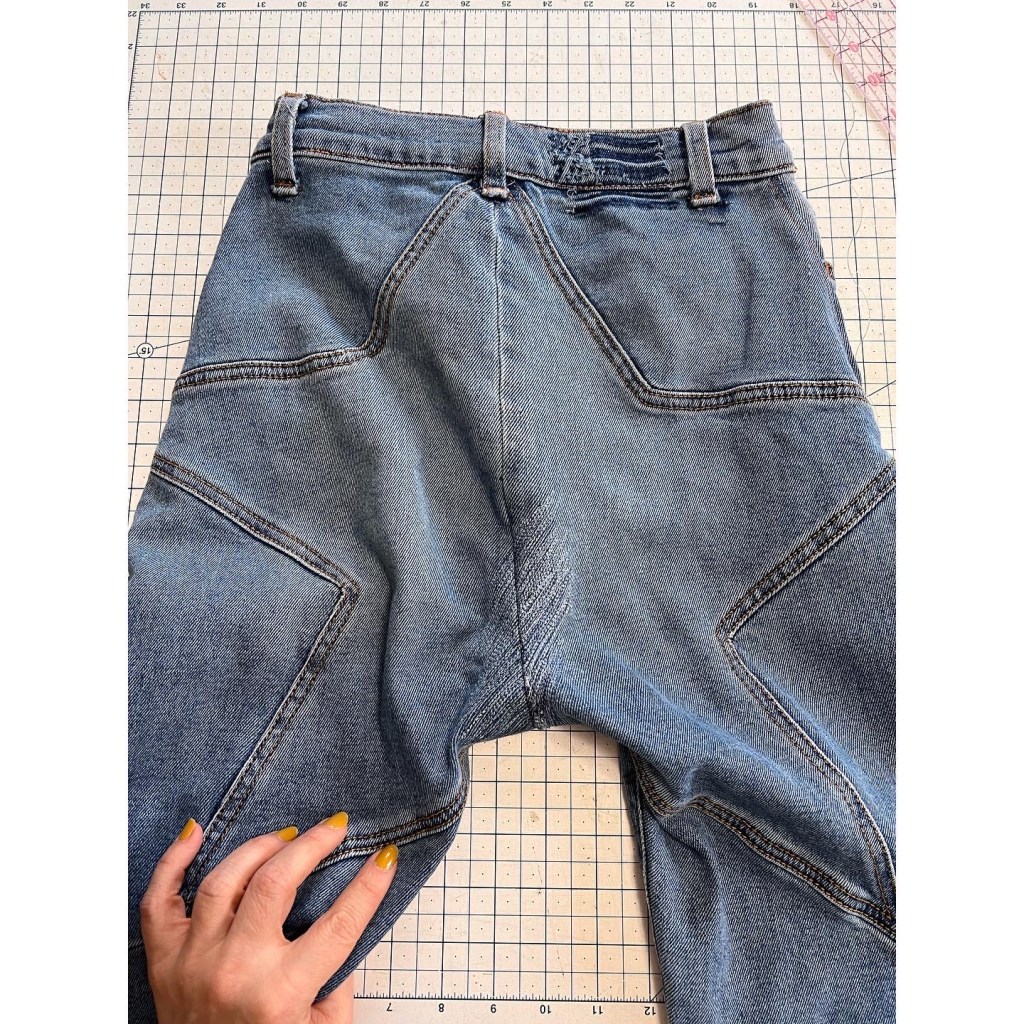
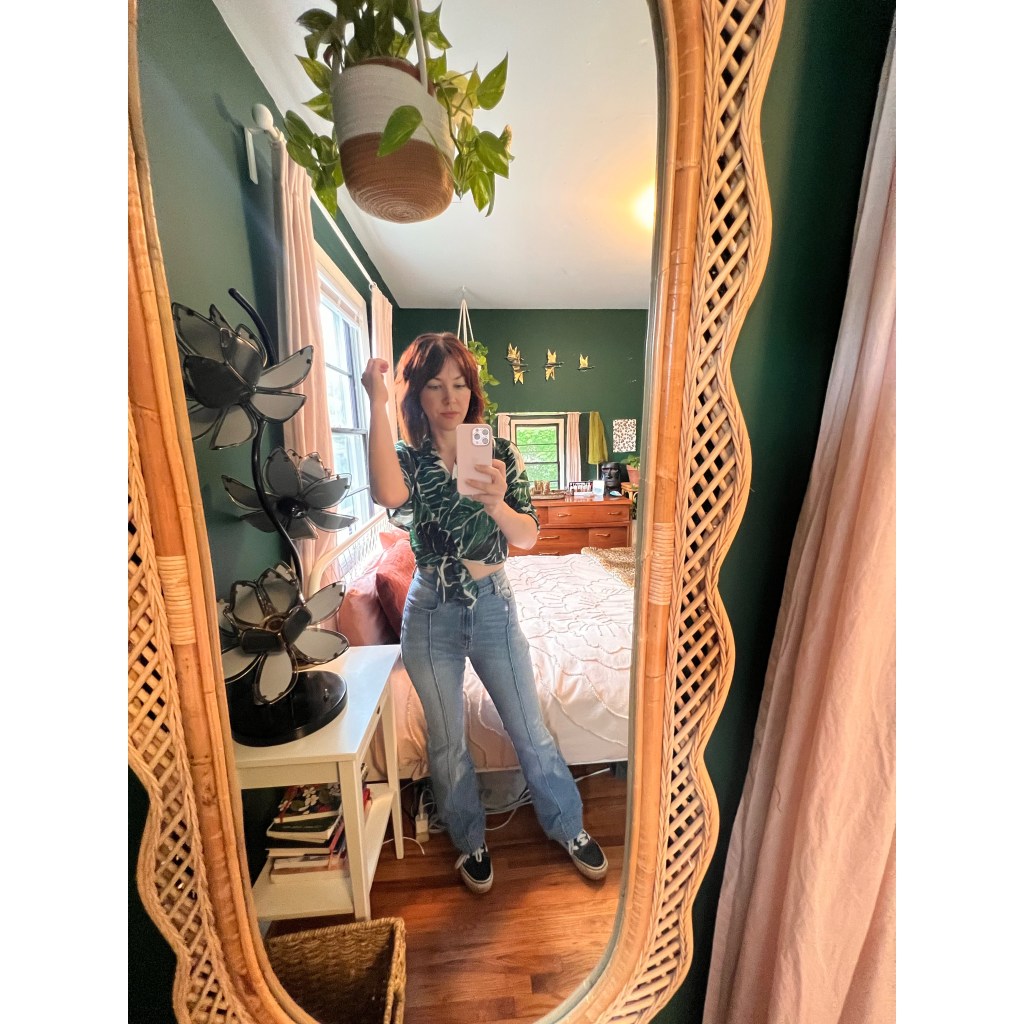
I always enjoy making a new pair of jeans for fall – after a summer of teaching jeans-making, I’m full of brilliant ideas and antsy to sew them. Now that I work part time as a tailor, I get my eyes on even more jeans with interesting design details that I’ve been dying to incorporate. For this pair, I thought I’d try out some features I’ve been seeing a lot lately, as well as a new (fashionable?) silhouette .

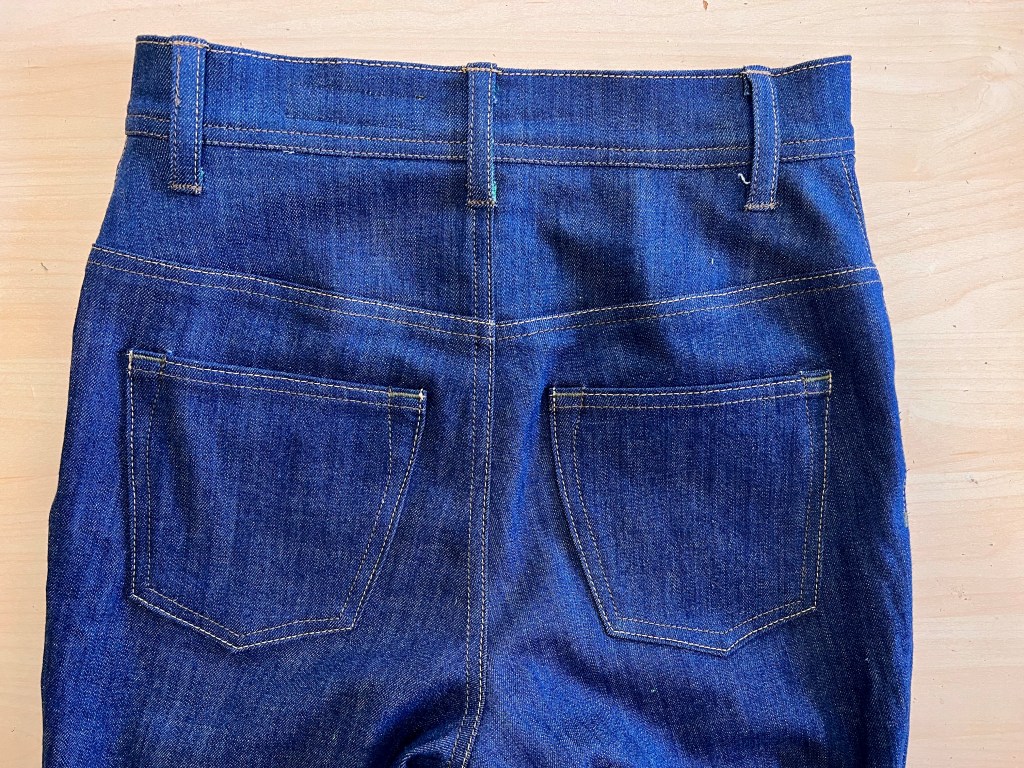
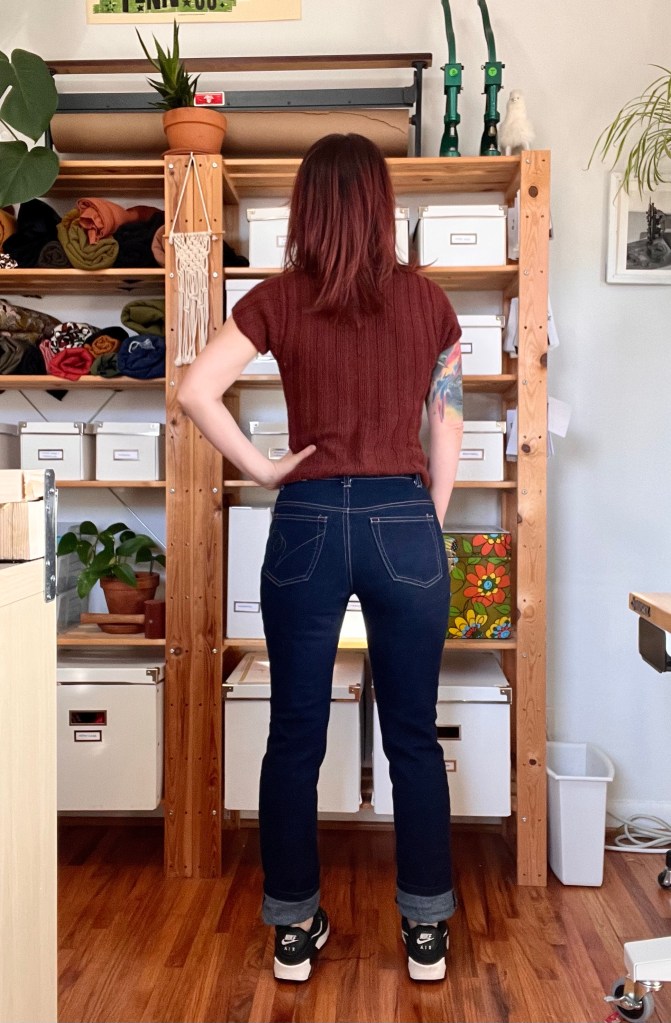
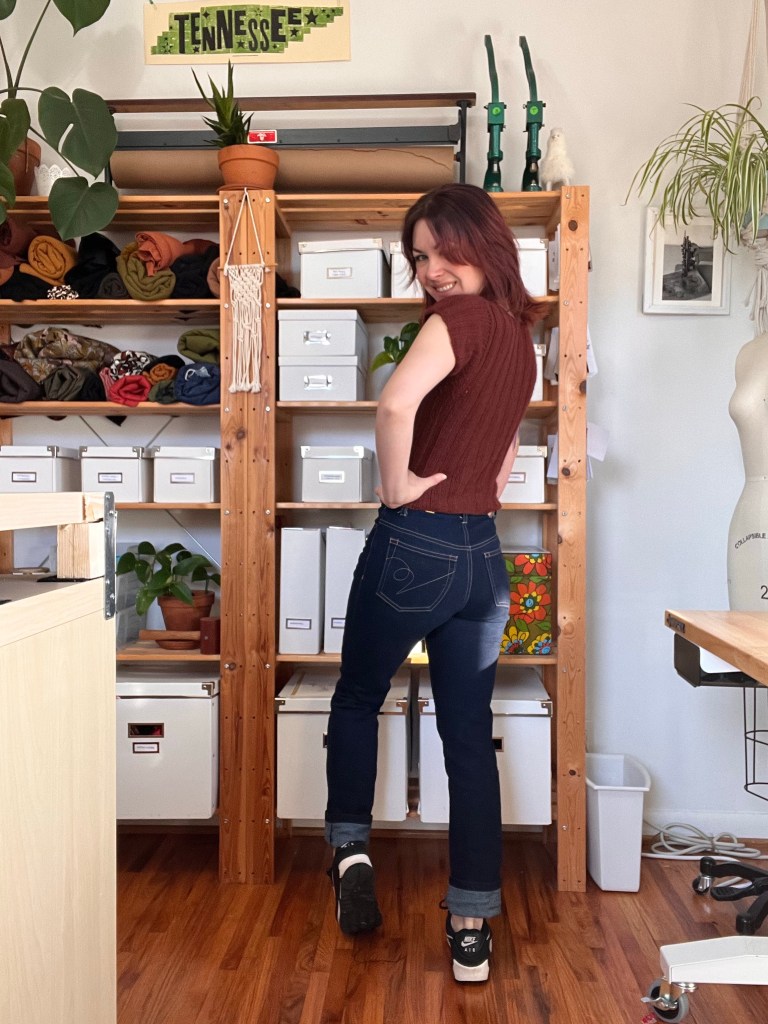
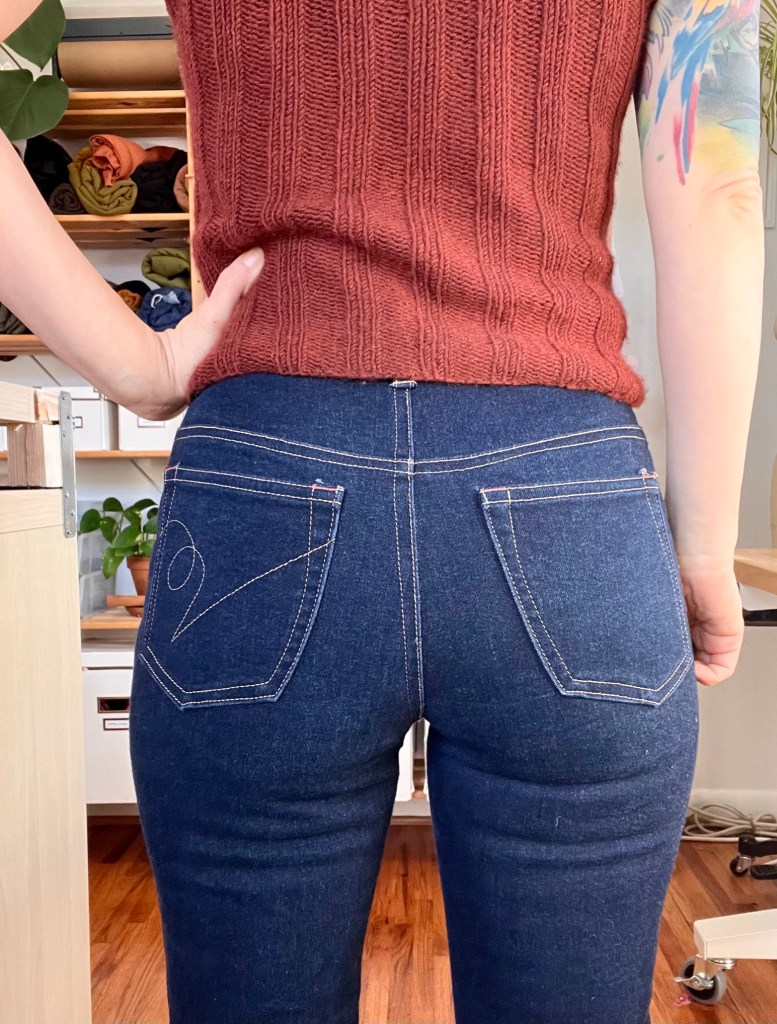
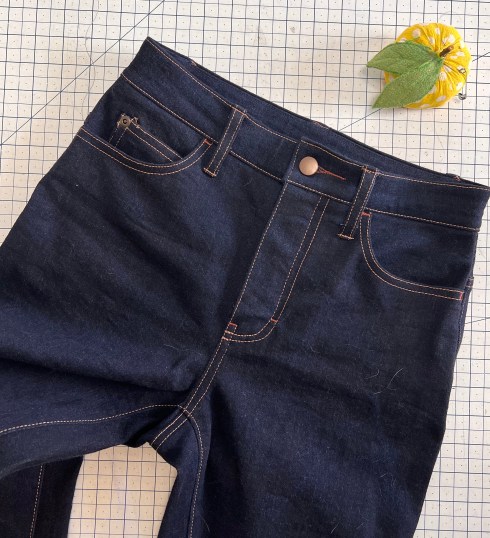
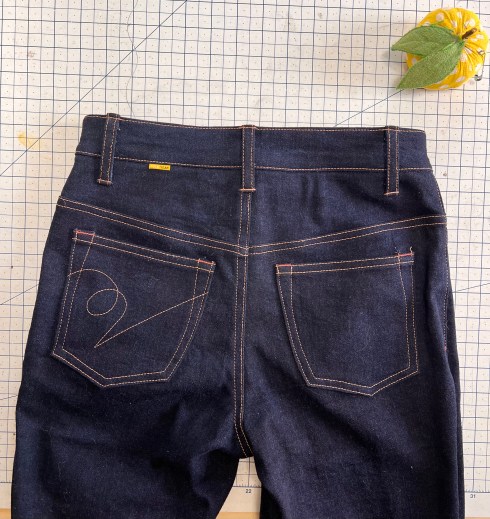
These are my tried and true jeans pattern – the Ginger Jeans from Closet Core Patterns. I’ve made this pattern enough times to have really nailed the fit down, and now I’m in that glorious phase where I just have to make tweaks and adjustments to change the style. I made multiple changes to this pattern:

  • Increased the rise about about 3/4″, so it covers my belly button
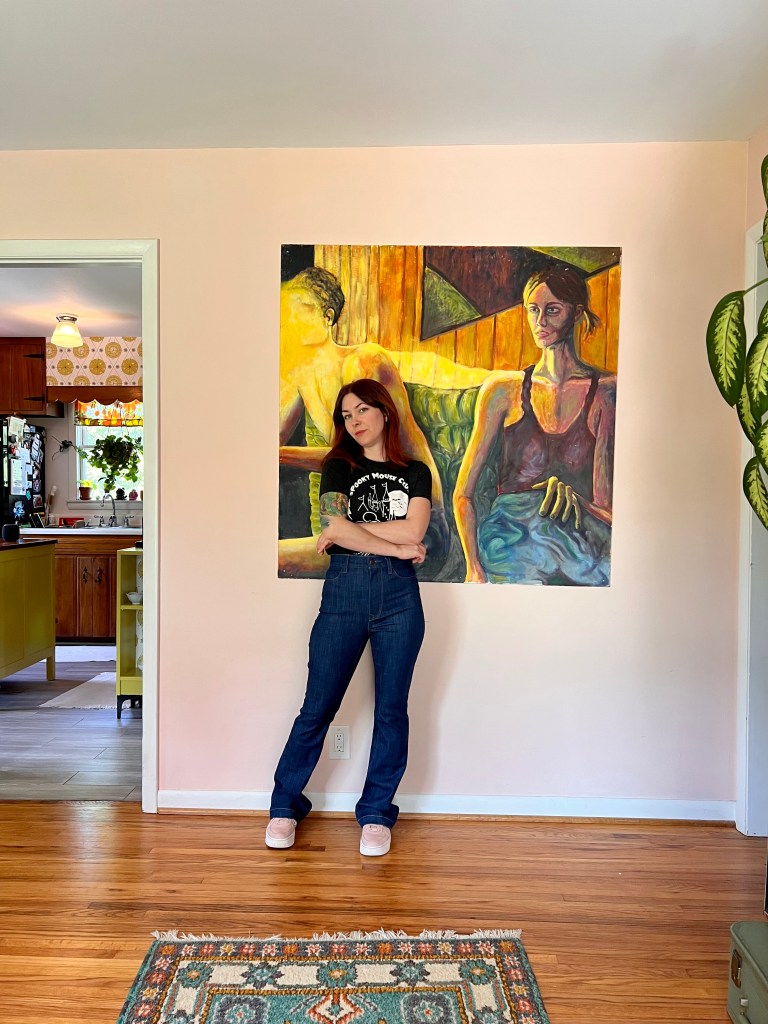
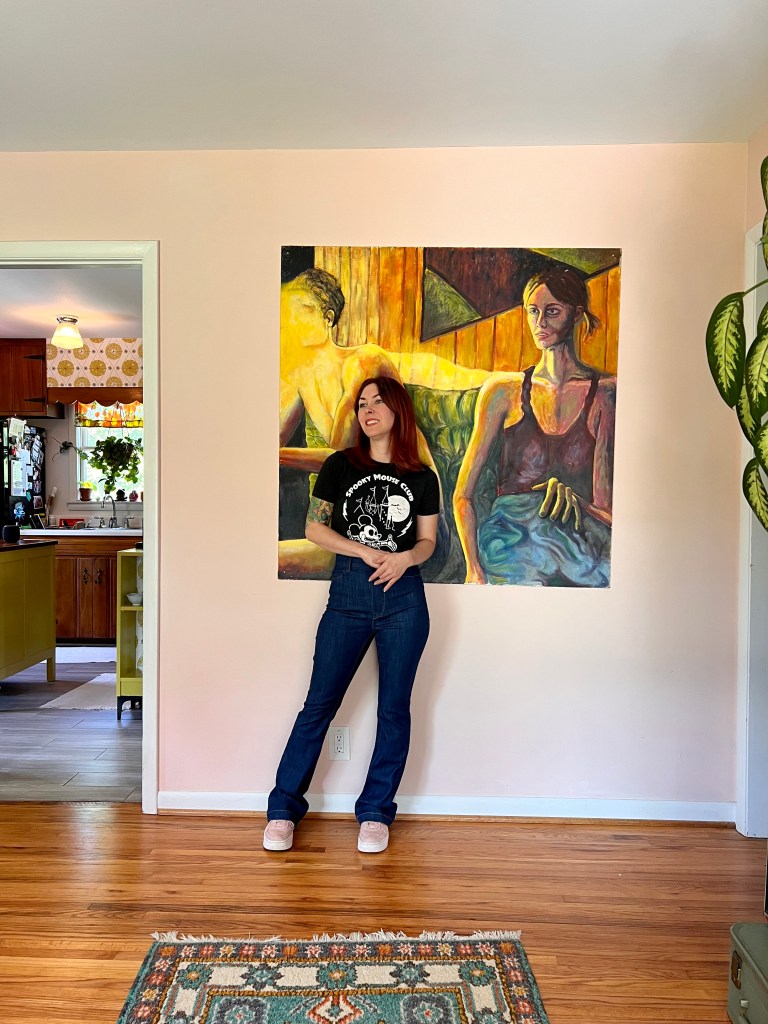
  • Changed the legs to bootcut, using an existing pair of flared jeans that I like as a comparison
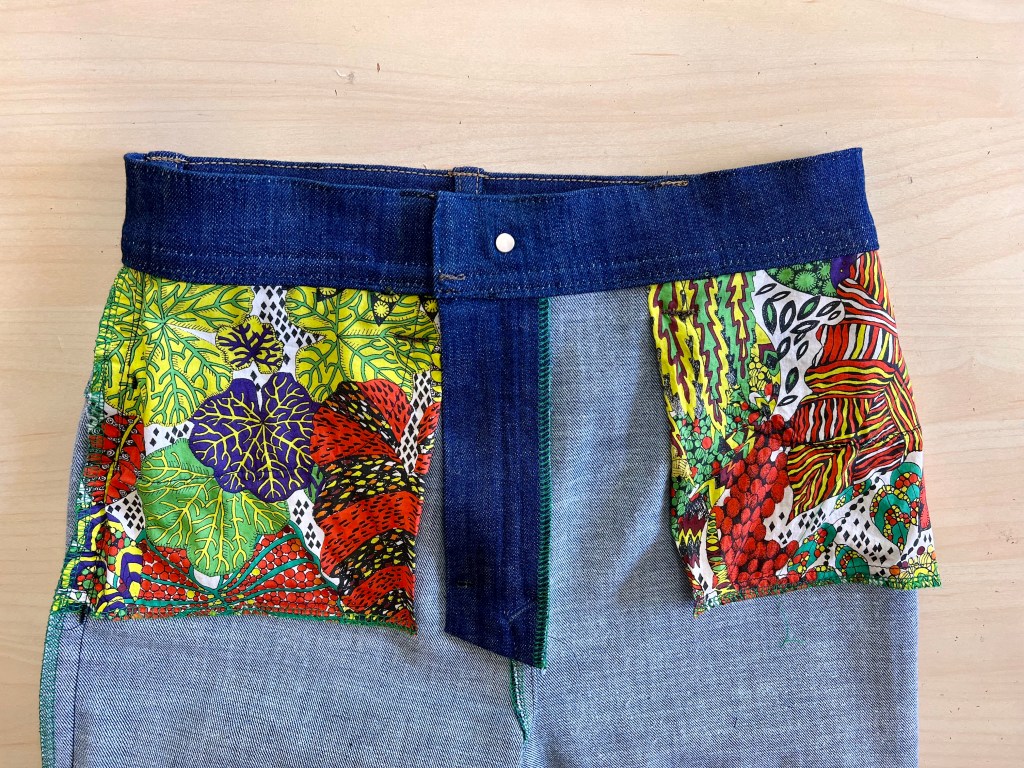
  • Swapped the pocket stay for normal hanging pocket bags
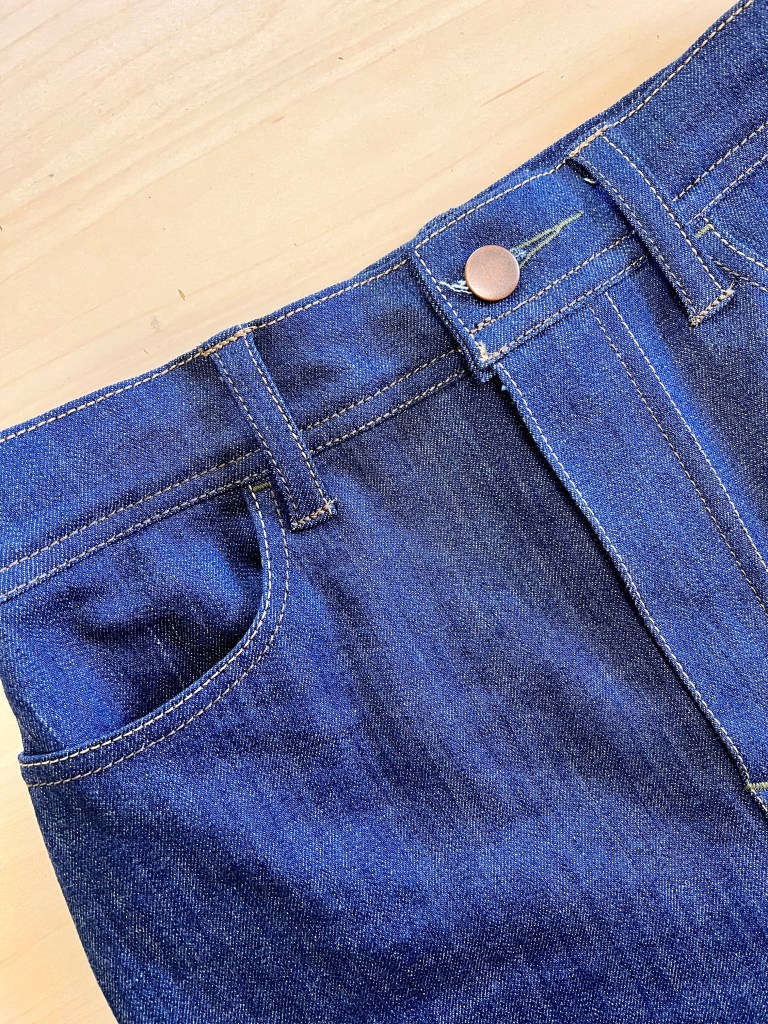
  • Changed the waistband to a rectangular one-piece folded waistband, instead of two pieces with subtle shaping. The shaping is obtained by easing the waistband to the top of the jeans. This is how most RTW jeans are done, btw, and it is MUCH easier to cut, sew, and alter

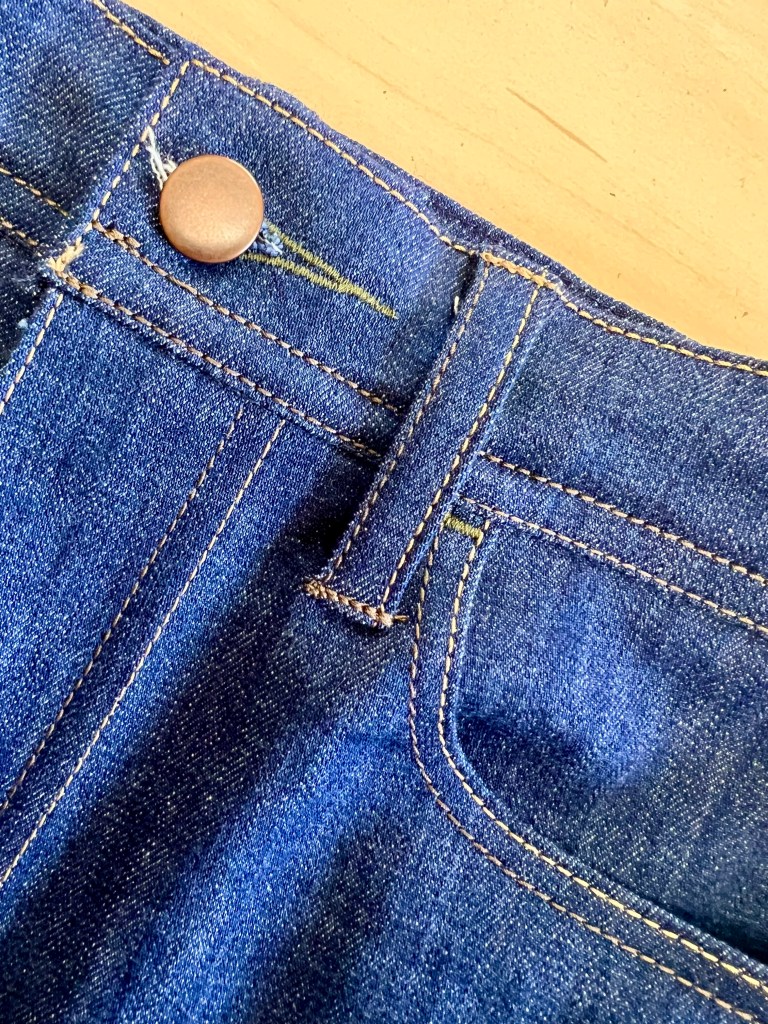
I also made some small design adjustments, such as leaving off the coin pocket, slightly changing the shape of the front fly topstitching, and sewing 2 lines of topstitching across the bottom of the waistband. I also used two different topstitch thread colors, as well as a third color for the bar tacks and button hole.

Not too much to say here that I haven’t already said before about this pattern, so here’s a bunch of photos of me + my ass.

I have no idea where I originally purchased my denim – if I had to guess, it’s either from Mood Fabrics or Pintuck & Purl, as I’ve bought loads of stashed denim from those sources. Maybe it’s Cone Mills? Who knows, it’s a mystery! All I can tell you is that it’s been in my stash for years. It is a beautiful medium blue that I think will lighten up nicely as it gets washed and worn. 4″ of my denim stretches to about 4.75″, so I was able to cut my usual size 4 and make no fit or size adjustments.

I used two sewing machines to sew this – one threaded for topstitch thread, and one for standard. Although I still had to change my thread a ton, since I was using two different topstitch colors! But I do think the effect is worth it, I see this in a lot of high-end RTW and I just think it looks really nice. I used Mara 30 topstitching thread, which is pretty thick – honestly too thick for most home sewing machines. I have a Janome HD9 that I use for topstitching, which is designed to be able to handle the super thick thread with a 110 needle. In my classes, we use the thinner Mara 70, which gives the look of thick topstitching but much more easily managed by the machines.

Love that you can’t even tell the difference between the two thread colors in this eXtReMe cLoSe Up BUT I PROMISE IT IS THERE.

I used a leftover scrap of Liberty cotton to make the pocket bags, which I sort of regret because it’s way too flimsy and doesn’t stay in place that great but oh well the colors were just too good! My serging thread is green to match. Oh, and I found an old Ralph Lauren label that I was able to fold so my pants have my name in them! Fun stuff!

I love the little flare – it’s very different than anything else in my closet (well, other than the *other* pair of flares I own that I knocked off LOL). The length is definitely long for me, but in my experience denim tends to continue to shrink in length as you wash/dry it so I’m going to let these settle a bit before I cut anything off. Plus, longer hems are supposed to be in right now? I don’t know, I keep looking at everyone’s long ass pants and thinking about how much they need a good hemming haha.

This was a fun little project and a great way to ease back into sewing after a summer of barely having time to make anything for myself! If you’re keen to whip up your own jeans, I still have a few classes through the end of the year – check out my WORKSHOPS page to get the details! We won’t have time in class to go fully custom – but you’ll learn everything you need to know about making a pair of jeans from start to finish, and get lots of ideas for customization on your future pairs! Also, as a head’s up – I’m currently planning my schedule for 2024 (with the possibility of adding a new location or two), so if you have a local shop offering classes who you’d like to nominate, please let me know!

MADE BETTER: TOTE BAG ALTERATION

24 May

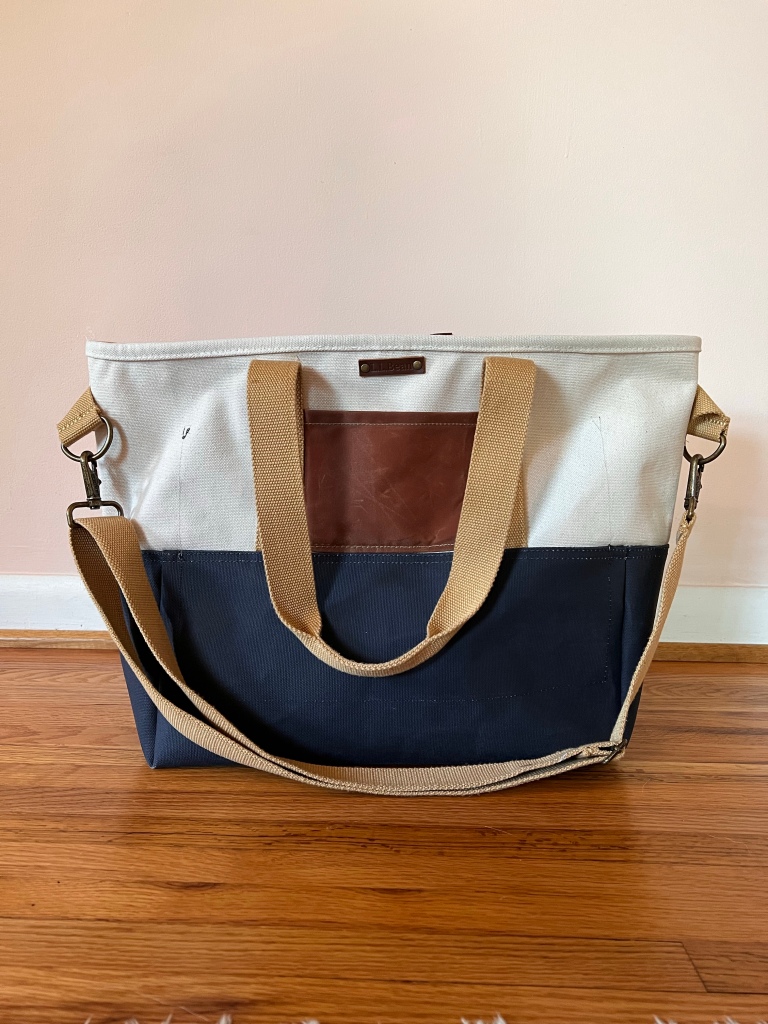
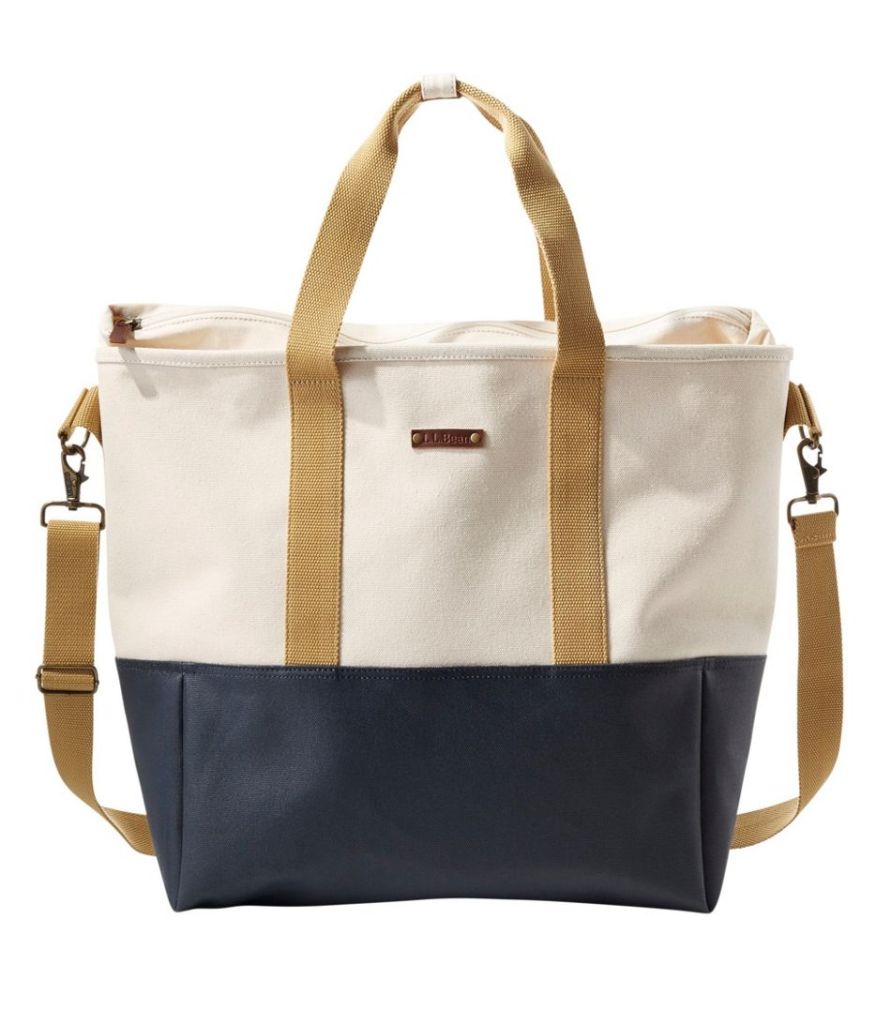
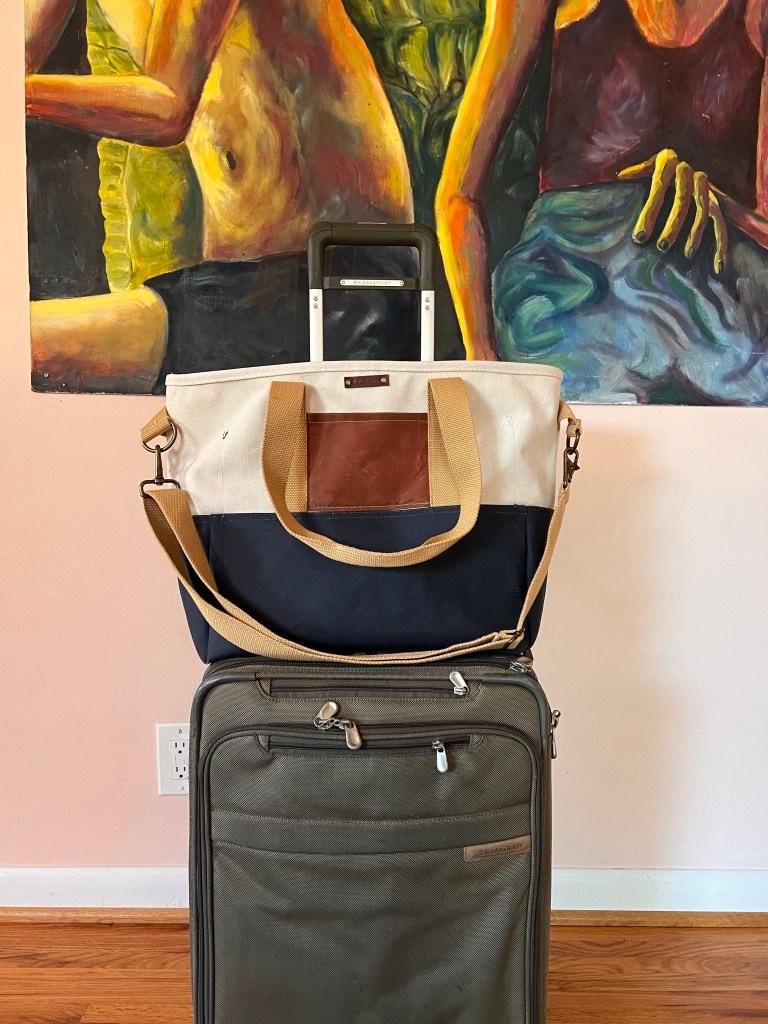
I know what you’re thinking: “Who TF alters a tote bag?” Honestly, a lot of people asked me this – my students, my coworkers, my friends, myself. But, dammit, sometimes I wanna do weird things just to see how it turns out. And in this case, it was making this LL Bean Nor’easter Tote Bag 1000x better than straight off the rack.

Here is a photo of the bag as grabbed from LL Bean’s website. It’s a fine bag, very well made. It works great as it is. But I wanted to make it better, so I did.

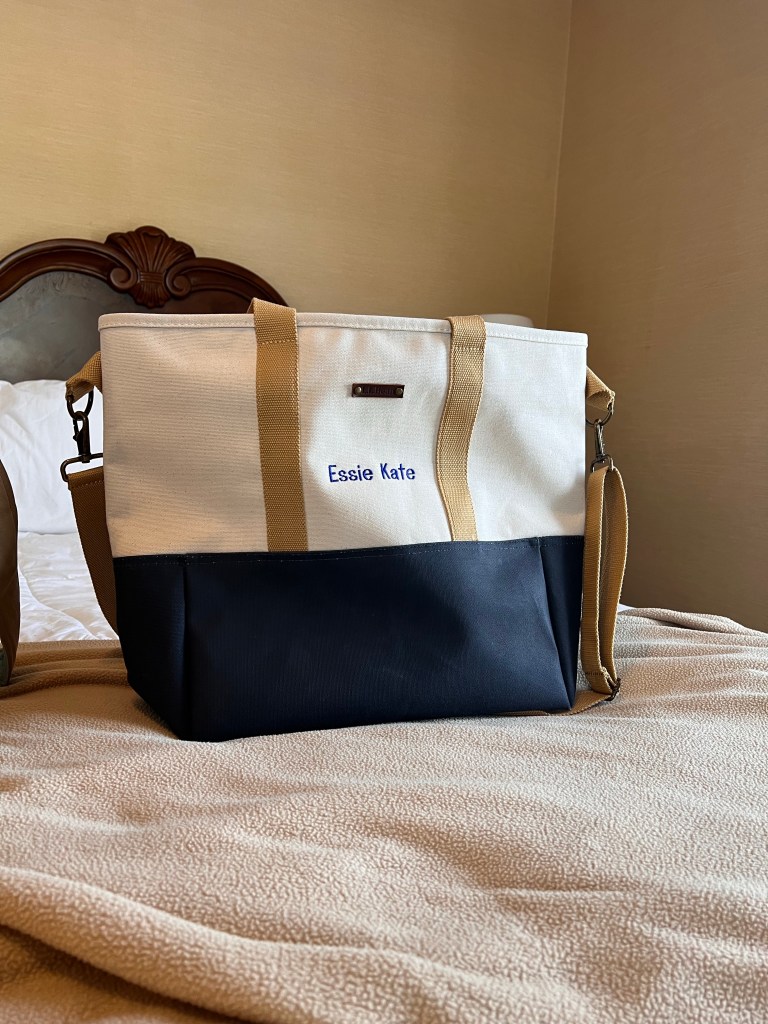
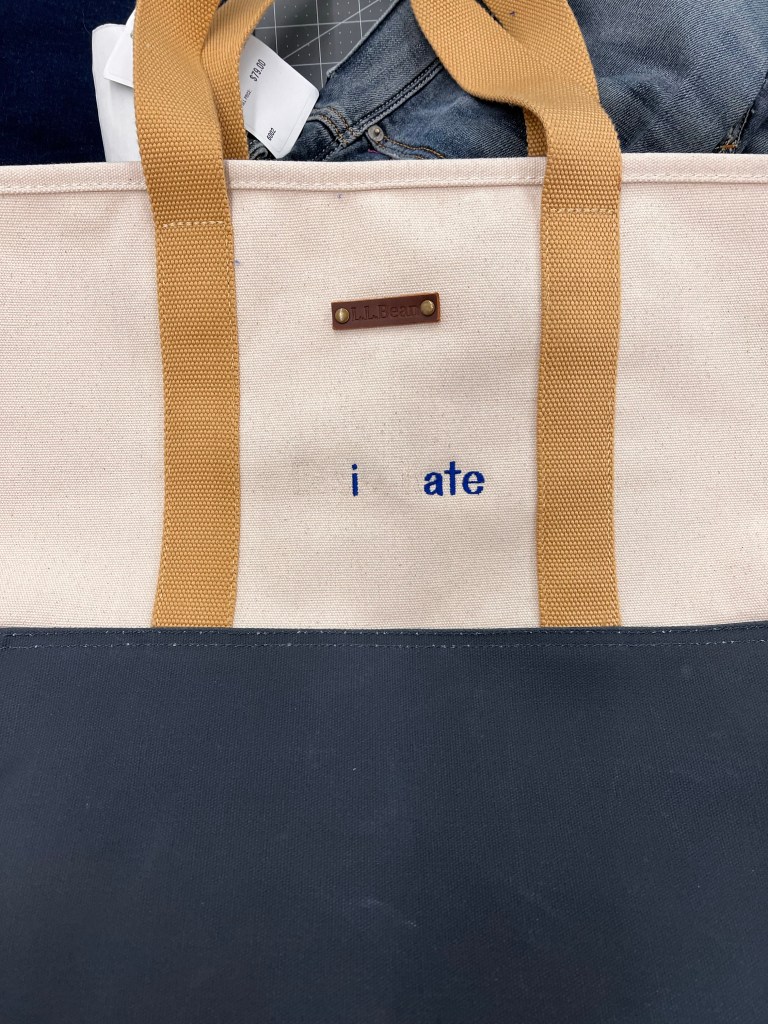
I bought my tote from the LL Bean Outlet Store in North Hampton, NH. Fun fact: It’s right down the street from Pintuck & Purl, and I make Maggie take me there every time I’m in town for a workshop LOL. This time, I was determined to get a tote bag! I have a vacation coming up in July and I wanted a big ol’ tote bag to strap to my carry-on suitcase. Another fun fact about the LL Bean Outlet – you can buy mis-embroidered tote bags for about 30% off the cost. Which is how I ended up with Essie Kate’s bag.

Thanks, Essie Kate! Love u!

Apparently it is very New England to leave the wrong name on your bag, which I briefly considered, but I just love seam ripping too much. Off it went!

I did also consider just leaving it as “i ate” but the spacing was just too weird. Bye Felicia! I mean, Essie!

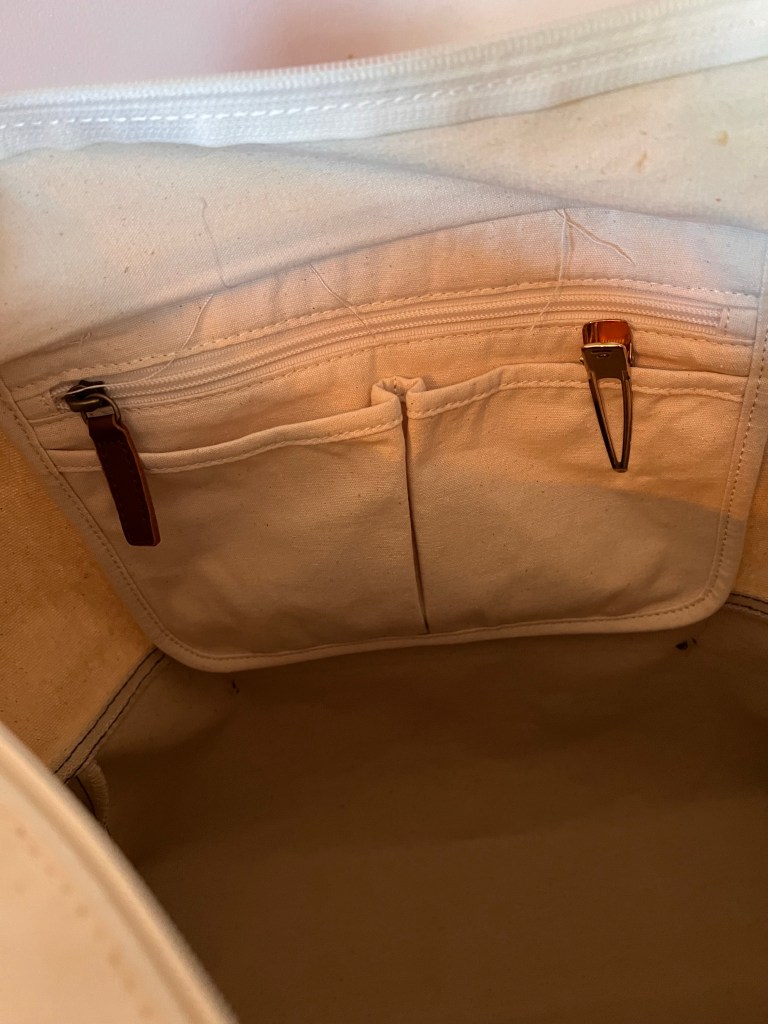
Like I said, the bag is great as-is – it is very roomy, has a zipper across the top, and a nice hanging pocket bag that includes a zippered pocket and 2 gusseted pockets. I liked that it included a detachable crossbody strap, in addition to the handles. The fabric is sturdy and heavy, and waterproof (both on the base and the interior). It was pretty close to what I was looking for. But after carrying it through the airport for my trip home, I made note of a few updates that would make it even better:

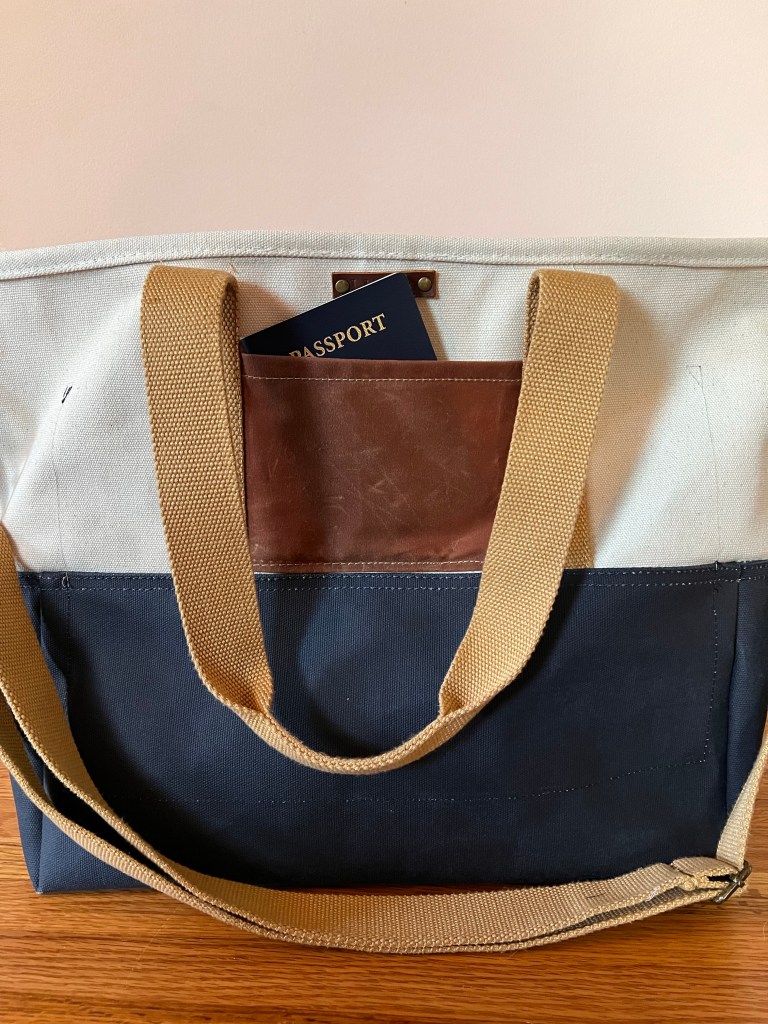
  • An outside pocket on the front to stash my phone
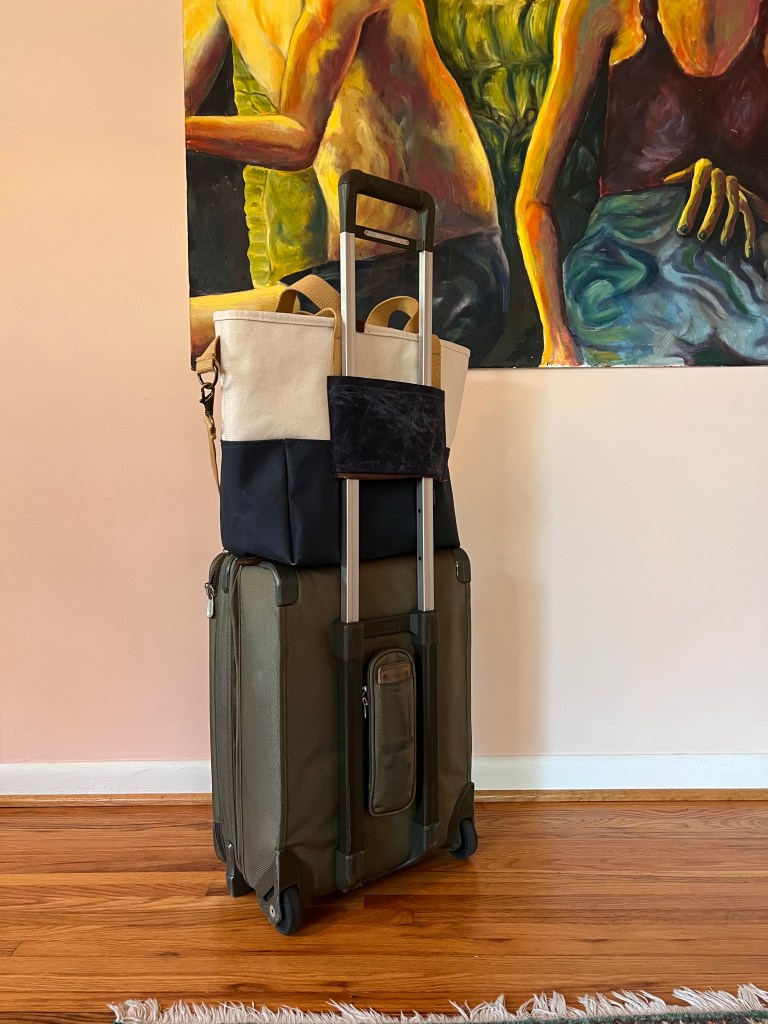
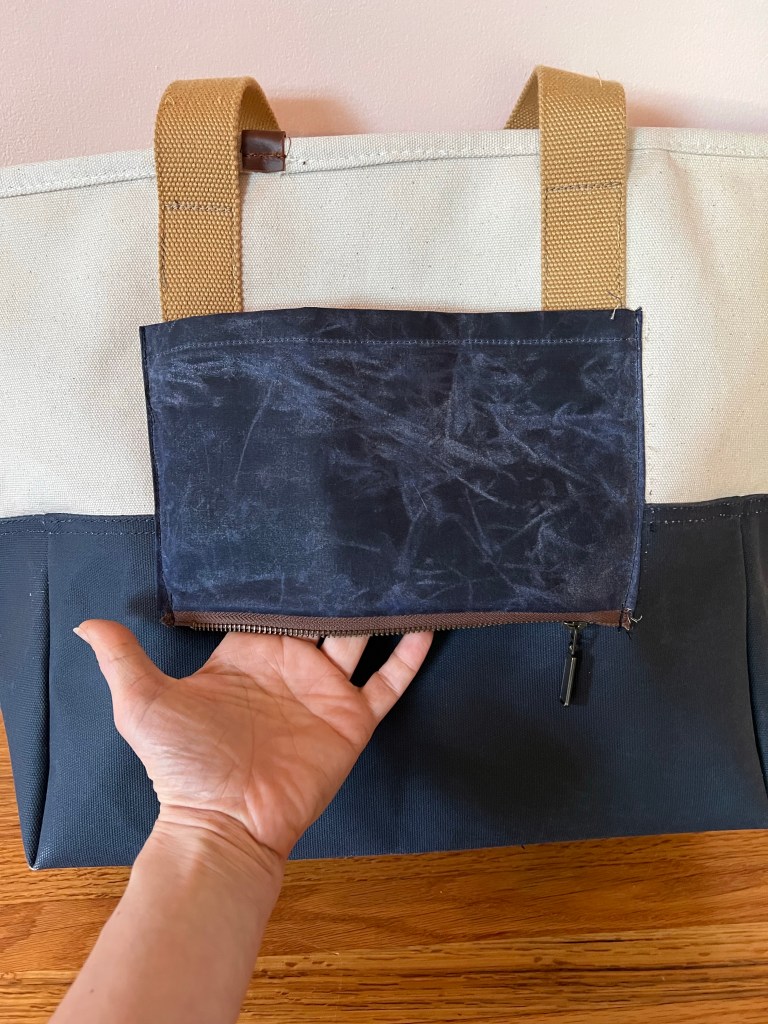
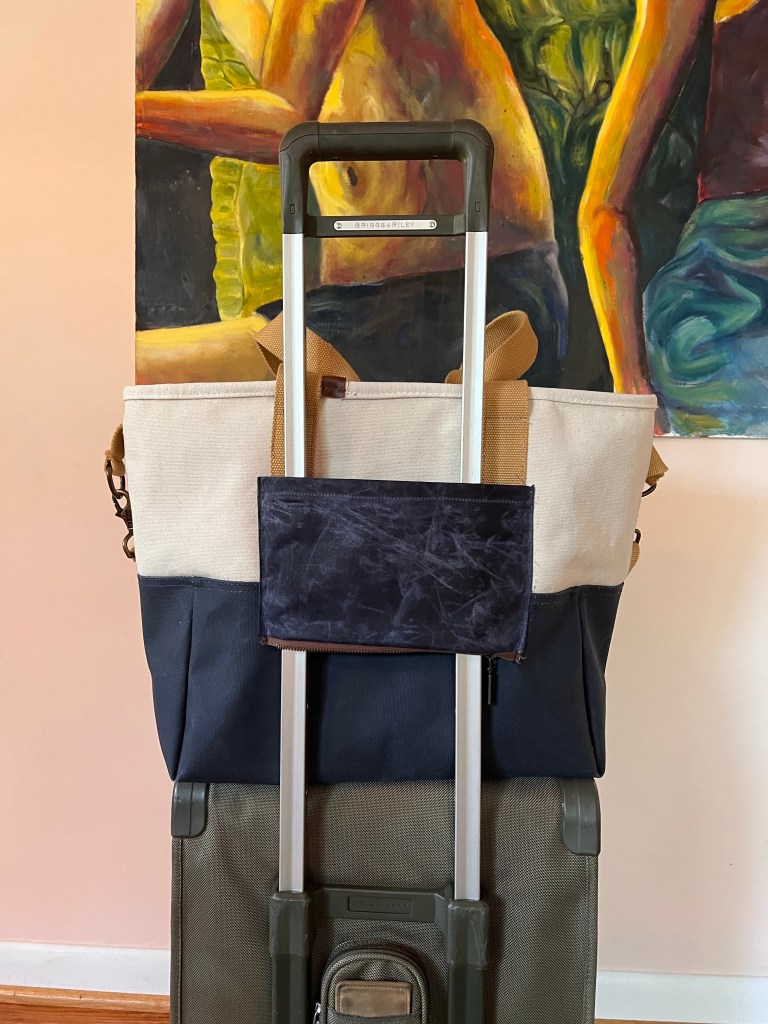
  • An slip-through panel on the back so I could attach it to my suitcase
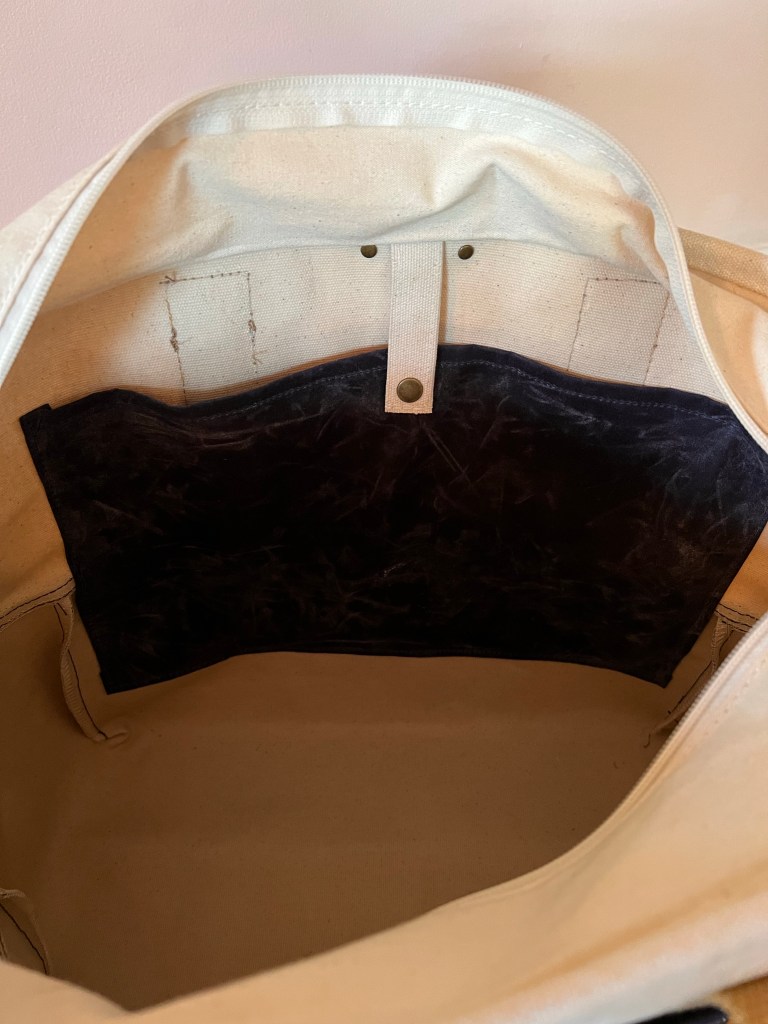
  • An interior pocket for my laptop so it doesn’t bounce around
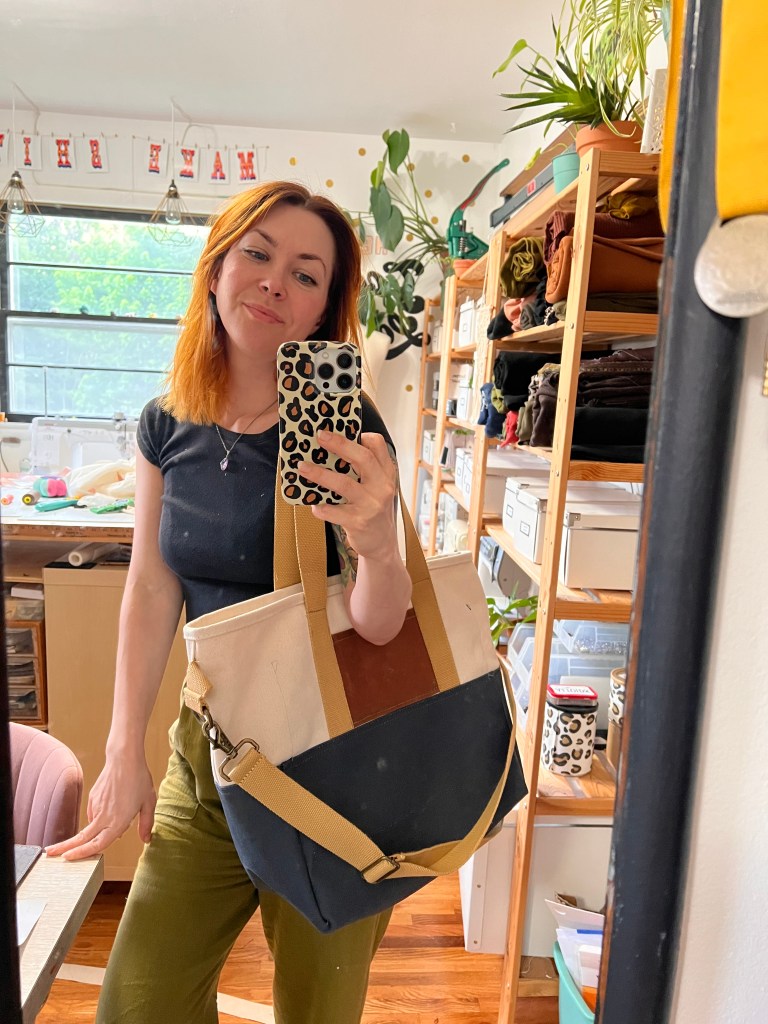
  • Also, the entire bag was just a hair too big. It needed to be about 2″ shorter – the height was a bit cumbersome for using the shoulder strap, and honestly just looks disproportionally large next to me, in all my 5’2″ glory

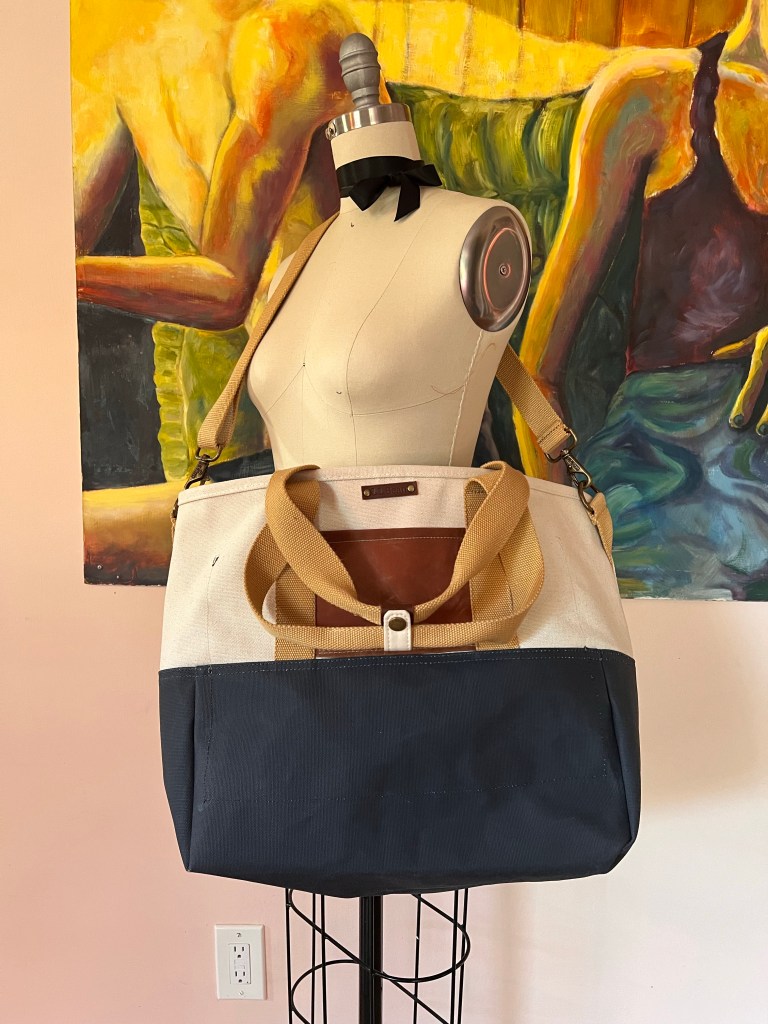
And here it is post-alterations! Hooray!

Making these adjustments actually wasn’t very hard – other than trying to wrangle the bag under my sewing machine (I’m sure you can tell that it’s not my absolute neatest sewing ever – which I’m fine with!). It only took a couple of hours and I was able to use materials that I already had on hand, so my only investment was purchasing the bag itself.

The front pocket was made using waxed canvas – I had the tiniest piece, it was actually used to keep closed a roll of wax canvas that came in a Klumhouse Kit. I saved it because it was a nice color, and it looks so good with this bag! To attach the pocket, I just ripped off the straps and inserted the pocket edges, then sewed the straps back down. I debated whether to insert it in the bottom fabric seam as well, but there was so much finishing and topstitching that I decided to just topstitch it down right above that seam instead.

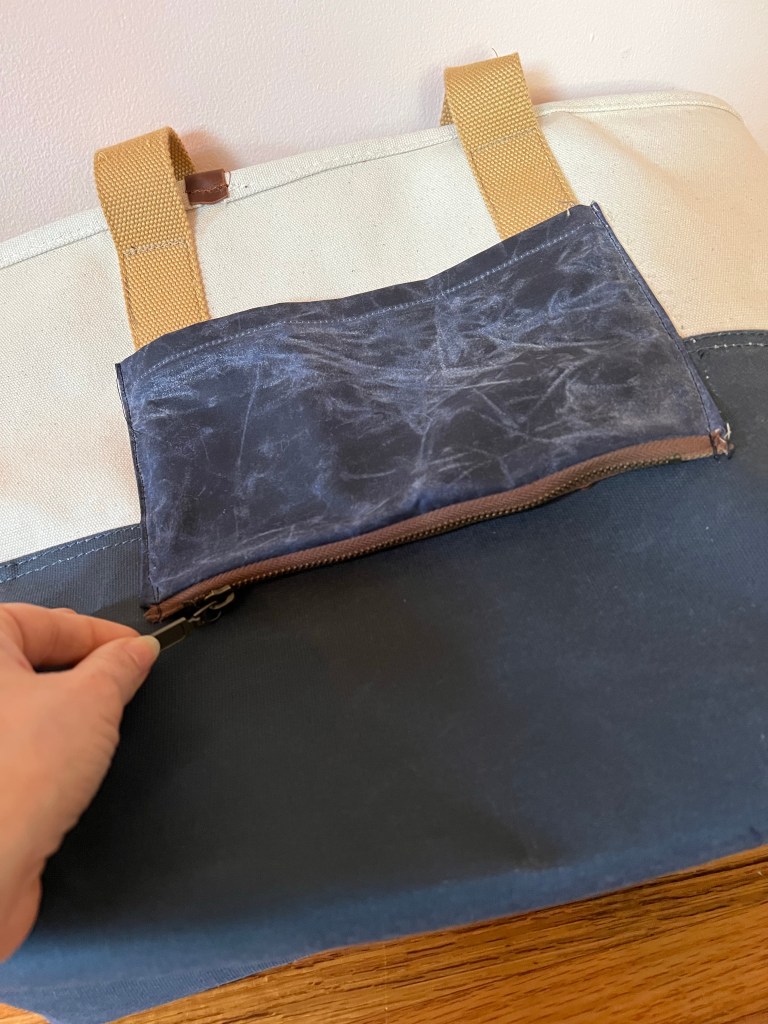
I’m actually pretty stinkin proud of that back slip-through panel – I added a zipper to the bottom (which was a neat idea I nabbed from one of my Briggs & Riley luggage pieces) so it can also function as a pocket when it’s not attached to my suitcase! The fabric is waxed canvas that I bought from the Crafty Gemini ages ago, and the zipper is from an old Niizo bag kit. The topstitching does look a bit sloppy at the bottom – again, I was sewing this on a fully formed (and quite rigid) bag, so I’m cutting myself some slack here. It’s fine.

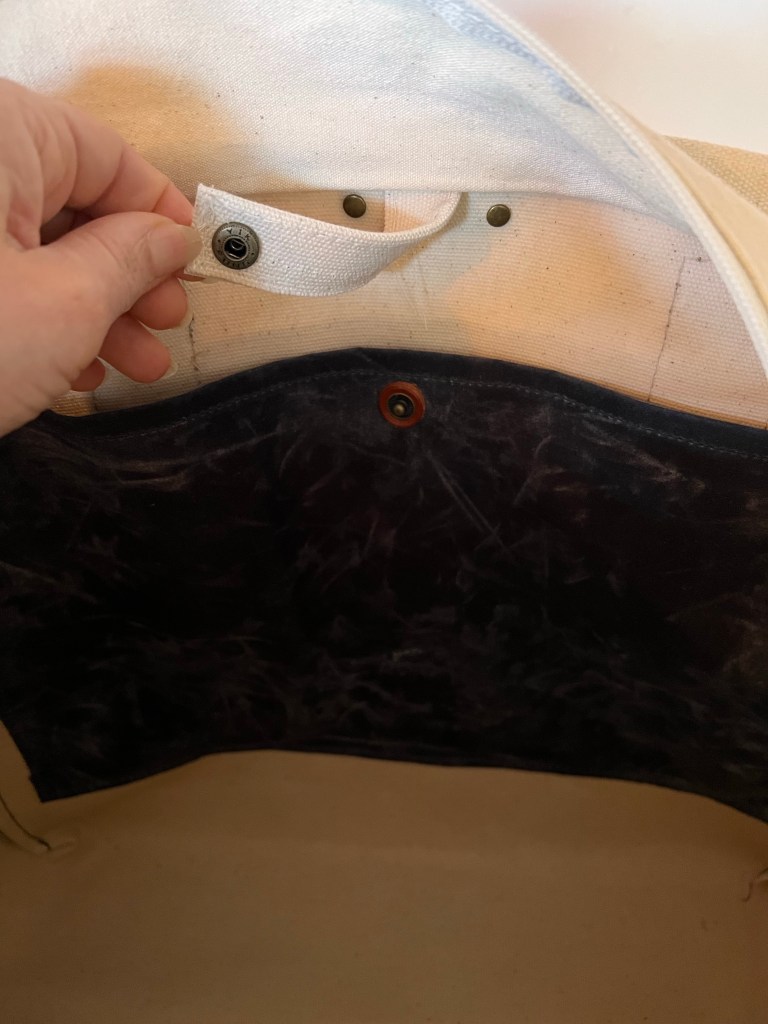
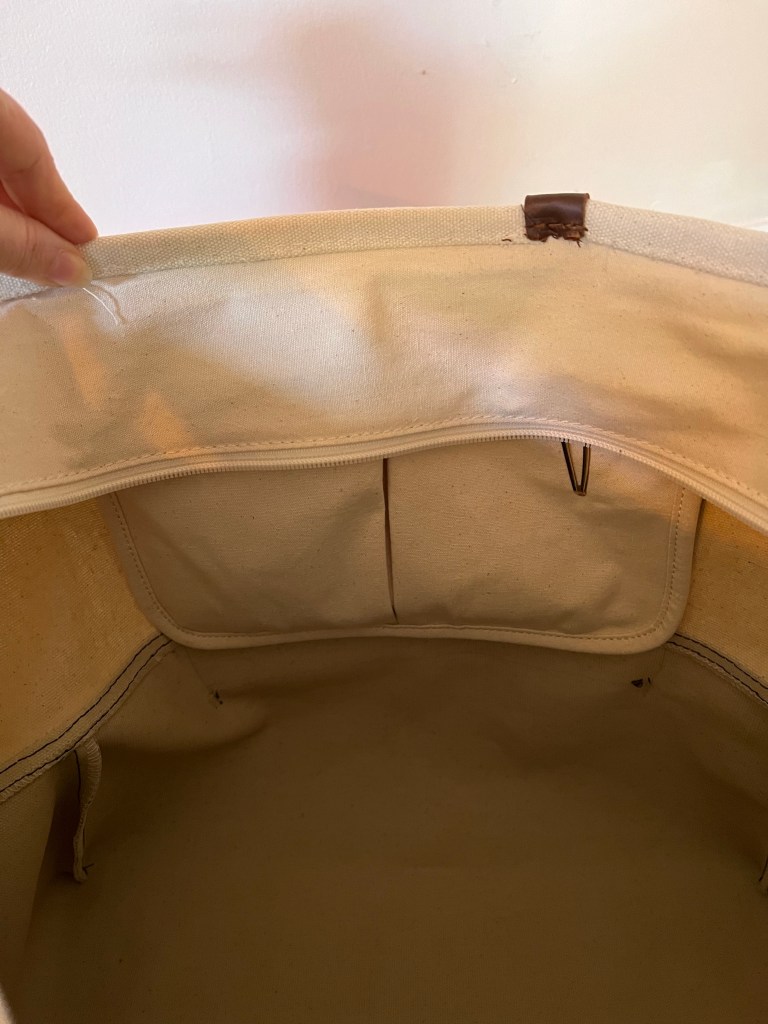
Here is a poorly-lit photo of the interior laptop pocket (can you tell that I didn’t edit these photos at all?). I sized it to fit my laptop and used more of the navy waxed canvas. I did have to be mindful of when I was sewing on white vs navy, and change my bobbin thread accordingly. I originally did not add a closure, but I hate a floppy laptop pocket (you think you’re putting something in the bag and it goes in the pocket, UGH). I used leftover canvas from the bag’s outer, and folded it up to create a tab, which got sewn into the top binding. I added a snap – the tab was sturdy enough to accommodate the snap with no extra reinforcement, but my navy waxed canvas is pretty thin so I supported it with a leather washer (this also came from a Klumhouse kit, and is absolutely 100% where I got the idea from). I use an industrial snap setter so I had no problem getting a strong snap through those layers. I like this closure because it keeps the pocket closed when not in use, doesn’t show from the outside, and also doesn’t risk scratching my laptop.

This is unrelated to my project and not something I added to the bag – but I wanted to share the free hanging pocket, which is really nice! The zipper gusset folds over the open pockets when the bag is not zipped, so your stuff doesn’t fall out 🙂 I thought that was pretty cool! PS sorry about all those threads that I need to snip!

Ok, I don’t have any photos of shortening the bag because that was a pretty straight forward process. The top is finished with a canvas binding, so I pulled that off with my seam ripper, which also removed the zipper gusset and the free hanging pocket. I also had to open the side seams a bit so I could lower the crossbody strap D rings, because they are close to the top and would get cut off. I removed 1.75″ from the top, moved down the D rings, put the gusset and pocket back in, and re-attached the binding. Like I said, the only hard part was wrangling it under then machine (which honestly felt like a walk in the PARK after sewing those pockets in haha).

I used my Janome HD9 machine, which is not an industrial but it can sew a pretty powerful stitch. I don’t know if a standard sewing machine could handle this, the layers got super thick especially when attaching the binding. I equipped with a size 18 needle and 30wt Gutterman thread – except the white topstitching, I actually didn’t have the right weight thread in that color so I doubled up 2 spools of 100wt! (this is a fun little tailoring trick I pull out of my hat when I have a rush jeans hem and don’t have the right thread color – or time to order. NO ONE can tell. Sometimes I even make my own ~custom colors~ by using two different spool colors lmao).

Aaaaaand that’s it! That’s the story how I altered a tote bag. I’m super duper happy with the changes – it’s a better size for me, and the extra pockets are highly useful. We shall see how well it fares on my international trip but in the meantime I’ll be bringing it with me to upcoming classes!

Speaking of upcoming classes – I’ve got a few more dates for my Alterations class scattered throughout the year (including one in October at Pintuck & Purl – you could walk to the LL Bean Outlet and nab yourself a discounted tote to attack!). I say this often, but I can’t say it enough – alterations does not *have* to be pants hems and boring shit. Basically anything that has been sewn can be altered. A big part of the fun of this class is bopping around ideas and changing things up in the most glorious and unconventional ways (although if you want to learn pants hems and other standard alterations – I can teach you that, too!). Read more about my alterations class here in this post, and check my upcoming dates here!

Sewing Studio Tour: 2023 Version

23 Mar

I just realized I’ve been in my house for 4 years now, and I never shared my studio space!

A little background before we dive in: I own my house, and it was built in 1958. It is considered a 3 bedroom, but the rooms are very small. My studio is about 10’x11′, so every square inch definitely counts. It’s not the smallest room I’ve worked in, but it is certainly a top 3 contender! Eventually, I plan on building out and moving my studio outside of the main house (whether I build an entirely separate/detached structure in the backyard, or simply add on to the existing house – I haven’t decided yet!), so this is technically “temporary.”

I’m not going to go into full detail about all the various pieces of furniture and storage in this room – I’ve talked about it extensively over the years on this blog, and you can find all that info in my last studio tour post. That post includes links to all my past studio tour posts, and a huge section of links that discusses all my furniture (including the cutting table). Short answer: Almost everything is from IKEA, and if it isn’t from IKEA, it’s likely from the Nashville Flea Market. Any questions you have about anything in this room that are not answered in this post, are answered in that post I linked so please check it out!

Anyway, I recently rearranged the room a little so I took some photos and I’m going to share them with y’all today!

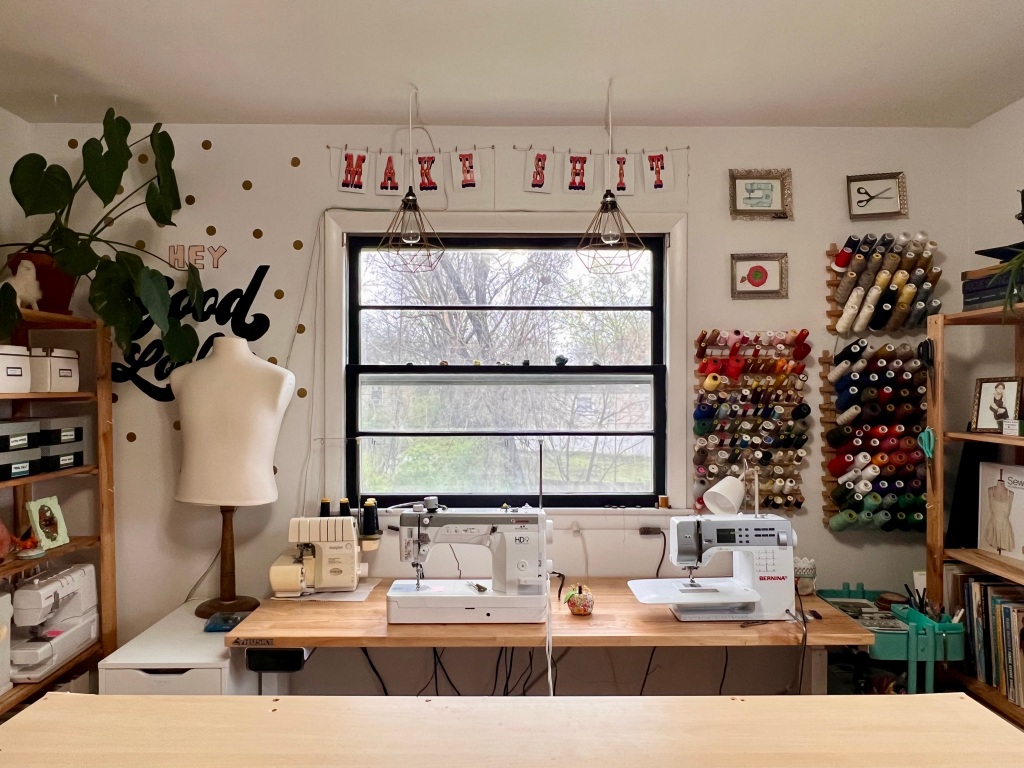
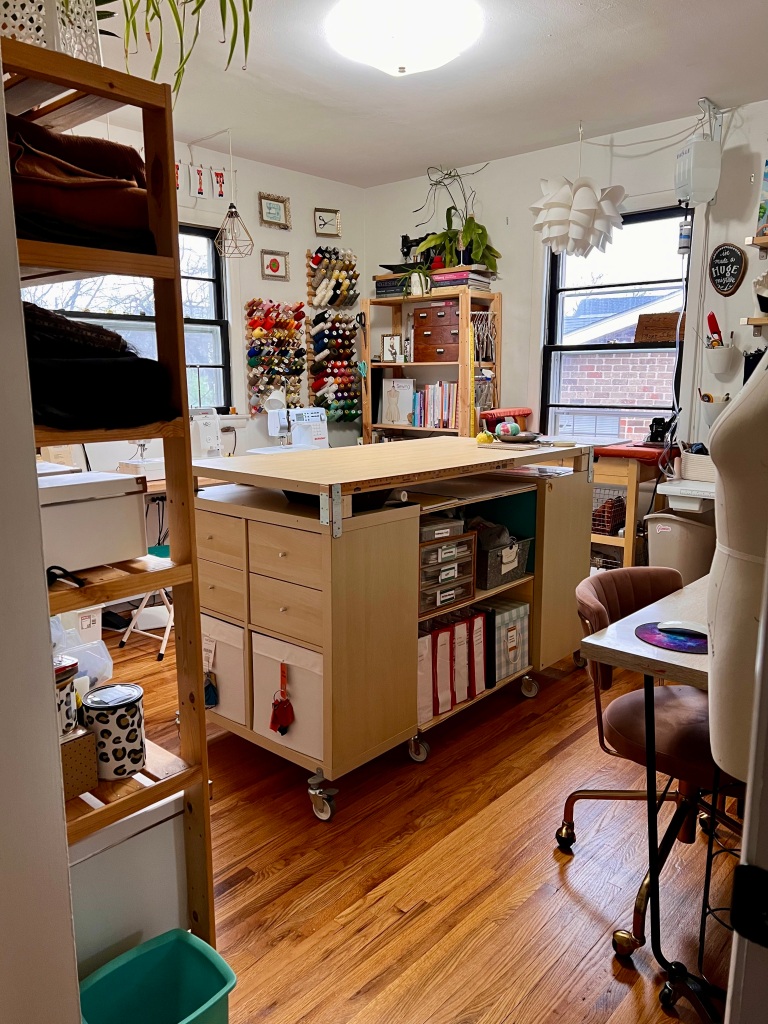
This is the view when you first walk into the doorway. Like I said, it is small! You can see almost the entire space from this viewpoint. To the left (the wall behind the shelf), there is a closet that is directly in front of the door when you walk in.

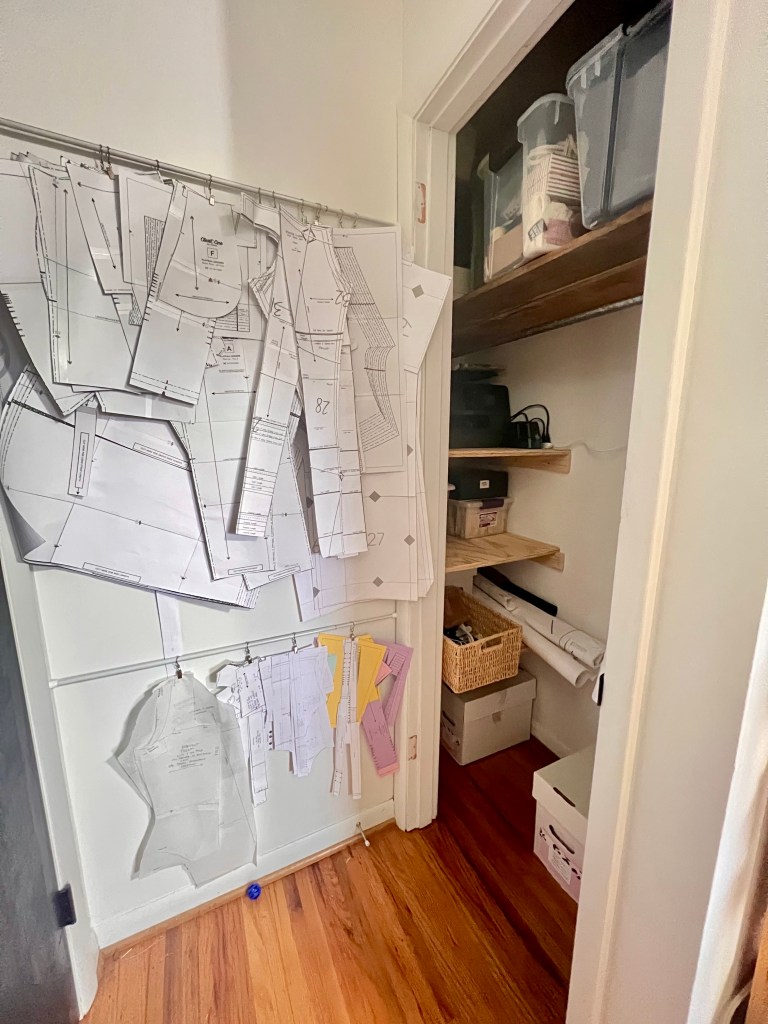
Here is the closet. You can see the entrance to the left (black door) and now the room is behind me. I’ll be honest – having a closet directly in front of the door is nice in terms of leaving lots of good available wall space in the main part of the room, but that closet shape sucks!! It runs super deep, and is hard to get to anything stored in the back. I can’t even imagine what it’s like when there are clothes hanging in it. I had a free standing shelf in here, but it was too hard to get to the back and that space ended up wasted. So earlier this month, I installed shelves in the deep part. I just used plywood and 2x4s from the hardware store, nothing fancy! The clothes rod is still up, so I can hang clothes in the empty side (useful for holding client’s pieces waiting to be altered or picked up). I also installed several hooks in the wall, to hang bags, etc. The top shelf holds sewing machine cases, my on-set tailor kit (basically a second set of sewing supplies so I don’t have to repack whenever I’m called on set), and my jeans samples. The empty space between the entrance and the closet has tension rods, and I use simple curtain hooks with a clip to hang the PDF patterns that I’m currently using. Eventually, I would like to move the closet entirely (knocking down some walls and adding to the laundry room – which is next to the back closet wall, etc) but this works for now!

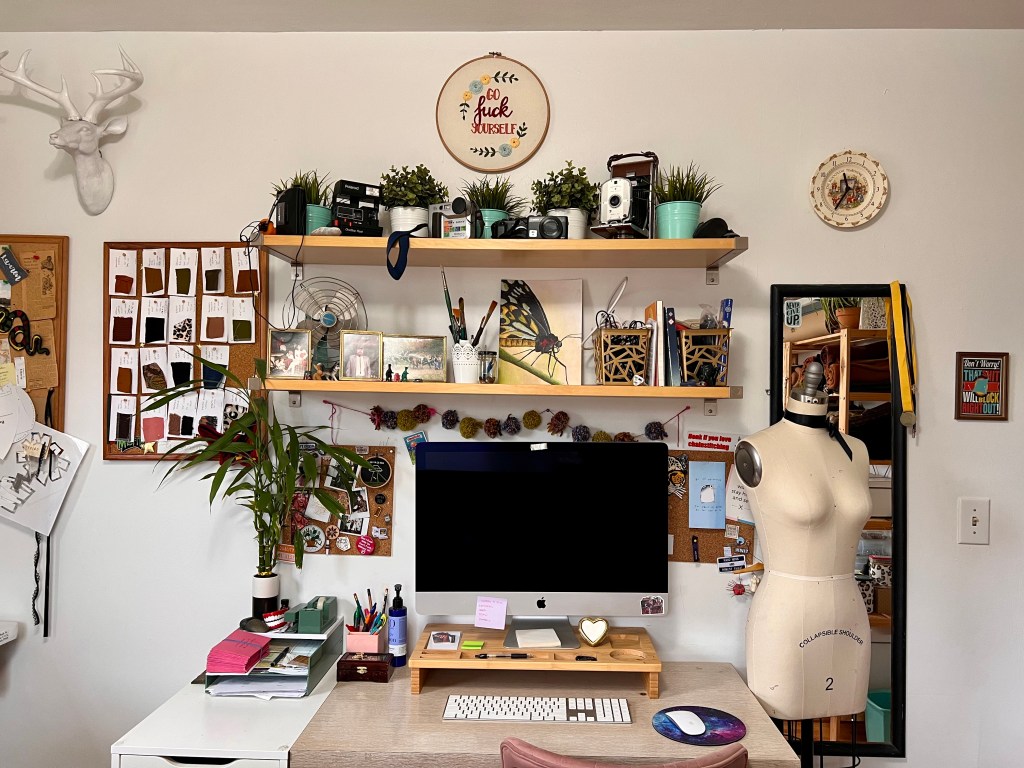
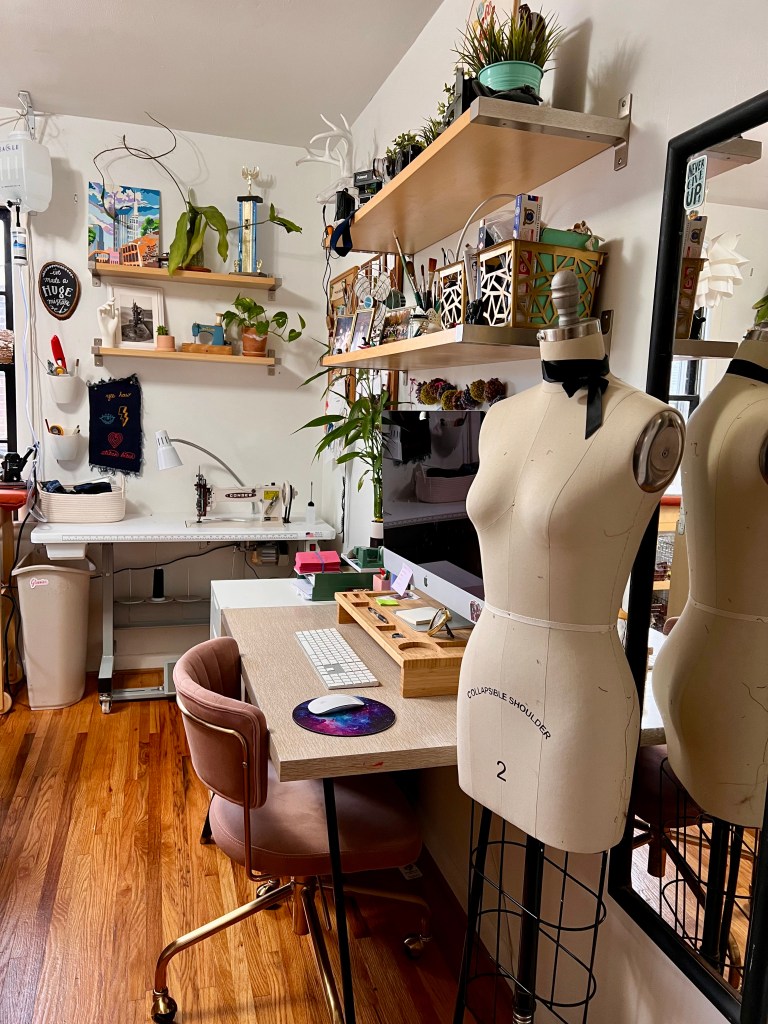
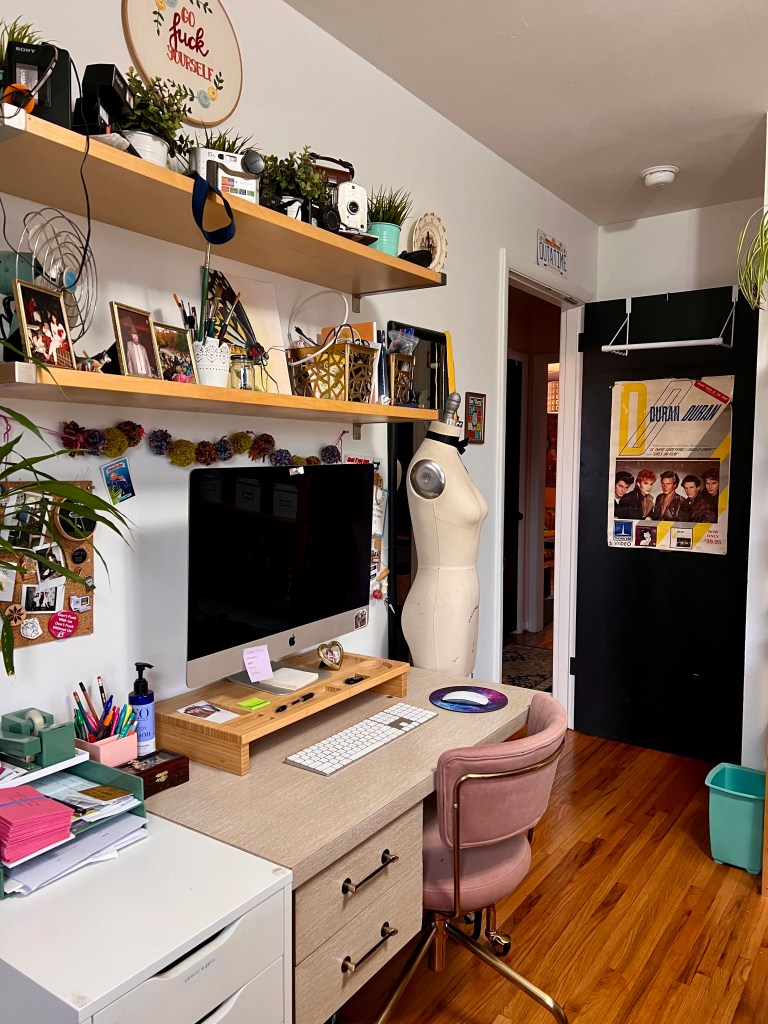
Here is the wall next to the entrance! Here I have my desk + computer (I finally upgraded to a desktop and WOW WOW WOW don’t think I can ever go back to a tiny laptop screen lol), and a small drawer unit that holds various office, art, and tech supplies.

The corkboard to the left of the desk holds swatches of all the fabrics on my shelves, I swap these out based on what I plan on sewing for the current or upcoming season. And the dress form lives next to my desk now because there is literally nowhere else for her to go! I just roll her out of the way as needed. FYI that pink desk chair is from Wayfair.

Next to my desk is my newest sewing machine (and the reason I had to rearrange this room)- a Consew chainstitch machine! This is new – I purchased it in January, and I’m deep in the throes of learning how to use it. The table is 48” long, so it took some creative maneuvering to figure out how it would fit in this space. Eventually I’ll hang spools of thread in that empty white wall behind it (or move that corkboard and put the spools there), but I gotta order them first 😇

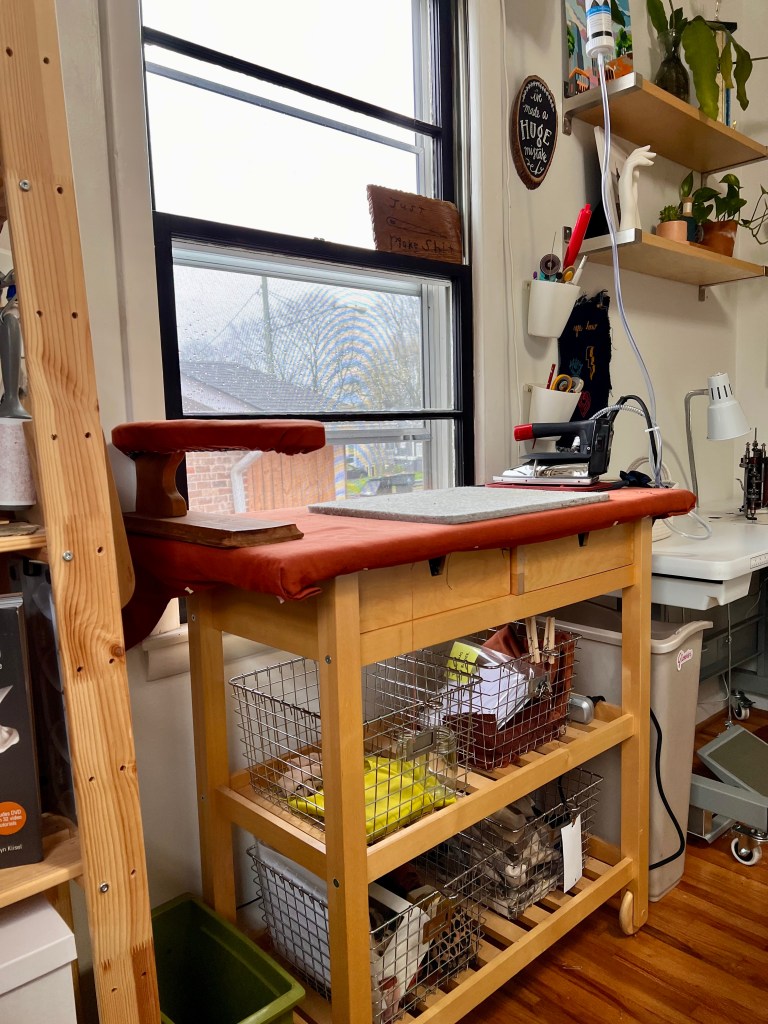
Next to the chainstitch is my ironing station. I use a kitchen cart, padded at the top to make an ironing board. The drawers hold interfacing and pressing tools, and the shelves hold baskets with cut projects. With a small space, it’s importantly to utilize what you can so I prefer this over a traditional ironing board, since it has shelves and drawers. My scissors and pressing supplies are hung from tension rods on the side of the shelf.

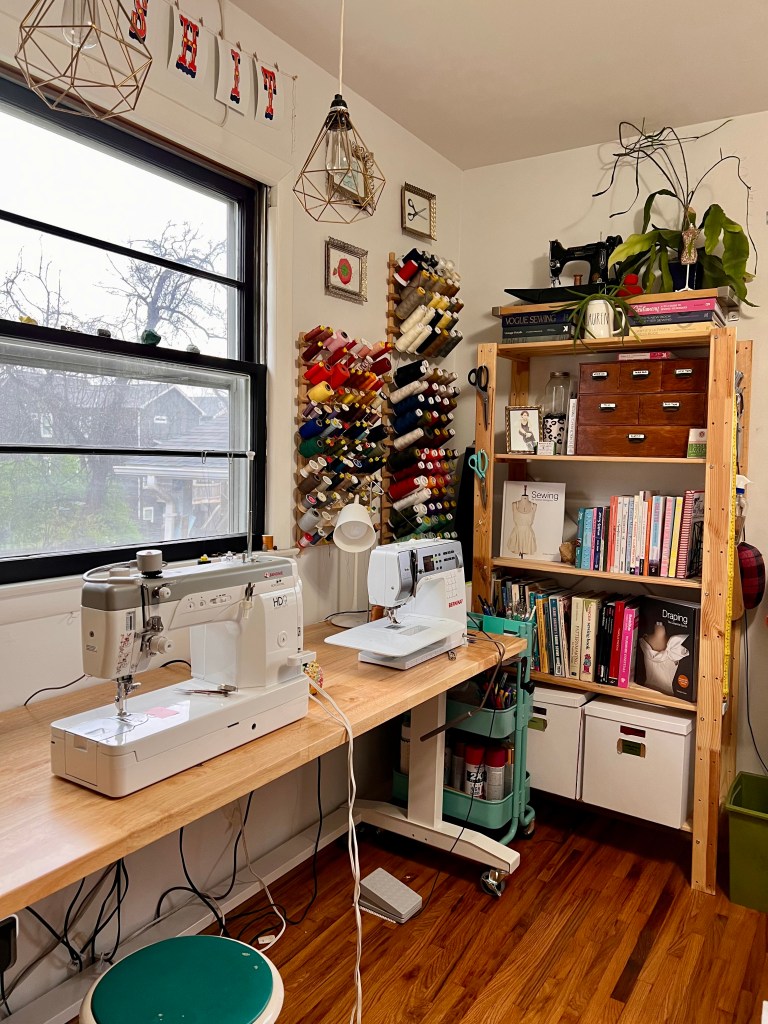
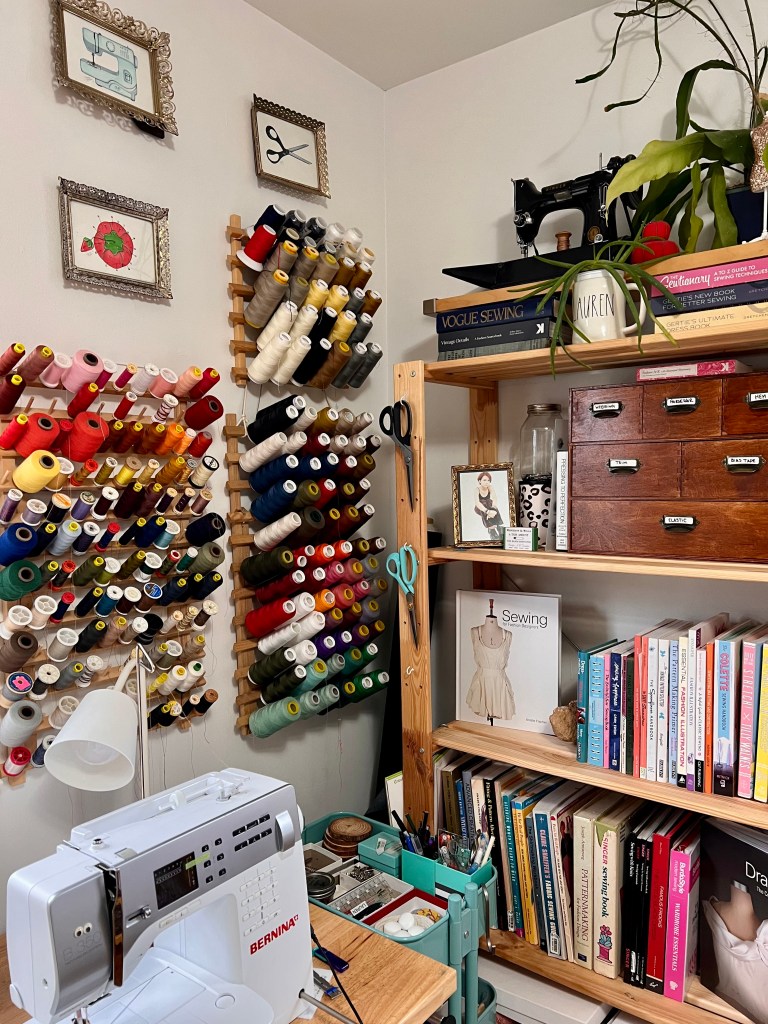
Next to the ironing station is a shelf, with all my sewing books and a drawer unit that holds trims and elastics. I also keep my thread here on racks. And one of those white boxes holds my entire yarn stash (yes, the entire thing! I don’t stash a lot of yarn!).

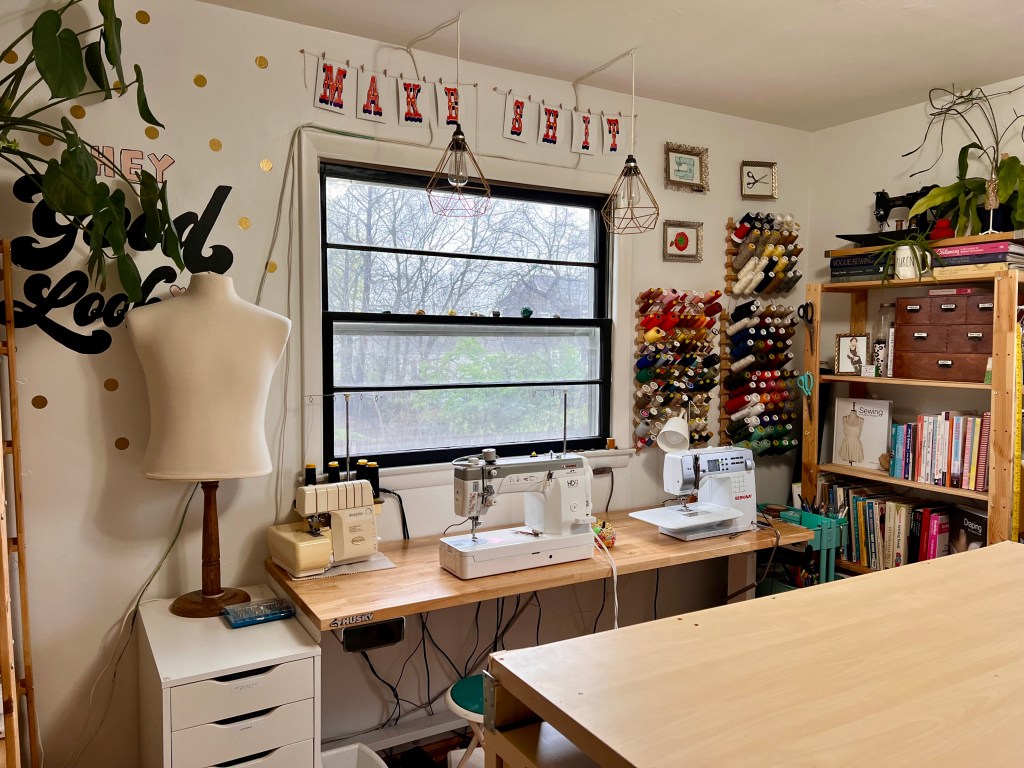
Then we have the main sewing table, which is about 5’ long. It’s the Husky Workbench from Home Depot; I swapped this out from my old tabletop (from IKEA). It is much sturdier (absolutely no bounce), the height can be raised or lowered, and the entire thing is on castors so it can be rolled around. If I need more cutting space, I can remove the machines, raise the height, and roll it next to my cutting table for a double space. I added the small drawer on the left (underside) – that’s from Amazon. The drawer unit next to the table holds all my sewing supplies – machine supplies, notions, specialty threads, snaps, buttons, etc. And the male dress form on top is actually a shop mannequin, I grabbed it when the shop I work at was changing their floor mannequins. It’s not a true dress form for fitting, but is useful for taking photos, measurements, or designing. I do a lot of sewing for male clients and this works way better than my lady form!

BTW you may have noticed my lack of chairs – I didn’t take any out of the room for these photos, I really just have one small stool! I realized I didn’t like having chairs with backs – I never sit back and use the back support, instead, it gets in the way when I’m doing a lot of moving around. I had this little folding stool that works great. I need to buy more, but I haven’t gotten around to it. I don’t even miss having wheels – they always got thread rolled up in them.

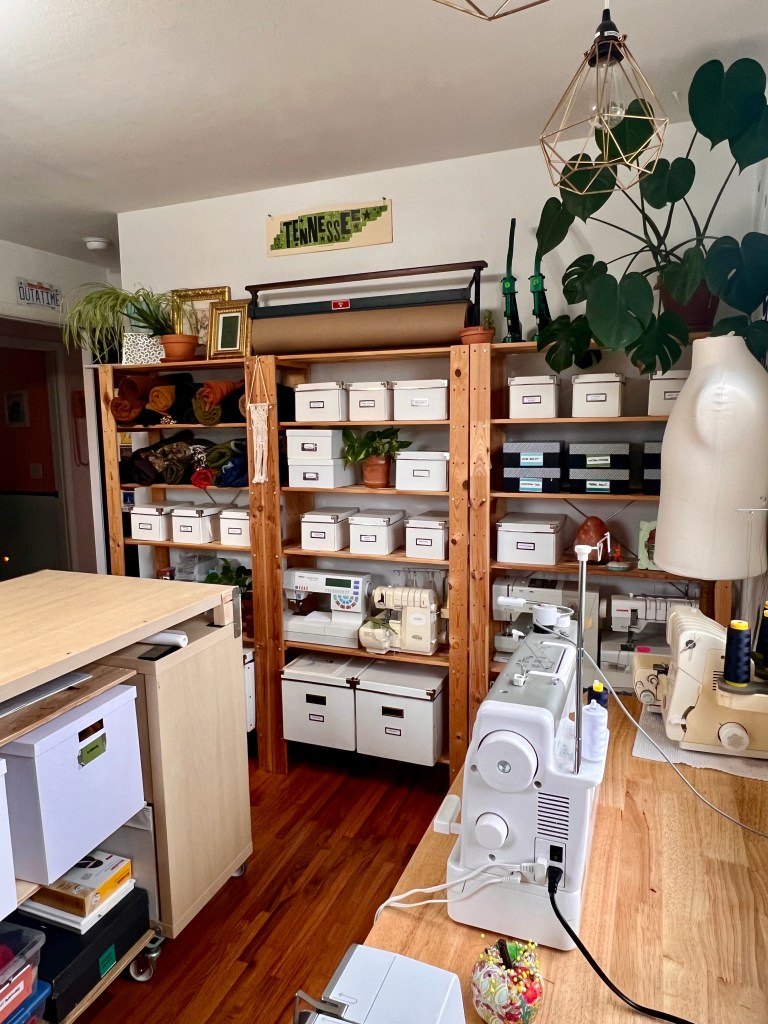
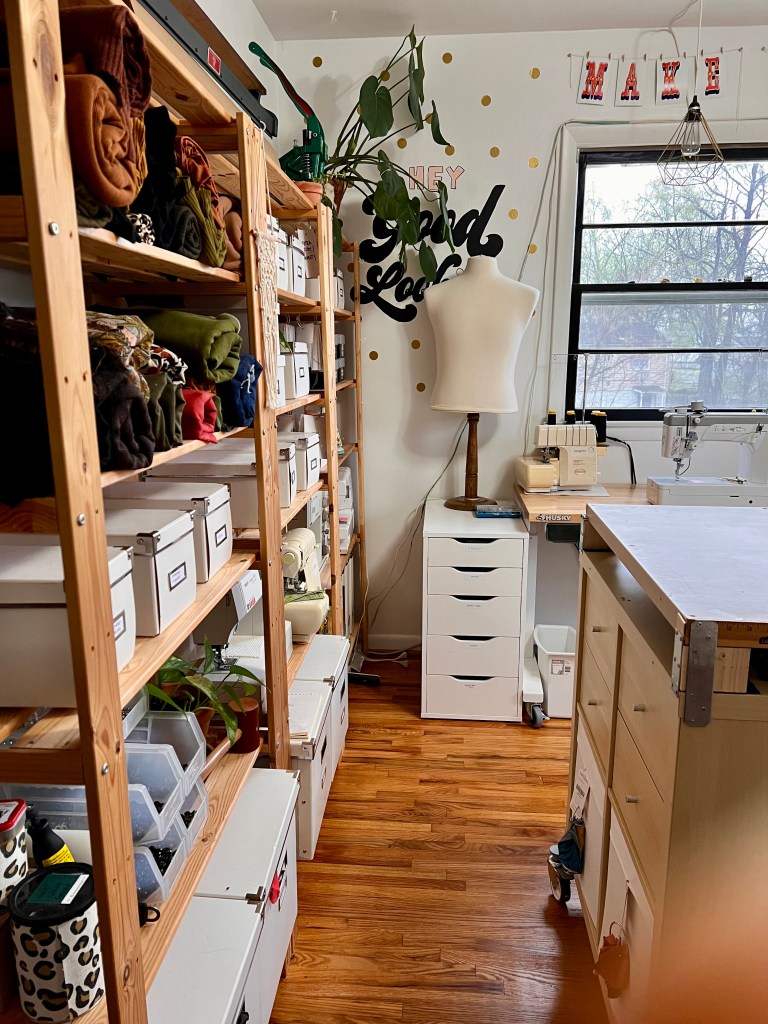
The wall next to the sewing table is just a long line of shelves! My fabric occupies a couple shelves (I keep the rest stored in my attic – check out this instagram post for the full run down), and the boxes hold specialty fabrics (lingerie, lining, scraps, etc) and notions (mainly bra making supplies). More info on that storage system can be found on this instagram post. Finally, I keep extra sewing machines on a couple of the shelves. I have a lot now and they don’t all fit on the table! I keep the plugs at the table (I installed cup hooks along the wall below the big window so they have somewhere to hang when they aren’t being used) and I store the pedals/knee lifts/and freearm tables in one of my white drawer units. This way, it’s really easy to swap the machines out. I will acknowledge that my cord system behind the table is GNARLY looking – and unfortunately, there isn’t a good way to hide them while also having regular access to them (I take my machines on set pretty frequently, so I need to be able to access the cords and hiding them would make that 10x harder!).

Speaking of machines – because I know someone will ask! – I have a Janome HD9 straight stitch, a Pfaff 7570, a Bernina 350PE, a Bernina 930 Record, a Janome coverpro 2000cpx cover stitch, a Babylock Imagine serger, a Babylock Evolve serger/cover stitch combo, plus my Singer Featherweight (on a wall shelf on the opposite wall) and the aforementioned chainstitch. It’s a lot! I don’t have a favorite – I love them all!

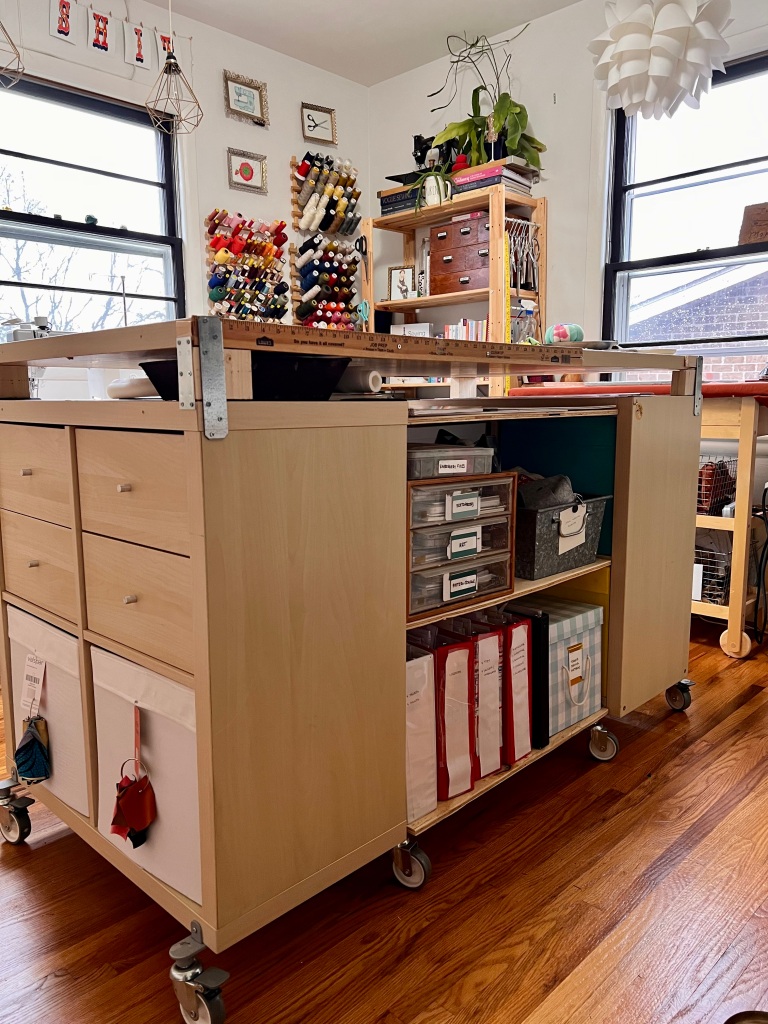
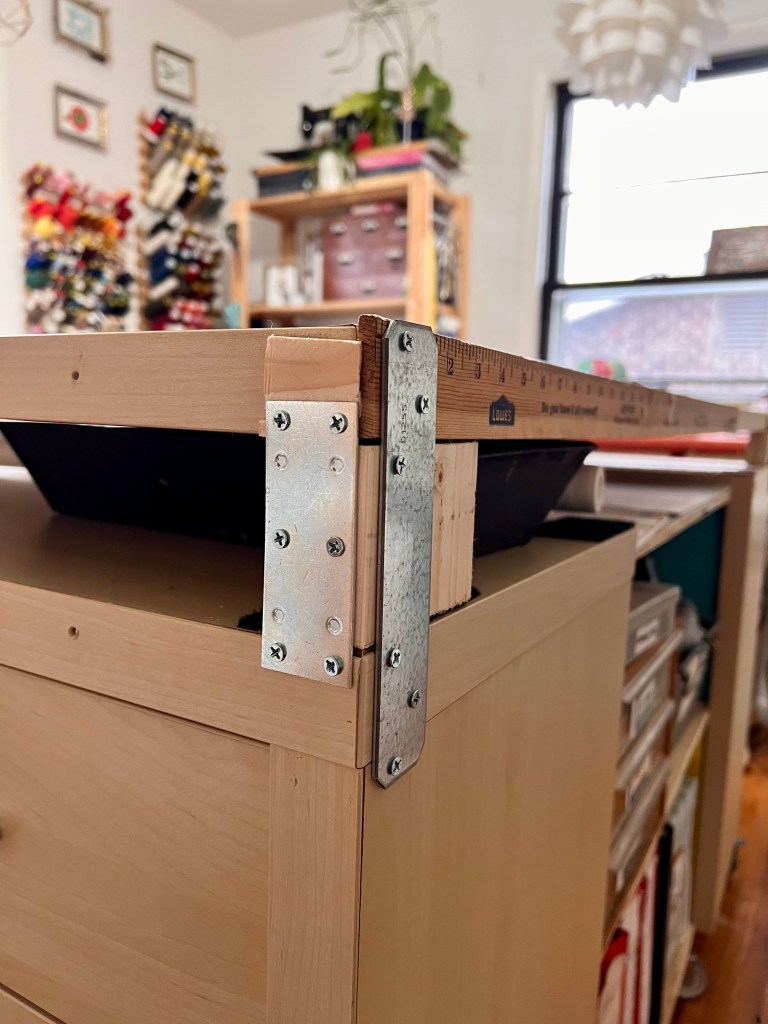
The last big piece in this room is my cutting table. I won’t go into detail about how I built it – it’s all IKEA pieces and again, I wrote about it extensively in the previously linked blog posts. But I recently filled in the empty center with more shelves (built with sanded plywood, and attached with metal brackets to the undersides), and I lifted the tabletop using wood blocks (2x4s that I cut and then glued 2 together to make a block, then attached to the top of the unit with metal brackets and some shims as needed). The narrow space is big enough to slide my cutting mats and rulers out of the way when I’m not using them, and just tall enough to hold the bowl of sewing tools I usually keep on top of the table. I wanted to be able to quickly move things out of the way when I need a big flat surface for cutting, without just moving them to another table area (where inevitably it’s still in the way!). I am REALLY happy with this edit! That short little shelf space is SO useful!

Here’s a close up of the block lifts. It took me a long time to figure out how to do this – I didn’t want to glue them to the table, because then they’d be permanent. So I used brackets to screw the blocks to the table and the tabletop. It is sturdy and – very important – can be taken down if I need to disassemble the table (it actually can’t leave the room without being disassembled, due to the angle at the entrance and the width of the hallway outside the door). It’s not very pretty, but I don’t care. I’m a seamstress, not a carpenter!

I don’t have a good photo of what I store under the table, but it’s basically everything I used to keep in the closet. Small boxes with craft and art supplies, sewing pattern storage supplies, boxes that hold big patterns (Vogue, Papercut) and binders to hold PDF patterns. I keep my other sewing patterns in boxes inside the closet, along with my printer. There’s more info in my pattern storage in a previous blog post, or check out this Instagram post.

Here are some more photos of things in the room, just because!

Fun fact – I won that big trophy in “beautiful baby” contest in 1985 LOL

Another fun fact – that framed photo is me at 14 and it’s just as hilarious up close as it is from far away. I have on fuzzy purple zebra pants and mismatched socks! Hoorary for the late 90s!

Anyway, that’s my studio tour! Like I said, it’s a small room – but I feel like I made a pretty good use to the space! Since the cutting table, sewing table, and chainstitch are all on castors, it’s also a little modular – I can roll things around as I need them (and also just *barely* fit a queen sized air mattress in the room for when I have guests over!). I really love this room – it gets beautiful light and honestly it just feels good in here. I’m excited for my future studios, but perfectly happy to sew in this one, too 🙂

I’ll leave y’all with one last photo – my mom’s boyfriend made this for me for Christmas last year. He was inspired by the letters hanging above my sewing machines 🙂

Completed: Stovepipe Ginger Jeans

20 Feb

Thank you all so much for the warm welcome back to my blog! Feels so good to be back! And now – at long last, the jeans post I have been promising!

I’m not sure how riveting (lol) this post will be, considering I’ve shared many versions of Ginger jeans over the jeans. But this is my newest pair, in a really wonderful denim, which I wanted to highlight since it is very different than what I’ve used in the past for this pattern.

This is the very newest version of the Ginger Jeans pattern from Closet Core Patterns. I have been making this pattern since it was released in 2014 (!!!), and it’s definitely a wardrobe staple for me. I generally prefer the skinny leg version, made with a very stretchy (25%+) bottomweight, but we are doing it different this year! I’m trying new things and branching out! What a rush!!

A little backstory first – while the Ginger jeans have been around since 2014, they have only been available up to a size 20 until last year. The pattern was re-released in 2021 to include up to a size 32 (63″ hip). This is the pattern that I use for my Sew Your Own Jeans weekend workshop and I was very excited to make a new set of samples with a new denim and that whole extended size range! I spent so much time laundering large swatches of denim and agonizing over which one to use for my future classes, and then even more time sewing 22 pairs of jeans (not quite full jeans – but with zippers and finished waistbands and a faux pocket stay). It was a lot of work and I absolutely stained the shit out of everything in my house.

I chose this denim, which is Wyatt from Robert Kaufman, because it washed and sewed so beautifully. The denim is 11.4oz and has about 20% stretch, and the cotton/poly/spandex content is remarkably similar to Cone Mills denim – at a much lower price point, and much more easily accessible as most fabric stores already carry Robert Kaufman fabrics. The lower stretch means it is really easy to figure out fabric for your next pair, as it is sort of a middle ground in terms of bottomweight stretch. If you find something more or less stretchy, it’s pretty easy to size up or down (or add/remove space from the seam allowances) depending on how much the percentage changes. And because of the polyester and spandex content, this denim has a really excellent recovery. I get about 7 or 8 wears out of my jeans before they start feeling a little loose. It’s amazing! Honestly, this is my favorite denim I’ve ever used. I was SO excited to have this for my classes! Yay Wyatt!

Unfortunately, Robert Kaufman ended up discontinuing Wyatt. Which was really lovely to find out 2 months after finishing the samples. To answer your questions – no, I’m not making new samples with a new denim, and our replacement class denim will be figured on a case-by-case basis (since Robert Kaufman also discontinued my back-up denim. I tell ya, it’s been a wild year). So I’m sorry if I just sold you on the best denim ever, just to tell you now that you can’t have it! I’m sorry! Email Robert Kaufman and ask them why the hell they discontinued it!

Anyway, enough with the denim drama lets talk about these pants! Since I was using a lower stretch denim than I normally make my Gingers with, I went up a size for this pair and made them in a size 4. My general rule of thumb for this pattern is to go up or down a size for every 5% stretch you gain or lose, starting with 15% and going up to 25% (I would not stray too much beyond those percentages). This has been the case not just for me, but across the board in my classes, fitting hundreds of students into a multitude of different sizes, denims, and ease preferences.

Using myself as an example: My measurements put me at a size 6 hip, which is the size I would sew with 15% stretch. For 20%, I can go down to a size 4. With 25%, I can make a size 2. When changing sizes – you can either cut a whole ass new pattern, or you can add the difference at the side seams (whatever the size grade measurement is – you will want to refer to your pattern. It can vary between 1/4″-1/2″ depending on your size range). Of course, you always want to try the pants on BEFORE the waistband has been attached – it’s really easy to add or remove room from the side seams.

To find your stretch percentage, you have to measure a physical piece of fabric. The amount of lycra in the fabric has absolutely no bearing on the stretch percentage – I’ve seen fabric with 5% lycra that stretches 10%, and 2% lycra that stretches 20%. You have to actually stretch and measure the fabric, and do math to figure out the percentage. There are tons of tutorials online on how to do this – here’s a good one from Cloth Habit. The Wyatt denim stretches 4″ of fabric to 4.5″ (or 5″ to 6″, or 10cm to 11.5cm). My specific math percentage may not be exact (please do not come at me in the comments with “wELL aKtShUaLLy….” I really don’t care lol), but it’s a good starting point to get the ball rolling. If you want to discuss this more in depth, please sign up for a workshop! 😇

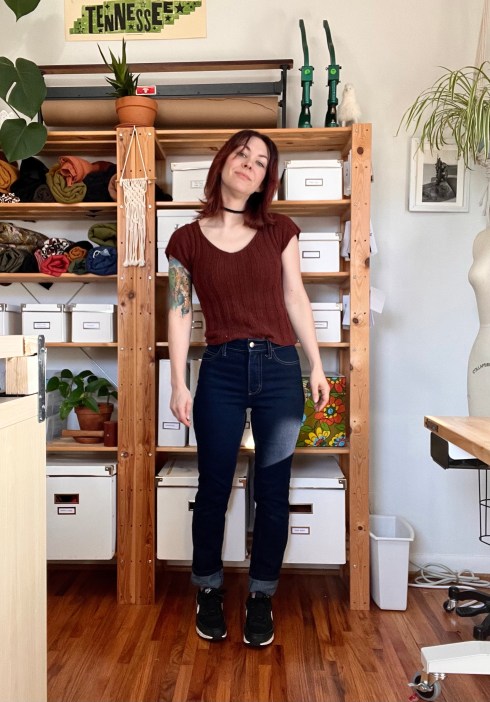
I made the stovepipe legs for this pair. The new version of this pattern includes both rises with both legs, so that you don’t have to pattern hack, which is really nice! I used the high-rise, and added an extra 3/4″ to the rise so the waistband would cover my navel. I normally need to add a full calf adjustment to my Ginger jeans, as the calf is suuuper slim, but as the stovepipe just kind of skims down the leg in a straight line this wasn’t necessary.

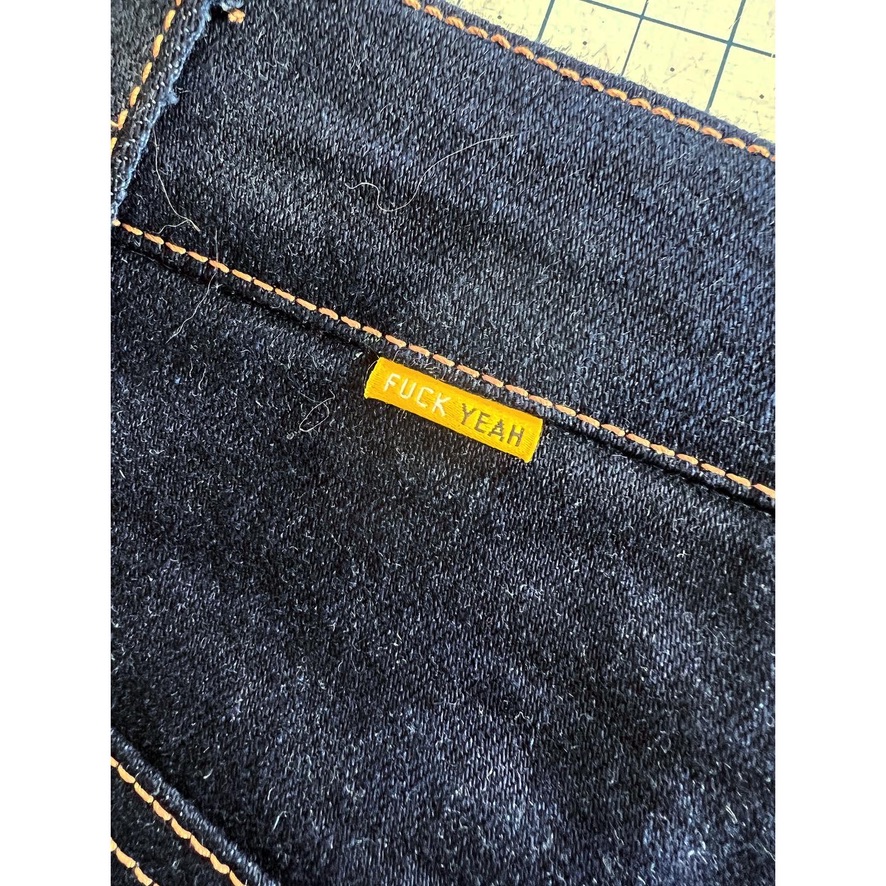
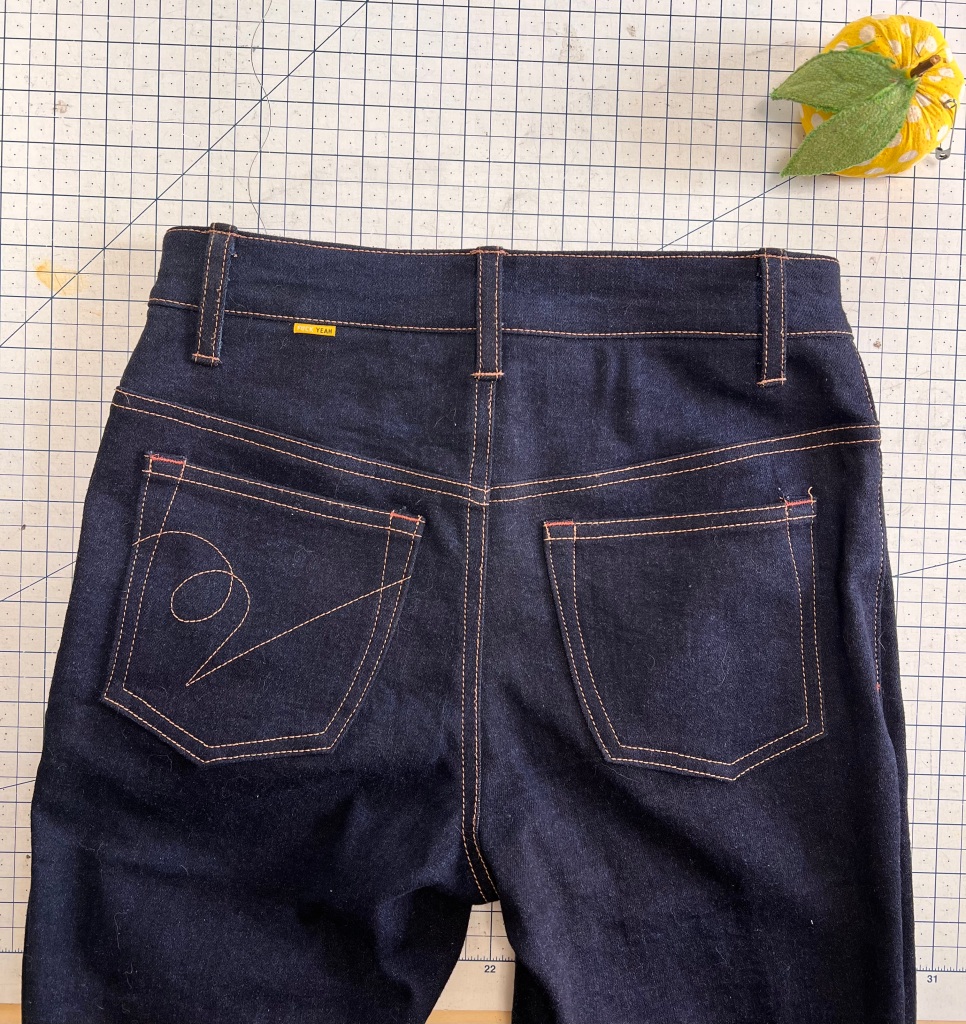
Other than that, sewing stuff is the same same same. I used 2 sewing machines for construction and topstitching, and a serger to finish the raw edges (I prefer this to flat-felled seams as it is much easier to alter if needed in the future. And I alter *everything*!). I skipped out on the rivets and went with contrast bar tacks, and added a little squiggle to my back pocket, and this fun tag from Kylie and the Machine. I think they turned out really nice! I’m still trying to get used to the slightly wider legs – I’ve worn skinnies for so long, I don’t even remember what shoes look good with a straight leg! LOL! I also need to re-hem these – I left them a little long to account for extra shrinkage, but after multiple washes, they haven’t gone up much. Speaking of washing – this denim also doesn’t bleed much. I am telling you, it’s awesome stuff! I’m so mad it isn’t being manufactured anymore!

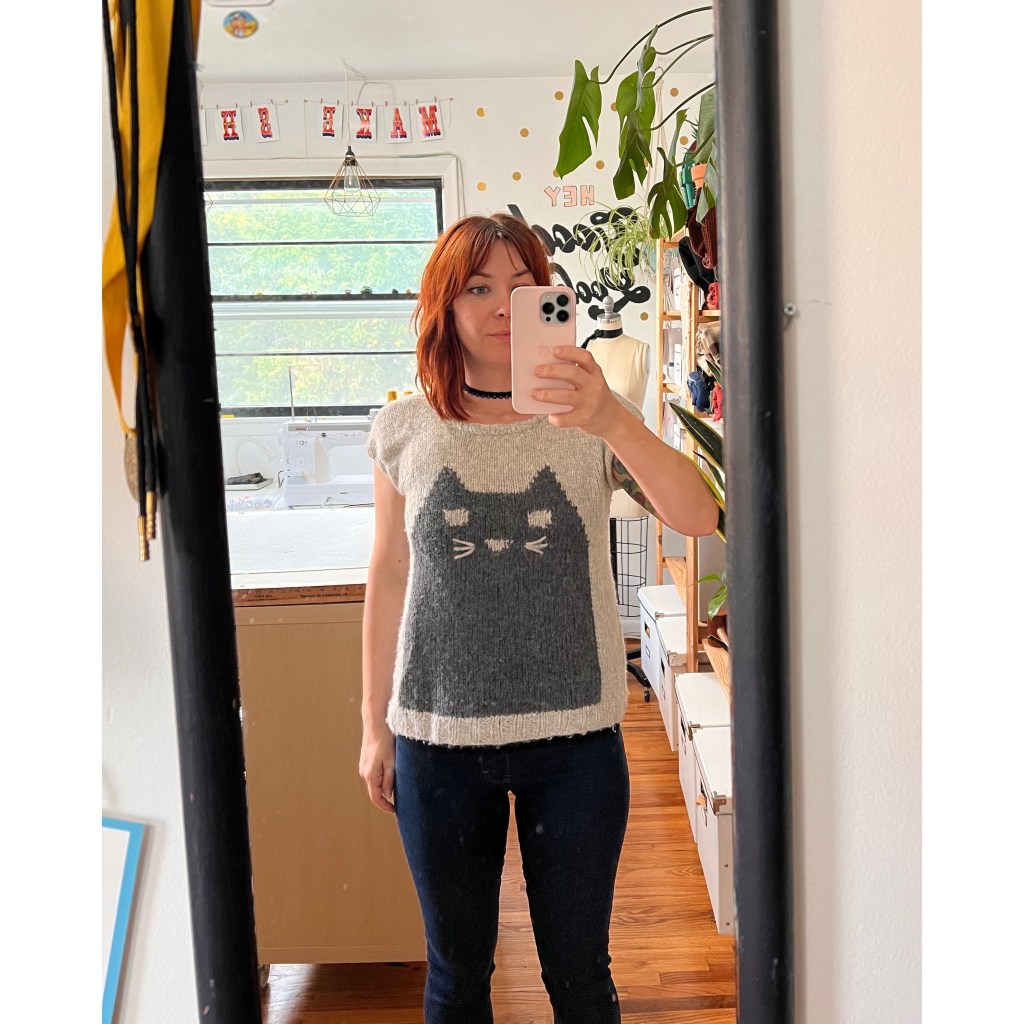
As a side note – I also knit my sweater! The pattern is the Ripple Crop Top, I made a size Small and added a few extra inches of length. I don’t remember the yarn – maybe Woolfolk Tov? Who knows? Anyway, the extra inches I added involved some MAJOR yarn chicken – to the point where I had a mere handful of yards remaining once I cast off. What a rush that was!

For those who are interested in their own guided denim journey, check out my 2023 Sew Your Own Jeans weekend workshop dates! My next two are in March at Urban Sewciety (Westfield NJ) and in April at Domesticity (Baltimore MD)! Each one still has 1 seat remaining – maybe it’s waiting for youuuu! ❤️

Completed: The Coziest Loungewear Set

8 Feb

Hi everyone and welcome back to my blog! 🎉

I haven’t posted much in the last couple of years – I moved over to Instagram as it felt more manageable, and that was a good thing. But lately Instagram has shifted into something different, and I don’t like it. I don’t care for the video format and I hate the algorithm (as opposed to showing me the accounts I actually follow!) and the whole app is just really unappealing now.

I do enjoy sharing my projects, though, and having that information accessible for future reference. So I thought I’d bring them back here to my blog! Rather than worry about algorithms and producing videos and getting followers and all the stressful shit that sucks the fun out social media, I’m gonna do what I’ve always done – my own thing! In my own space! I’m going to try to keep these short and sweet and manageable for myself (as time is my most precious resource and blog posts take a lot of time!) (update: I gave myself 20 minutes to write this post, it’s officially been an hour. Oh well!). But anyway. Welcome back!

And to be clear – I’m not jumping the Instagram ship (yet). I’ll still post on there, but I’d like my in-depth stuff to live here, on my own platform. Where there are no videos and I can type using a real keyboard HAHA.

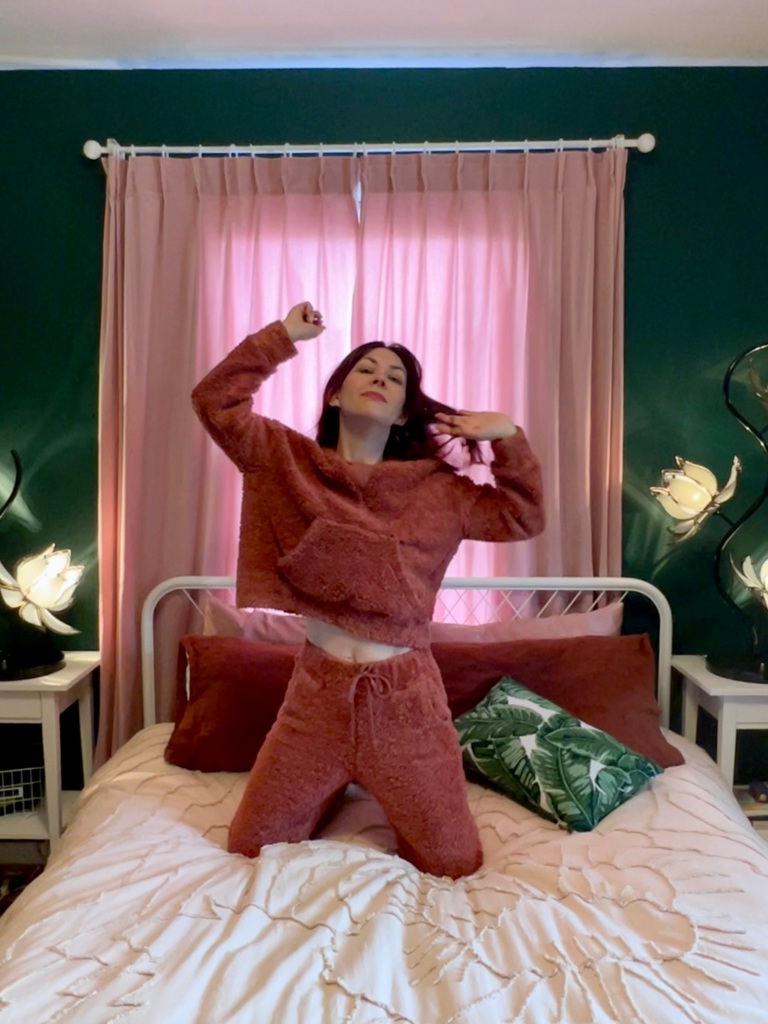
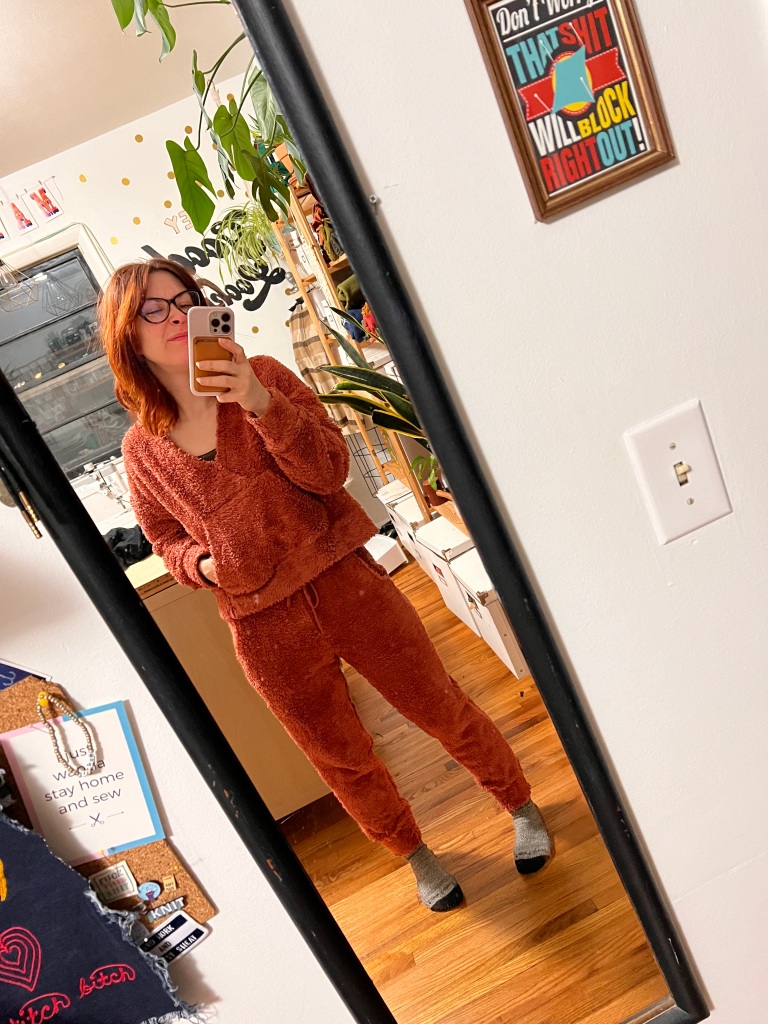
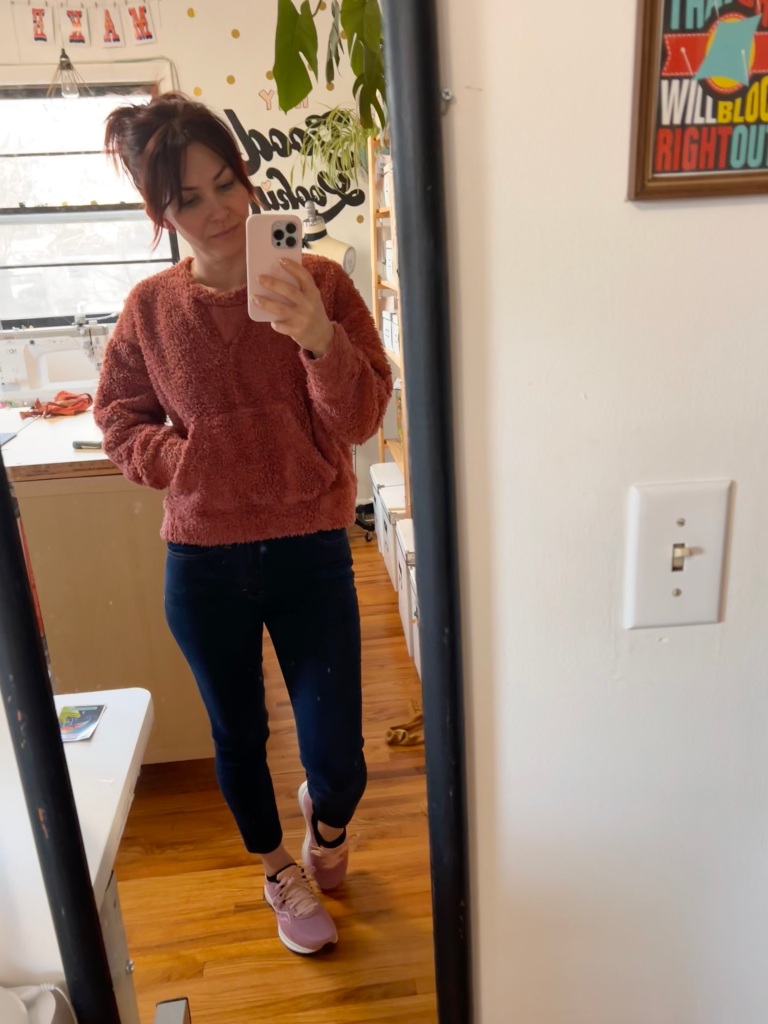
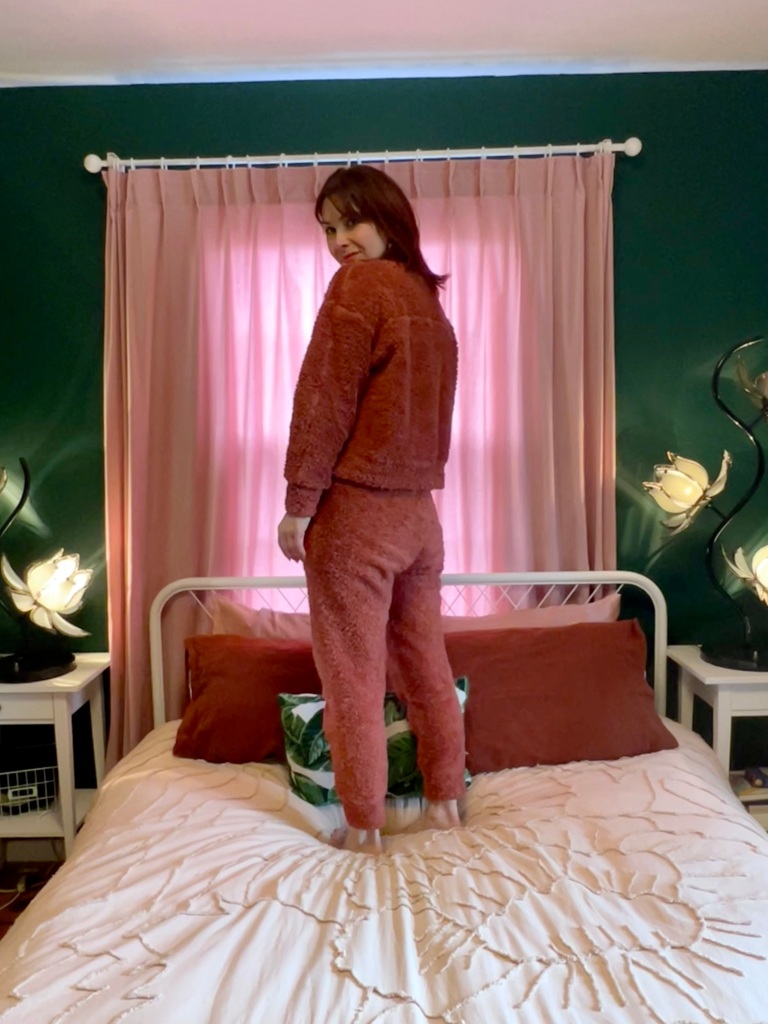
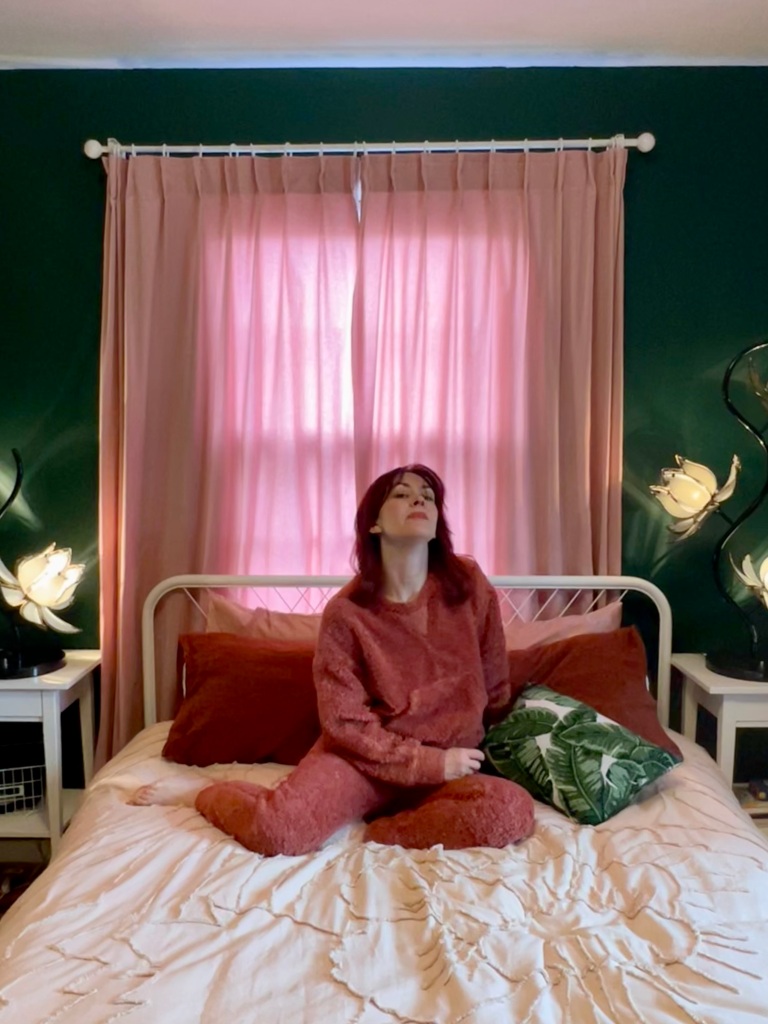
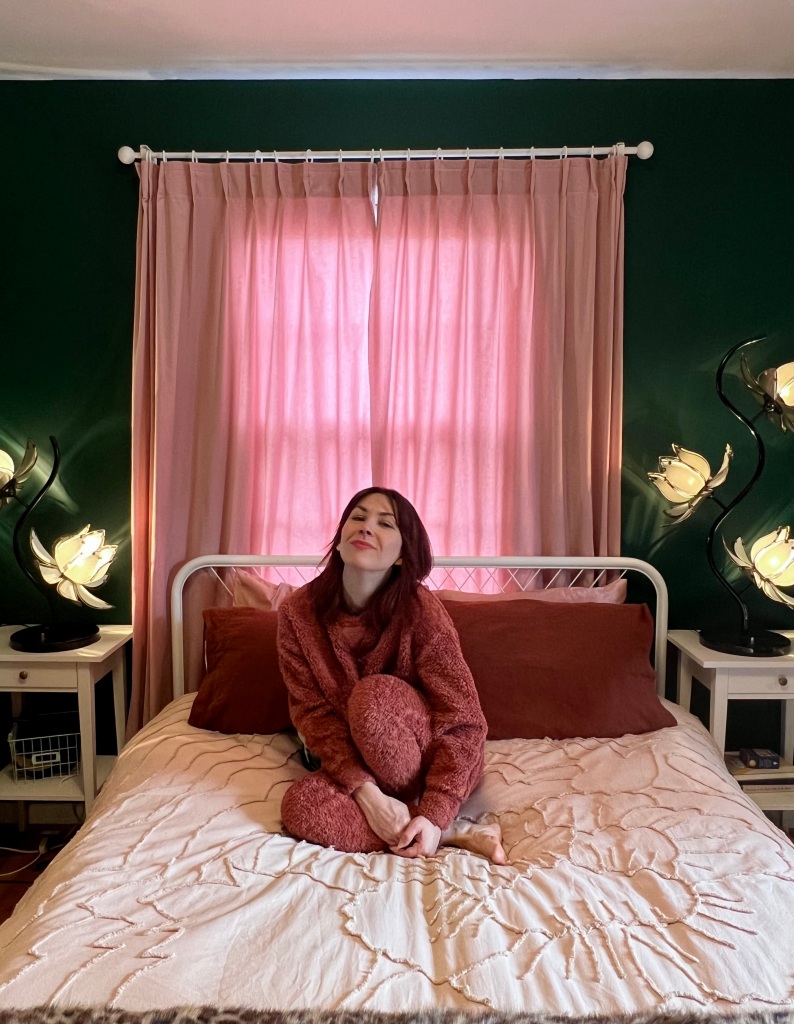
Today I want to share with you my newest, favoritest, coziest loungewear set: The Sherpa Dream 🐑

The sherpa fabric came first, so I’ll talk about it first! This pink fuzzy delight is from Domesticity (by way of Birch Fabrics, although I think it has been discontinued now) and I’ve been eyeballing it since the first time I taught there in June 2021. It’s enormously soft and fuzzy, and 100% organic cotton (which is important for me as I tend to get really sweaty in polyester). The color is just the perfect shade of warm coral pink. At $36 a yard, it was a splurge, which is why it took me so long to finally go all in. But I did and I bought 3 yards! It filled up half a suitcase! No regrets!

I wanted to make separates – I’ve been very inspired by these fuzzy knit loungewear pieces (lol @ Skims but like… don’t hate). I used both patterns from the Closet Core Montreal Collection – the Plateau Joggers and the Mile End Sweatshirt.

I will admit that when I first saw these patterns, my immediate reaction was “Seriously? Another pair of joggers?” It feels like every single pattern company has released their own version of joggers and sweatshirts. And while I understand that this is the current fashion – I am really just tired of looking at them! A jogger is a jogger is a jogger! But my favorite thing about Closet Core is their unique details on all their patterns – and once I took a closer look at these, I was on board. I love how the joggers lack a side seam at the pocket, which makes for much less bulk. The sweatshirt has some interesting detailing – including a yoke and elbow darts – which unfortunately is lost in this crazy fabric but that’s ok! The set has nice proportions, too – the top is slightly oversized and cropped, and the pants are slim but still comfortable.

I made a size 2 in sweatshirt, and a size 4 in the joggers. Both of these are a size smaller than what my measurements suggest, but based on other reviews I read + knowing how slim I like to wear my clothes, I’m glad I sized down. The only adjustment I made was to increase the rise of the pants by 1″, which I ended up taking out because they were too high! (whoops!)

Here is the sweatshirt originally, with the v-neck and hood!

So the other thing I did when I made this set – I actually started with view C of the top; it was originally the crossover bodice with a hood. It is SUPER cute on everyone I’ve seen wear it! But, alas, this was a classic mistake of the wrong fabric + pattern pairing. The sherpa is overly warm, which is weirdly incongruent with the deep V. The deep V was also too wide for my shoulders, so it regularly gaped open and made it hard to wear the sweatshirt without a tshirt underneath. I stitched the first couple inches of the V closed, which helped, but then I had the issue of the hood being suuuuuper heavy and causing the entire top to pull toward my back as I wore it (which might not have been an issue if the shoulders weren’t so wide to begin with?). Further, the hood was so giant and thick, I couldn’t wear it with a coat or jacket – it was too bulky underneath, and the wide neckline meant that it didn’t sit right when it was pulled out, either. It was just a little too fussy and unwearable for me, so after about a month or so I changed it into a standard crew neck.

Doing this was surprisingly easy – I always think the easiest alterations are the ones to garments you’ve already made, since you know them pretty intimately inside and out! I removed the hood completely, opened the top of the kangaroo pocket, and unpicked the turned over hems of the V-neck. From there, I was able to create a vertical seam above the pocket – which is basically invisible due to the nap of the fabric. Since this started as a V-neck, I eventually ended up with a small gap at the top where the edges no longer meet. To fill this in, I added a small piece of the sherpa, wrong side facing out, like the detail on a sweatshirt. Then I finished the neckline with a fuzzy band of self fabric. All in all, the alteration took an hour or so, and resulted in a top that is INFINITELY more wearable than the original version!

And here it is after I altered it – so much more wearable!

Working with this sherpa was pretty easy, although it did require some extra steps. Since the nap runs in every single direction, I didn’t worry about it while cutting my pattern pieces. The fabric sheds like craaaaaazy, so I used my serger to finish all the edges (I kept a longer + wider stitch to help push it though, as it’s quite bulky) and kept my handheld vacuum nearby to periodically clean up (which sort of worked but also my studio is still full of pink fuzz so… there’s that). After sewing seams, I used a comb to pull the hairs out of the seams and fluff them up, same as one would do when sewing faux fur. I did try some topstitching on the top to better show the seamlines, but they are still pretty subtle, so I skipped them on the pants. My fabric is stretchy so I was able to use self fabric for my bands (with no elastic, other than in the waistband). Since the fabric is very bulky, I opted to use a matching cotton interlock knit on the pocket pieces (you can’t see the inside at all and it keeps that area nice and flat). I used the same cotton interlock to make the fabric waist tie. Oh, and while I did try to finish the eyelets that the tie feeds through – nothing would stay in place due to the nap of the fabric. So there are literally just… holes in the waistband. They seem to be stable enough lol.

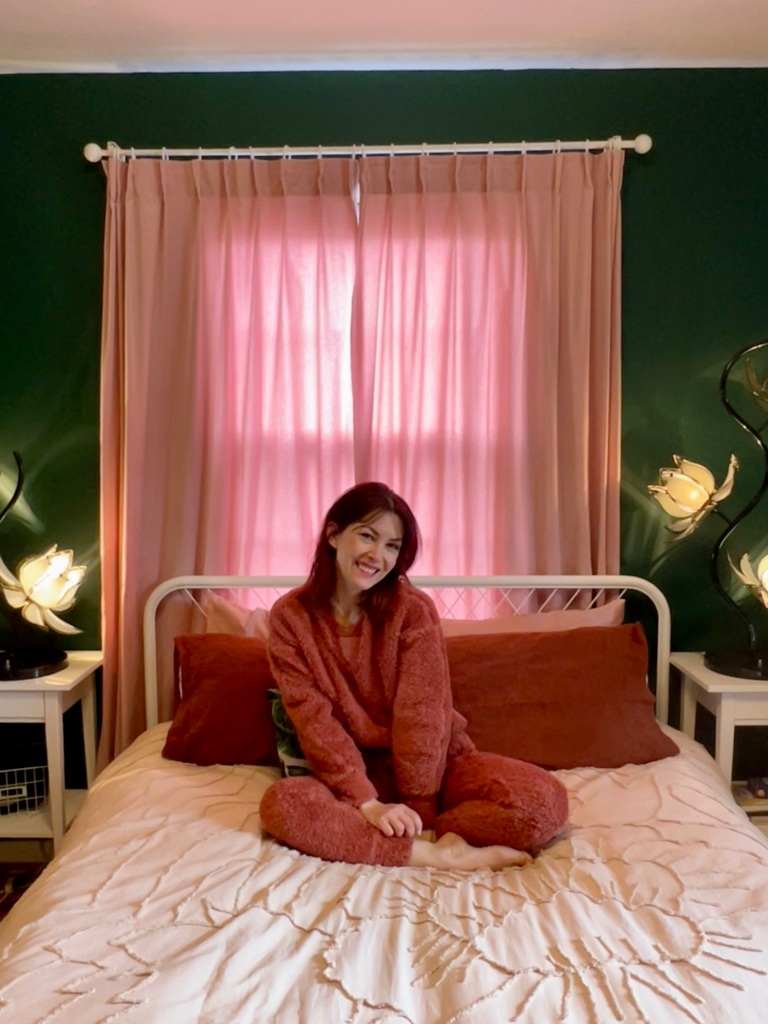
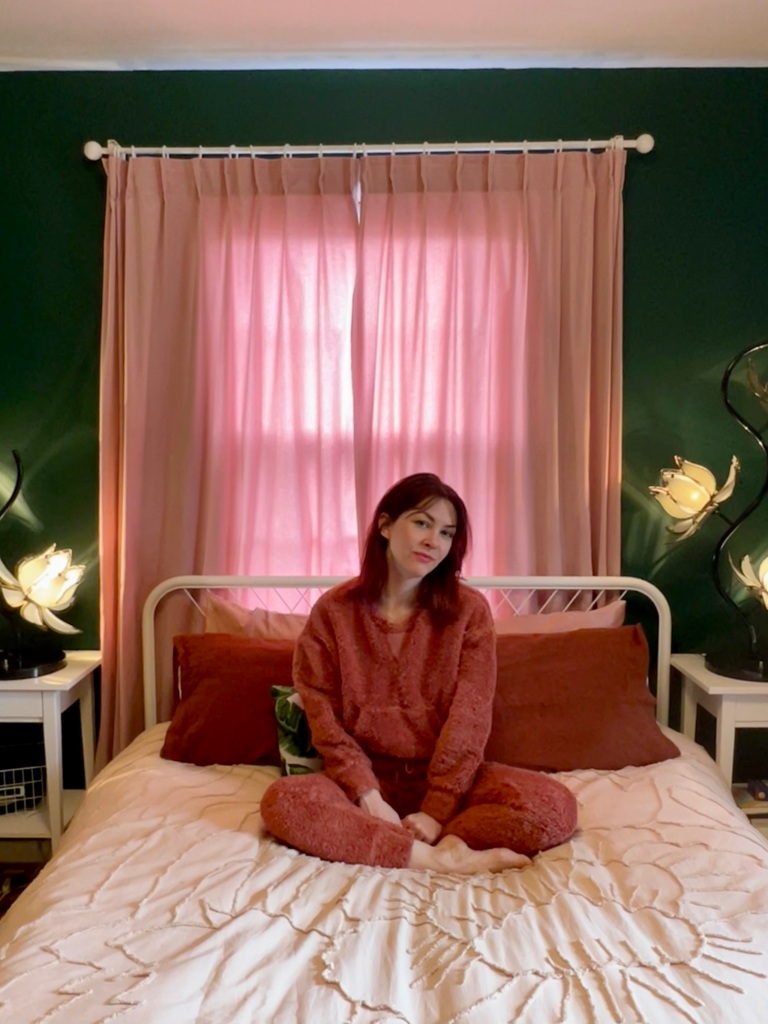
It took me a couple months to complete this set – and then a couple more to get photos. I took these in my bedroom, which I love waking up in every morning! Sorry the photos are blurry – no idea why, but I’m not re-taking them LOL. Oh, and while we are talking about handmade and altered things – I made the rust linen pillowcases (fabric is from Blackbird Fabrics – it felt sinful to use such a nice garment weight fabric for PILLOWCASES but the color was just too perfect for my ~palette!), the tropical throw pillow (leftover fabric from this project!), the pinch pleat curtains (originally from Ikea; I sewed channels at the top to create the pinch pleats) and re-wired the smaller lotus lamp on the bedside table.

That’s all for now! Have a great day!

2023 Jeans Workshop Dates (+ an Updated FAQ)!

23 Jan
I made these jeans!

Hi everyone!

Happy 2023! I’m so excited for another year of sewing and jeans-making! I announced my workshop dates over on Instagram toward the end of last year, but forgot to post them here. I also wanted to share with y’all some Frequently Asked Questions, as these tend to pop up regularly any time I announce my workshops. If you’ve got a burning question, please check the list below as I may have already answered it!

All dates and links are listed on my WORKSHOPS page, as well as at the end of this post. For more information, including pricing and a link to sign up, please visit the shop’s website or send them an email! For funsies, I’m also including a list of dates for my Alter + Repair Your Garments workshop – most shops will be hosting this one day workshop the day before or after Jeans Weekend. For more information about my Alter + Repair Your Garments 1 Day Workshop, please check out this post! I wrote so much about it!

✨SEW YOUR OWN JEANS WEEKEND WORKSHOP DETAILS✨

Ready to be your own personal denim designer? Join me for a 2 1/2 day workshop and I’ll show you all the secrets to sew up the jeans of your dreams! We will kick off the weekend with a half day to fit and cut – there will be samples you can try on to determine your size and any fit adjustments. Saturday and Sunday will be dedicated to sewing, and we will go over aaaaaall the details – front pockets, zip fly, killer topstitching, secure bartacks, serged seam finishes, creating and attaching a waistband, hardware installation, and stress-free buttonholes (yep, those exist!). Students can expect a fun, energetic, and fast-paced environment that focuses on learning and creating. You will leave with not only a new pair of jeans, but also the knowledge and empowerment to make more on your own!

😎👖

✨WORKSHOP FAQS✨

What can I expect to learn in this workshop?

My Sew Your Own Jeans Weekend workshop primarily focuses on construction – you will learn all the details that go into making a pair of jeans, including order of construction, seam finishes, topstitching, inserting a fly zipper, attaching a waistband, and loads and loads (and loads) of little tips, tricks and best practices sprinkled throughout the weekend (seriously, so many little tips!). The knowledge you obtain isn’t just jeans-specific – you can use what you learned to apply toward all sorts of future sewing adventures (Denim jackets!! Rad pants! Skirts! Dresses! Bags! Your possibilities are endless!). You will leave with a great pair of jeans, plus the confidence to go home and make more!

Does this workshop cover fit?

We will go over fit, although this is not a fit-focused workshop. The first half day is devoted to choosing our size (including trying on samples!), adjusting our preferred fit, and preparing our fabric for sewing (cutting, marking, etc). We *will* go over minor fitting adjustments as needed for each individual body. We will *not* spend a long time fussing over fit, nor can I guarantee that your first pair will be ~the most perfectly fitting pair of pants you’ve ever worn~. There simply is not enough time in class to allow for us to make multiple muslins for a perfect fit – and to be completely honest, this is hard to obtain without wearing the pants around for a few days to really get an idea of what needs to be adjusted. I don’t say this to discourage you, but rather, to set the expectation of what you will get out of your weekend. We will tweak the fuck outta your pants throughout the weekend (if it needs it – most students find they get a great fit right out of the envelope! #magicpants) and you will leave with something lovely and wearable that I promise you’ll be proud of. Should you need future adjustments, you will be armed with the knowledge to make it happen!

Is this class suitable for plus sized sewists?

Hell yeah! The Closet Core Ginger Jeans pattern is available in sizes 0-32 (up to a 63″ hip). Need a bigger size than that? Holler at me and I’ll get it sorted. This class caters to EVERY size, no butts left behind!

I’m a dude / don’t wear lady pants, can I take your class?

Hell yeah you can! The Ginger jeans pattern can be adapted with minor tweaks for more androgynous fit, or we can adapt a men’s jeans pattern for you. Please contact me in ADVANCE of the workshop so that I can be sure we’ve got the perfect pattern ready for you!

What experience level should I be at in order to take this workshop?

Beginners, rejoice: You don’t need to be a sewing superstar with years of experience under your belt to take this class. The prerequisites for class are that you should be comfortable threading and operating a sewing machine, and have experience sewing at least one sewing pattern. That’s it, that’s all you need to take this class!

If you are a very experienced sewist with lots and lots of sewing (and maybe even jeans making!) under your belt, I still believe you will learn a lot in this workshop! I have had a vast array of skill levels in my classes – from the total beginner to the seasoned professional – and everyone leaves with more knowledge than they came with.

**For all skill levels** Please note that this workshop moves really fucking fast. 20 hours of instruction sounds like a lot, until you realize that I talk through most of it and our actual sewing time is quite limited! You will feel like an absolute warrior when the weekend is over, and also very very tired. If you are a very timid or slow sewist, I encourage you to practice working quickly and confidently to prepare for class.

I don’t like that pattern, can I use a different one? Can I modify it?

I hate to be a fun sponge, but we really don’t have time in class to make huge design changes to the pattern or try to work with something entirely different. That being said, there are downloadable pattern hacks for the Ginger Jeans that you are welcome to bring to class – Ginger Mid-Rise Jeans and Ginger Flares. We can make additional small fit tweaks as needed, but plan on saving the major changes and additional patterns for your home sewing practice!

Will you ever offer this workshop as an online class?

Probably not! I don’t wanna do online classes! Sorry!

Will you ever come to _____________ (city / state / country / planet) to teach this workshop?

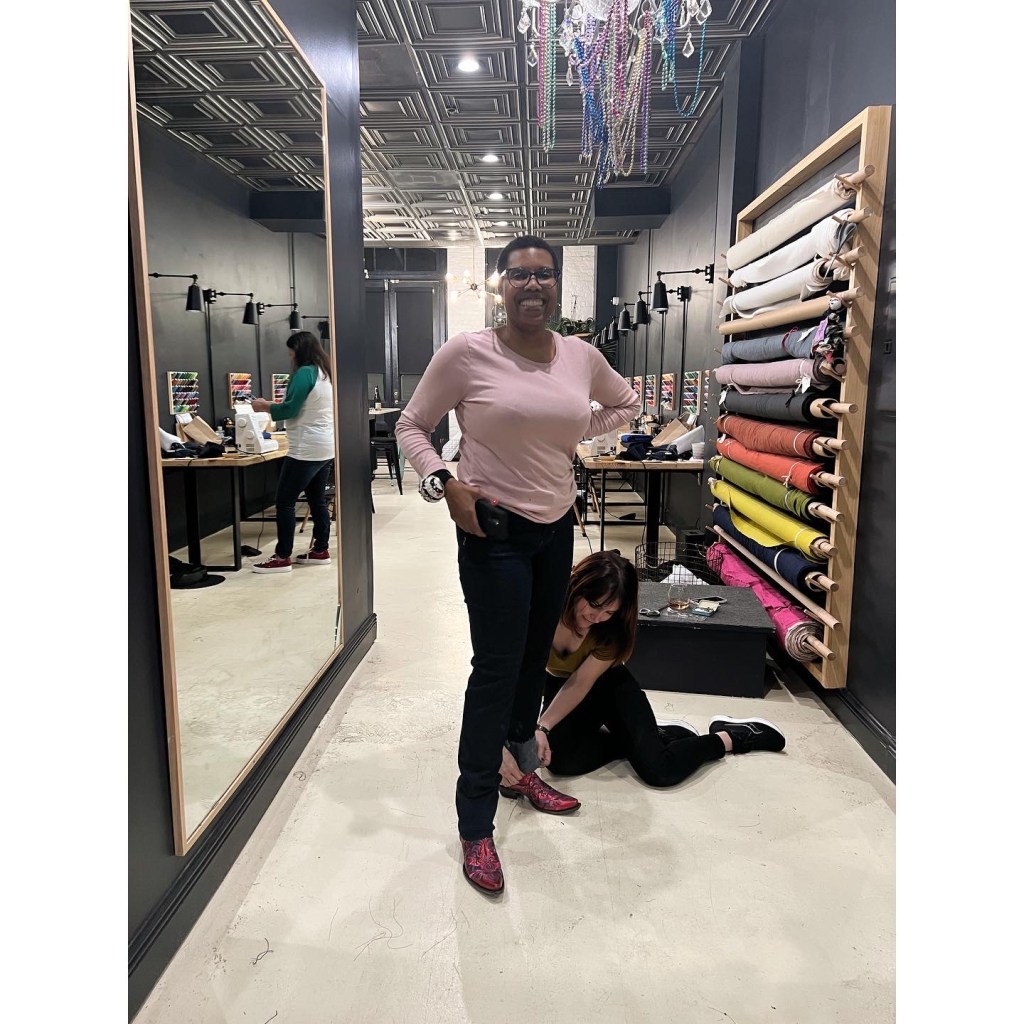
I get this question a lot, and the short answer is – I’d love to!! My best advice to make this happen is to holler at your local sewing shop and tell them you want to take a LLADYBIRD Jeans Workshop, and encourage them to reach out to me (lladybirdlauren AT gmail DOT com). This allows the shop to recognize that there is already interest in a workshop, which means they are more likely to get the ball rolling in terms of planning one!

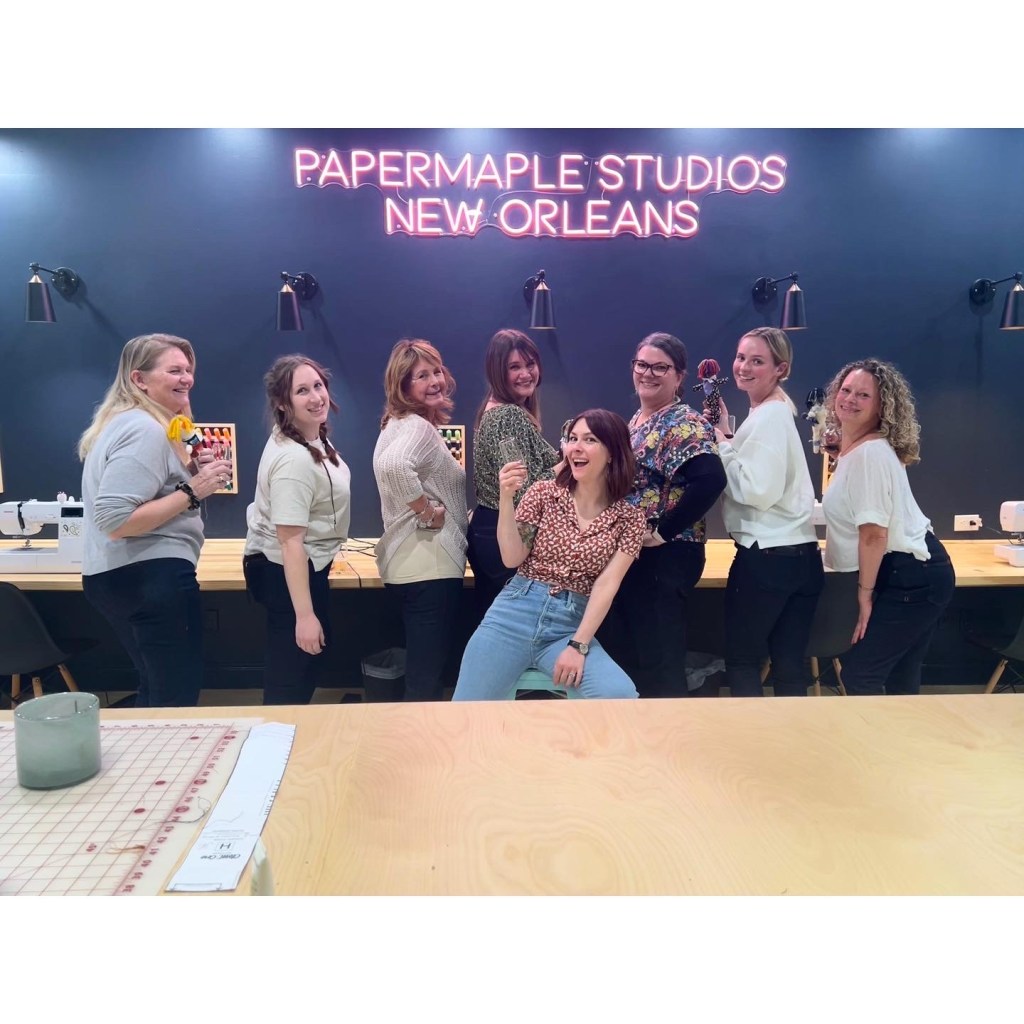
At Papermaple Studio in New Orleans!
At Domesticity in Baltimore!
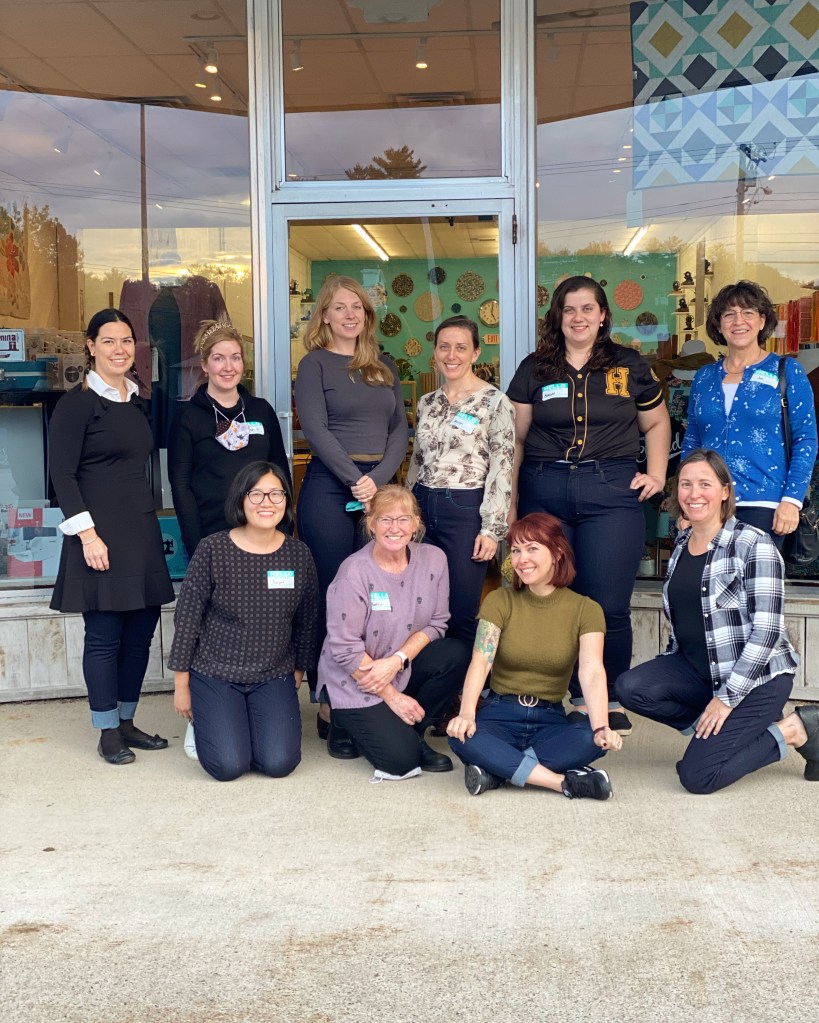
At the Maker’s Hideaway in Washington!

MAKE THE MOST OF YOUR WORKSHOP WEEKEND

So you signed up for a jeans workshop! Yay! We are so excited to have you in class and I can’t wait to make a lil’ denim believer out of you!! Here are a few tips to help you make the most out of your class weekend:

💙TIP #1: BUY THE KIT💙

Folks, I cannot stress this enough. Please, please… spend the extra money and buy the kit that I recommend for class. Please do not use this as an opportunity to “use up that old Joann’s denim that’s been languishing in the stash for several years.” Nine times out of ten, students will show up with wildly the wrong denim – non-stretch, shirting weight, unwashed, etc. Even if you do show up with bottom-weight stretch denim, the actual amount of stretch may differ from the sample you are trying on which means you will not get the same fit with your finished jeans. My samples are sewn with the exact same denim as provided in the kits, so you can get a good idea of what your finished jeans will also turn out like in terms of sizing, ease, etc. If you want the best possible results and easiest class experience, please buy the damn kit!

💙TIP #2: LET GO OF PERFECTION💙

I know this can be really hard for a lot of sewists – but in my workshops, I really encourage you to let go of any ideas of perfection and just enjoy the learning process! By allowing yourself to make mistakes, you take a lot of stress out of class. Believe me, you are going to have some wonky topstitching, and maybe your first go at bartacks will be kind of horrifying. But rather than spend your time stressing and seam-ripping and hyper-focusing on small details – I encourage you to let it go and embrace the fact that you are learning something new! As you continue your practice at home (on your own machine, with no rushing), you’ll further develop your skills and, yes, continually improve! Furthermore, there’s something really sweet and lovely about looking back on your first go at something and recognizing the vast improvement you’ve made over time.

💙TIP #3: STOP BEING SCARED💙

I know the concept of sewing jeans can be very intimidating, but there is absolutely no reason to be afraid! Can you operate a sewing machine? Do you want to make jeans? Congratulations, you are qualified for this class! In addition to being your (super fun, super awesome) teacher, I’m also your personal cheerleader. I’m here to encourage you throughout the weekend, to tell you that you got this. Bring a notebook (or plan to film lots of video), wear comfy underwear, tell your inner naysayer to shut the fuck up and come sew with us!!

At Papermaple Studio in New Orleans!
At Madalynne Studio in Philadephia!
At Papermaple Studio in New Orleans!
At Pintuck & Purl in New Hampshire!
At Josephine’s Dry Goods in Portland OR!

👖2023 JEANS WEEKEND WORKSHOP DATES👖

Sew Your Own Jeans Weekend Workshop
March 17 – 19, 2023
Urban Sewciety / Westfield, NJ

Sew Your Own Jeans Weekend Workshop
March 31 – April 2, 2023
Domesticity / Baltimore, MD

Sew Your Own Jeans Weekend Workshop
May 12 – 14, 2023
Pintuck & Purl / North Hampton, NH

Sew Your Own Jeans Weekend Workshop
June 2 – 4, 2023
Josephine’s Dry Goods / Portland, OR

Sew Your Own Jeans Weekend Workshop Retreat
June 23 – 25, 2023
Maker’s Hideaway / Stanwood, WA

Sew Your Own Jeans Weekend Workshop
July 7 – 9, 2023
Urban Sewciety / Westfield, NJ

Sew Your Own Jeans Weekend Workshop
August 4 – 6, 2023
Stitch Sew Shop / Alexandria, VA

Sew Your Own Jeans Weekend Workshop Retreat
June 18 – 20, 2023
Maker’s Hideaway / Stanwood, WA

Sew Your Own Jeans Weekend Workshop
September 8 – 10, 2023
Old Spool Sewing Studio / Brielle, NJ

Sew Your Own Jeans Weekend Workshop
September 22 – 24, 2023
Pins and Needles / Mount Kisco, NY

Sew Your Own Jeans Weekend Workshop
October 13 – 15, 2023
Papermaple Studio / New Orleans, LA

Sew Your Own Jeans Weekend Workshop
October 27 – 29, 2023
Pintuck & Purl / North Hampton, NH

Sew Your Own Jeans Weekend Workshop
November 10 – 12, 2023
Domesticity / Baltimore, MD

Sew Your Own Jeans Weekend Workshop
December 1 – 3, 2023
Stitch Sew Shop / Alexandria, VA

🪡2023 ALTER + REPAIR 1 DAY WORKSHOP DATES🪡

Alter + Repair Your Garments
March 16, 2023
Urban Sewciety / Westfield, NJ

Alter + Repair Your Garments
March 30 2023
Domesticity / Baltimore, MD

Alter + Repair Your Garments
May 11, 2023
Pintuck & Purl / North Hampton, NH

Alter + Repair Your Garments
June 1, 2023
Josephine’s Dry Goods / Portland, OR

Alter + Repair Your Garments
June 26, 2023
Maker’s Hideaway / Stanwood, WA

Alter + Repair Your Garments
July 6, 2023
Urban Sewciety / Westfield, NJ

Alter + Repair Your Garments
August 3, 2023
Stitch Sew Shop / Alexandria, VA

Alter + Repair Your Garments
June 21, 2023
Maker’s Hideaway / Stanwood, WA

Alter + Repair Your Garments
September 7, 2023
Old Spool Sewing Studio / Brielle, NJ

Alter + Repair Your Garments
September 21, 2023
Pins and Needles / Mount Kisco, NY

Alter + Repair Your Garments
October 12, 2023
Papermaple Studio / New Orleans, LA

Alter + Repair Your Garments
October 26, 2023
Pintuck & Purl / North Hampton, NH

Alter + Repair Your Garments
November 9, 2023
Domesticity / Baltimore, MD

Alter + Repair Your Garments
November 30, 2023
Stitch Sew Shop / Alexandria, VA

All About My New Workshop: Alter + Repair Your Garments!

11 Oct
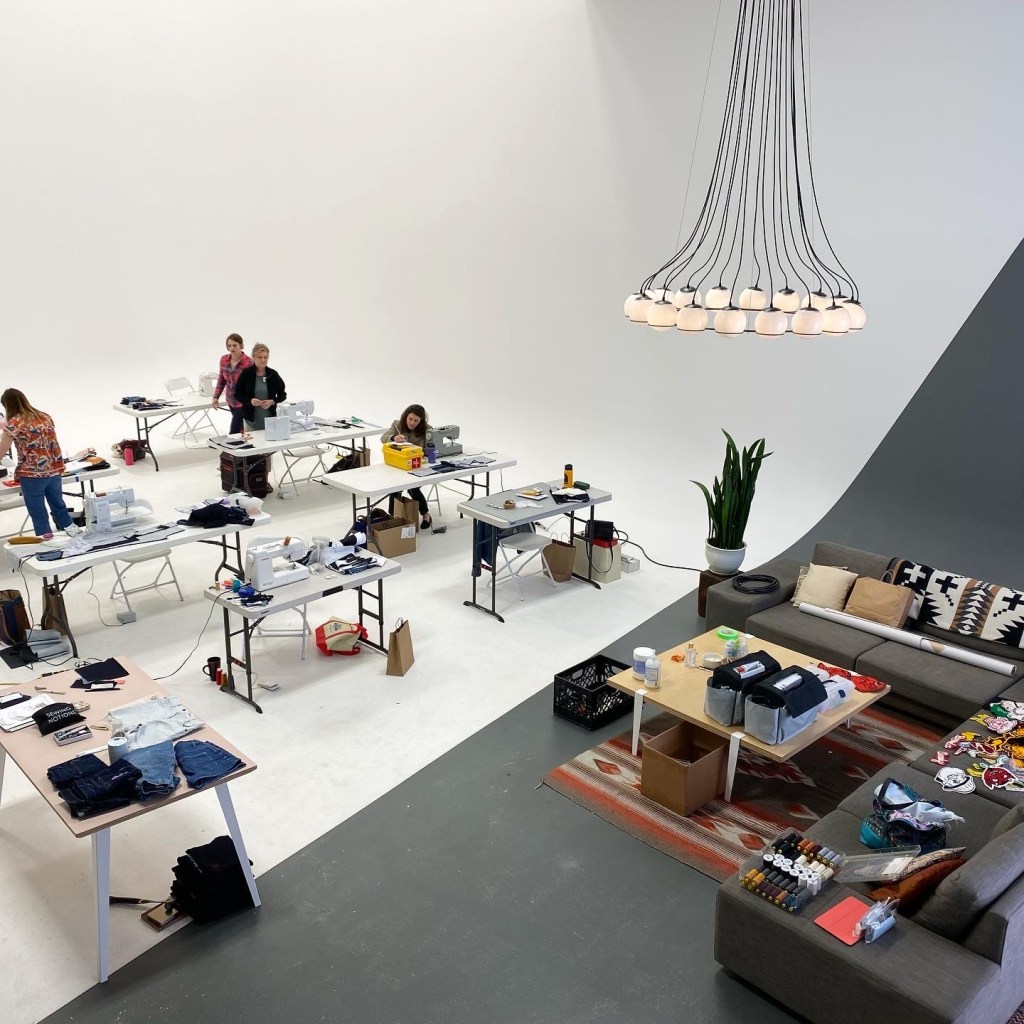
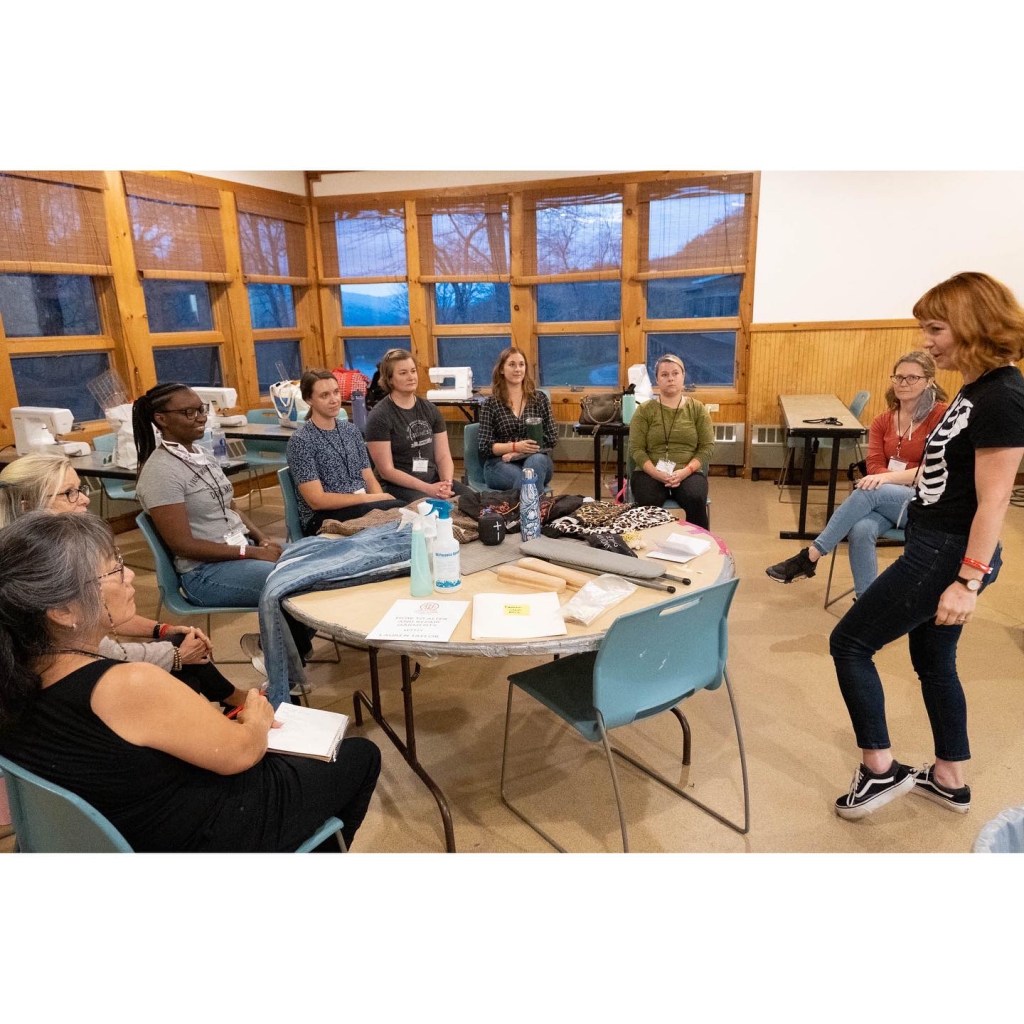
Teaching my new workshop, Alter + Repair Your Garments, at Camp Workroom Social in 2021!

Hey all! Long time no chat 🙂

Don’t expect a return of regular blog posts (sorry! Real talk; this shit took me multiple days to write and I am exhausted lol), but I did want to pop in and talk about my new workshop that I’ve been offering this year. That’s right – I went away for a full 12 months, just to come back around and try to sell y’all some of my crap! HA HA! Wait, come back, I promise this is some interesting quality shit!

As you [probably] already know, I’ve been a sewing teacher for many years – almost a decade, actually (crazy!). I’ve been teaching my Sew Your Own Jeans workshop now for years, and it’s awesome and fun and you should totally believe all the good hype you hear about it. As much as I love making jeans, though, a new sewing skill has entered my repertoire that I just cannot get enough of and I’m dying to share it with everyone! So I created a new one-day workshop, Alter + Repair Your Garments. And today, I’m dusting off this old blog to tell you more about it! And even if you don’t care about my new workshop, I hope that you will at least enjoy the absolute avalanche of photos in this post.
Alterations are a really sensitive subject in the sewing community. We love to say things like “Yes I sew – no I won’t hem your pants.” I’ve seen sewers literally make an entirely new garment, rather than address fit issues in a current garment. Things like seam ripping and making adjustments get a really bad rap in this inner circle. Why is that? I don’t know, but I had a similar attitude up until a few years ago. I would happily upcycle clothes – that’s how I really learned how to sew, by taking weird things from the thrift store and turning them into something even weirder (what can I say? I love weird shit). But I, like many other home sewists, didn’t touch alterations. Until recently, anyway.

I’ve touched on this a little on my blog – and a lot more on Instagram – but I actually do alterations for a living now. I started out as a freelance tailor, which I still do, and I also work part time in a tailor shop that is connected to a high-end clothing store. The tailor shop is stable and occasionally a bit redundant (which I honesty like), and the freelance work is… sometimes redundant, and sometimes just absolutely wild. As a freelance tailor who also lives in Nashville, the majority of my clients are musicians, mainly country and gospel artists. I work closely with my clients and their stylist to get their clothes to do whatever they want them to do. Sometimes that means proper fittings and alterations for things like red carpet events and tour outfits. Sometimes it means I’m sitting in a parking lot with my sewing machine powered by a generator, while I furiously take in something in the absolute shittiest and fastest way possible so they can film a music video. I also do a lot of adjustments to clothing in ways that aren’t traditional alterations – changing the style and fit of a garment (in a way that was not originally intended by the designer), adding or removing elements to make it wearable for performing, or to work with a stylist’s ~vision~. It’s all different and it’s all fun and I love it so much!

My new 1 day workshop, Alter + Repair Your Garments, allows students to dip their toes into the world of alterations and garment changes, with the support of someone who has quite a bit of experience under her belt (that would be me!). This class is a little different than what you might imagine when you think of doing alterations, though. Yes, we can (and we will) cover the basic stuff – hemming pants, taking up sleeves, adjusting waistlines, etc. The not as exciting bits that we like to tell people we don’t do as sewists. It’s totally valid and useful sewing and can be very handy if you think you might want to pursue a career as a tailor, or if you just want to handle your own alterations and save some cash, or in the case of some of my students – to show you the involvement in alterations, and release some of that sewist’s guilt when you realize you’d rather just continue to pay someone else to do it so you can keep your free sewing time entirely selfish and fun!

A big part of alterations, though, is a lot more exciting – the creative problem solving! This is where we take our garment sewing to the next level by changing things that might not be so obvious on the first go. Sometimes it’s a simple fix – shortening a hem, taking in excess. Sometimes it’s more involved, like replacing a zipper or a shredded panel of fabric. Sometimes it’s something really wacky, like making a new neckline or turning a dress into a top. The beautiful thing about sewing is that *most* things can be changed – I mean, it’s all sewn, after all. So go ahead and put pockets in that dress! Chop 6” off the bottom of your jeans and keep that original ratty hem! Dye your favorite sweater to a color that better suits your complexion (ok, no dyeing in this class but we can talk! We can talk!)!

Every class is different, and the curriculum is based on whatever students choose to bring into class. This means you aren’t signing up for a class that teaches you shit you don’t care about – you’re going to bring in your own garments (ready to wear or handmade, vintage or modern, yours or someone else’s! Whatever you want to work on!), and we are going to address those pieces specifically. Some students love the opportunity to watch what everyone else is doing – it’s like extra little bonus lessons! Some students like to bring in an entire pile of clothing and try them all on, chat their way through all the changes and how to do them, and save the actual sewing for home. Some students will just bring a couple big projects, and let their class session focus on finishing them. Some students use class time as an excuse to finally tackle the pile of clothing alterations they’ve been avoiding dealing with. However you decide to treat the class is up to YOU!

This is not a “fitting” class per se – although, most alterations do involve fit. We fit for style, for comfort, for wearability. We are not worried about getting “perfect fit” because that does not exist (and any photos you see without wrinkles? That’s due to the magic of Photoshop and standing completely still in a garment that probably isn’t very comfortable!). A fun bonus effect of this class is that this sort of fitting – on completed, wearable garments – can actually increase your understanding of fit and it’s adjustments on the future garments that you make. Fit adjustments are much more obvious on a finished garment, rather slogging through a book and trying to figure out the strange name that is supposed to describe the wrinkles you see.

As a tailor who works in the entertainment industry, I bring a unique point of view that you might not necessarily find in other classes. I’m not afraid to do something wild to a garment if I think it will improve it in some way. I love using elastic to sneakily take things in, and I’m a huge fan of turning mistakes into design elements. My goal for this class is to teach students how to approach this in a systematic way that makes sense and can be replicated with any garment, not just the pile you worked on in class. Of course, I want you to leave with a pile of pieces that you definitely will wear now – but I also want you to leave equipped with the knowledge and confidence to do this on your own, too!

Alter + Repair Your Garments is perfect for any sewist who wants to improve their sewing, as well as learn a whole new range of skills. Do you have a pile of clothes in your closet that you don’t wear, but you also can’t quite figure out why? You need this class. Do you want to be able to smugly tell those acquaintances who ask you to sew for them “Actually, yes I do know how to do that type of hem – but sorry, I don’t sew for other people :]”? This is your class, baby! Have you taken my jeans class and you just really want to hang out with me again but you are good with all things denim? COME ON DOWN AND SEE ME, MY FRIEND!

You do *not* need to be a sewing super star to take this class! I wouldn’t recommend this class to an absolute beginner – you should have a little experience under your belt, a general understanding of the basics of clothing construction, and be comfortable using a machine. But you know what the other beauty about alterations is? There’s the easy way, and there’s the “proper” way. And you get to choose the method you want to use (because those are your damn clothes and there aren’t any sewing police!)! From adventurous beginners to seasoned pros – I truly believe this is a class for everyone!
Here are some things you can expect to learn in this one day workshop:

  • Effective seam ripping techniques for a variety of stitches, including straight stitches, serged finishes, and chainstitches
  • How to assess a garment’s fit and style, and how to determine what changes need to be made
  • How to pin fit a garment and transfer the adjustments in preparation for sewing
  • How to take apart a garment, look inside, and determine the best method for executing whatever adjustment needs to be made based on the construction of the original garment
  • Basic garment repair
  • How to determine whether a garment can successfully be altered or repaired,
  • Best practices for using trial-and-error to approach for alterations on existing garments, and how to troubleshoot any problems that may arise
Maybe you just need help getting the right hem length on your long dresses? I got you!

A couple notes on what *not* to expect in this class – we are working on finished garments only, so no muslins and we will not cover flat pattern adjustments (that’s an entirely different class, one that your local sewing shop likely already offers!). We cannot work on specialty (or messy) materials, such as leather, sequins, or fur. Pls leave that shit at home!
Altering your clothes to better suit your body, style, and comfort needs is truly the most sustainable way to sew. In this class, I hope to show you how to see flaws in garments as exciting opportunities for improvement. Whether you are buying used or new clothes that need a little tweaking, or perfecting the fit + style finish on your own handmade goods (side note: *most* of my handmade clothes go through at least one round of alterations after they are finished! This is totally normal – even with a preliminary muslin fitting, clothes are going to fit different when you wear them out and around vs standing in front of a mirror with a shell made of a stiff fabric), the possibilities are endless and exciting!
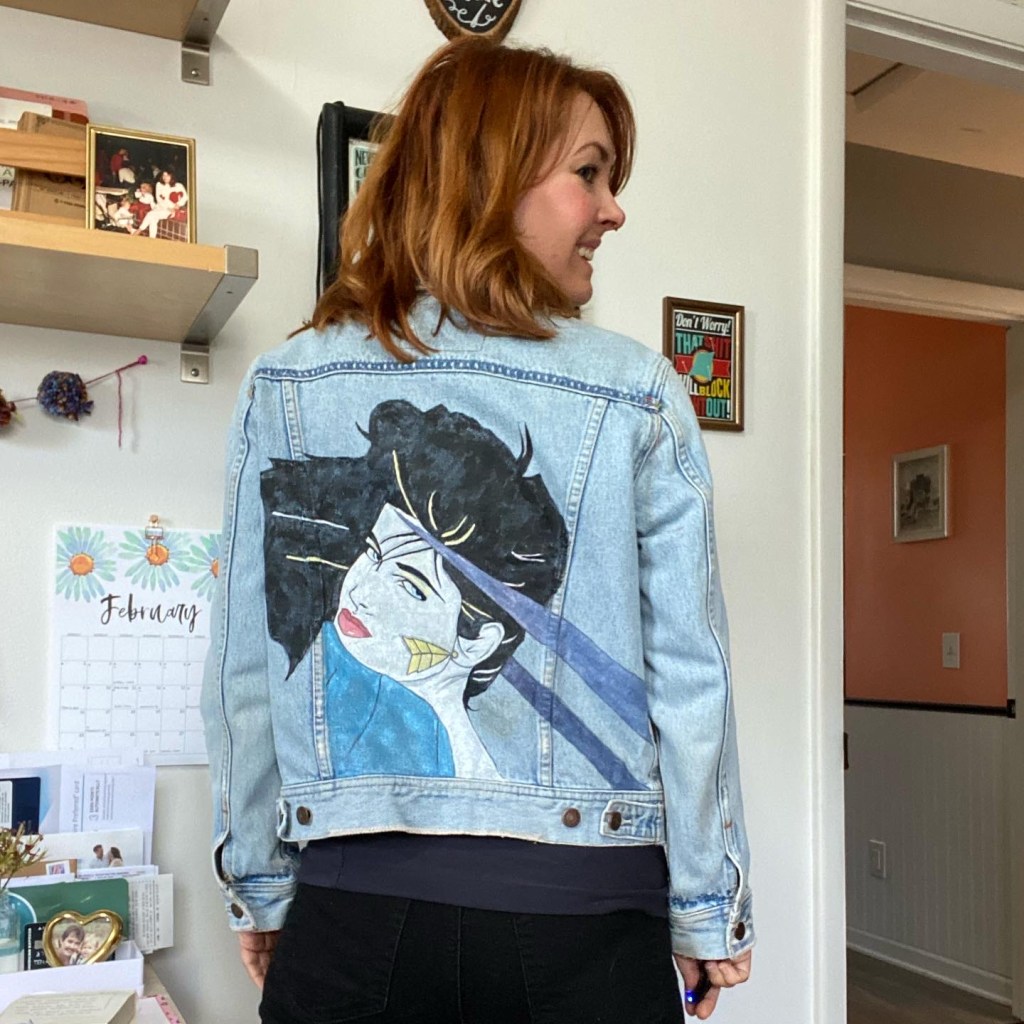
Does this count as an alteration? Old RTW jacket that I thrifted and painted on the back! Full Instagram post here.

Don’t worry – I’m still teaching my Sew Your Own Jeans workshops (got a lot more butts I need to touch!). I will be offering Alter + Repair Your Garments in tandem with the weekend dates of my Sew Your Own Jeans workshops. I’m finalizing my 2023 workshop dates right now and will be announcing them soon – stay tuned! Can’t wait until 2023? There are still a couple seats left at Domesticity (Baltimore, MD) and Papermaple Studio (New Orleans, LA)!

For more information on my Alter + Repair Your Garments workshop, check out this interview I did with Workroom Social earlier this year.

For a list of all my upcoming workshops – check out my WORKSHOPS page.

I Donated Bone Marrow – This Is My Story

14 Jul

Good morning everyone! Today I want to veer way off-topic and share with y’all something very non-sewing – which is my recent bone marrow donation!

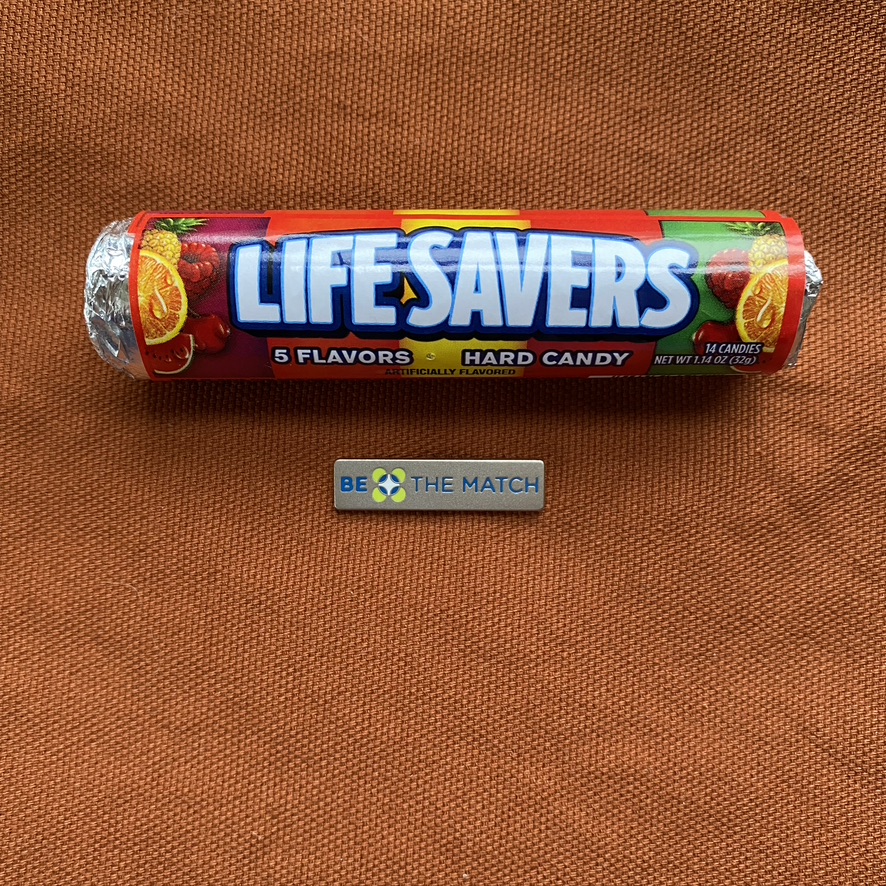
Before I go any farther, I do want to address the question that I have been asked the most – “Doesn’t donating bone marrow hurt really bad?” The short answer is, nope! I realize that “painful” can mean different things for different people – pain is subjective and we all have different tolerence levels! – but for me, I experienced very minor, very manageable pain (all post-procedure), no worse than the soreness you experience after exercising for the first time after a long hiatus. I believe the procedure was painful in the past, but that has not been the case for a long time. There are two ways to extract the marrow – one is surgical, one is not. You can read more about those here on Be The Match.

I initially wasn’t planning on sharing this story on my blog at all. However, the staggering amount of misinformation I’ve come across (primarily from well-meaning friends when I told them what I was up to) has led me to believe that it would be a disservice not to use my platform to share my own experience. A lot of the information you may know about donating bone marrow is out of date, or simply not true. I would, of course, encourage you to do your own research as well – but if one person signs up for the registry as a result of this post, and maybe even is found to be a potential match…. That’d be pretty fucking rad.

Anyway, moving on! I have been on the bone marrow donor registry (via Be The Match) since 2009, but wasn’t contacted until earlier this year. Lots of people who sign up for the registry and may never get the call. I honestly had forgotten about it; it’s been 12 years! I joined the registry by requesting a kit, which was mailed to me. I swabbed my cheek and mailed it back. I did not pay for anything. When they contacted me this year, it was via email with a request to call for more information. I spoke to a rep who answered all my questions (I probably asked her the pain question LOL) and once I agreed to proceed they put me on standby while they looked at other options to determine what was best for the patient.

Not gonna lie – getting the call and being told I was the “best possible option” kind of felt like I won a prize. Me! I’m the best! Hell yea!

The process leading up to the donation did not require too much of my time or effort on my end. I was assigned a rep who went over the procedure and everything with me, answered all my questions, and was my point of contact for everything related to the donation. My rep had actually donated marrow herself so she was a great resource to direct all my questions to! I went through a full physical and blood panel (including an EKG and chest x rays – side note, I had no idea my boobs would be fully visible in a chest x ray but they were and that was cool lol) to be sure it was safe for me to donate, plus a couple rounds of blood withdrawal in those last 2 weeks. The hardest part was coordinating a date for the donation – as I had a full travel+teaching schedule already booked, and my recipient is in another country so there were only certain days they were able to do the donation, plus we had to find a donation center that actually had availability for the surgery. My rep was adamant that I not change anything about my own schedule, that they would work around me, but I was just as adamant that we do the procedure as soon as we possibly could because I didn’t want my recipient to have to wait (I can’t imagine needing to wait months for a life-saving transplant???). I ended up getting booked for mid-June, between workshops, at Georgetown University Hospital in Washington DC.

All my travel arrangements (flights, hotel, etc) were booked and paid for by Be The Match. I was allowed to bring a companion – obviously I brought my mom (the ONLY person I want around when I’m not feeling well!). While there were a few things I had to pay for out of pocket (medications and supplements, and our meals during the trip), those were all reimbursed after the donation. In short, I did not pay for anything in order to donate bone marrow. Every single expense was covered by Be The Match.

The donation itself was as uneventful as you’d hope for surgery to go. I was put under anesthesia, they perforated two small holes in my lower back (right where the back dimples are), stuck a couple needles in to extract the marrow (they used the word “harvest” which honestly grosses me out so much LOL) and they were finished within 90 minutes. I was hoping for an outpatient situation – usually the case with marrow donation – but I ended up getting pretty nauseous from the anesthesia + low blood sugar (both are normal for me) so they kept me overnight. I wasn’t terribly happy about at first but honesty it was kind of awesome. The nurses were so kind and took really great care of me. I don’t want to say the whole experience was completely painless – because it wasn’t – but at most my pain was maybe 5/10. It was very very manageable with painkillers. The staff at the hospital was EXCEPTIONAL with their care and attention. They even gave me a goody bag when I left (and my emotional ass totally cried about it LOL). Unfortunately, my mom was not allowed to visit me due to COVID so she stayed in the hotel – but they set her up with a Lyft account so she could explore DC (at no expense to her) if she wished.

Overall, I was in DC for about three days. We flew in the day before, spent some time being cute tourists, I had my donation the second day, and on the third day we left and were home by about 5 PM.

One thing I was not prepared for with this donation was the recovery process. It’s not awful – but since you’ve had a lot of your marrow taken out, there are some limitations in order to allow your body to heal. For example, our flights home had me in a wheelchair to get around the airport (let me tell you, skipping all those lines was quite the silver lining woohoo) (I even got to ride in the little CAR at one airport!), and I wasn’t allowed to exercise or lift anything over 20 lbs for the first 2 weeks. I was also very, very tired. Like the sort of fatigue that you feel in your bones when you are ill. Even that honestly would have been manageable, but, I unfortunately underestimated just HOW TIRED I would be (I cannot emphasize this enough) and went straight back into traveling and teaching 2 days after donation. I managed and I lived, but it was a real struggle that I could have easily prevented by allowing myself ample time to rest. I really should have given myself at least a week to rest and recuperate before trying to go back to work.

I’m a few weeks out from my donation now, and basically back to normal – no lifting or exercise restrictions, my energy levels and appetite are completely back to their original baseline, and while I occasionally have some subtle soreness in my lower back first thing in the morning or if I stand for too long, a Tylenol knocks it out no problem. My incisions healed up without an issue, and I sort of hope they leave cute scars (just little dots on my back, super cute).

My biggest advice if you’re considering doing this – do it! Sign up for the registry now. If you are a match, you are under no obligation to donate. For real, I had SEVERAL opportunities to back out. No one would have been mad. So if you’re on the fence, understand that signing up for the registry does not automatically mean you *have* to donate if you are a match. You can say no; it is your body and ultimately your decision to make. There’s a huge chance you’ll never be called to donate – but if there is, and if you decide to do it, you will be giving a person and their family the greatest gift of all time. You get to call yourself a superhero! I think that’s pretty cool.

My other advice is to make sure you allow for ample time to rest! I really cannot stress this enough. There is no way of knowing how your body will react to the donation – some people bounce right back to normal, some have a little more of a struggle (my nurses told me stories about how some patients were running laps around the hospital within hours of surgery; meanwhile I was struggling to walk to the bathroom without throwing up!). My own struggle was directly related to the amount of rest I didn’t allow myself, and I definitely should have allowed for at least a week to recover. Go ahead and block off ample time for recovery – if you feel good, great! You can easily schedule things as you feel up to it. But also, you just donated bone marrow so it’s perfectly acceptable to spend a week sleeping on the couch in your underwear while watching Cosmos and eating peanut butter (my ideal situation).

I don’t want this to sound like it was a total walk in the park – I certainly experienced side effects that were less than pleasant, such as muscle soreness, bloating/constipation, and trouble sleeping for the first couple of nights. My entire body swelled up with all the fluid I was pumped with, and I had lil’ fat kid hands for about 2 days (see below photo LOL) and could not wear normal/non-elastic pants. Not to mention that fatigue! WOOF. But all my side effects went away within a couple of weeks, and at no point during ANY of this did I regret my decision to donate. I’ve put myself through way worse discomfort (piercings, tattoos, body waxing, IUD insertion and subsequent replacement, drunken slip’n’slides, etc) without a second thought. I’ve fractured my elbow, endured kidney stones, and once I woke up during a wisdom tooth extraction. This is NOTHING compared to any of those painful experiences. The difference with bone marrow donation is that I saved someone’s life. I gave someone a second chance.

Would I do this again? Absolutely I would, without hesitation. Losing my dad to cancer 4+ years ago was one of the hardest things I’ve ever had to experience, and I would have done anything to keep him alive. While there were unfortunately no options available for us to keep him earthbound, it is such an incredible honor to know that I can provide that hope and second chance for someone else. My body is strong, able, and healthy – I think we often forget just how able we are in comparison to others who may not be so fortunate (wheeling around the airport in a wheelchair – while admittedly fun – was a stark reminder of that in itself). Sharing my own good fortune with someone who needs it feels like the most appropriate way to truly appreciate the privilege of my good health. The recipient of my marrow is a young person in another country (please understand that due to patient privacy, I am being intentionally vague here), and I’ll probably never meet or interact with them. But I hope they know that I am rooting for them, and I hope my marrow works as magically for them as it has for me. It’s pretty good stuff!

Well this got way longer than I expected it to be! In closing, I want to share some photos that my mom took while we were in DC the day before my donation. We went down to the National Mall and walked around for the afternoon, which was so lovely. And yes, I made those pants! I used the True Bias Hudson Pants as my base, and widened the legs + raised the waistline. My fabric is a viscose/linen noil from Blackbird fabrics, so to accommodate I sized up to an 8 (I normally wear a 2 in knit Hudson pants). I also changed the pockets to be patch pockets, instead of slant. This was a quick and easy make that is great for traveling and also wearing when it’s a thousand degrees outside but you’d still like a little leg coverage!

Are you on the bone marrow registry? Have you ever donated? What was your experience like?

Me Made May 2021

25 Jun

Did you participate in Me Made May this year? I used to be really active in the early days, but over the last few years I have chosen to not participate as I regularly wear me-made clothes almost exclusively, which at that point just seemed a little annoying and self-congratulatory to shoot a whole ass month of photos for something I already do without prompt.

However, in the last year or so, I went through a bit of an existential crisis as far as my wardrobe was concerned. I started with changing my color palette (I’m sticking strictly to warm tones now, and holy shit I can’t believe how all my stuff just effortlessly coordinates now, what a rush), then later playing with different silhouettes. I am now starting to slowly branch out from my own personal self-imposed “style rules” and experimenting with new ways to express myself with how I dress. Clothing is supposed to be fun!

So I decided to participate in Me Made May this year, and see what else I could discover.

What I really wanted to focus on was less the fully handmade outfits, and more something that previous Me Made Mays have absolutely fucked up for me when I participated in the past – allowing outfit / garment repeats, and RTW (ready-to-wear) pieces! Old MMM’s gave me this weird aversion to wearing the same thing twice in one month – because you want every photo to be fresh, right? The major problem with this – for me – was that it trickled into my daily dressing, too. It gave me a weird complex to wear the same garment twice, even weeks apart! Y’all, I get that this is a thing that is really pushed on us with our buy-buy-buy culture, but I honestly cannot articulate how fucking STUPID of an idea it is. There is absolutely nothing wrong with wearing the same shit on repeat (especially if it’s something that makes you feel really good!). People don’t notice – do you notice when someone repeats a garment/outfit? And realistically, even if you did notice – does it really matter? Like, who really cares in the grand scheme of things? I really needed to hammer this into my own head. Again – clothing is supposed to be fun!

Another reason for joining MMM this year was to simply get more comfortable taking photos of myself, and to try different locations. Let’s be real here – the main reason why I post less and less is directly related to my comfort level with taking photographs. I’ve never liked taking photos of myself, and over the years I find myself avoiding it more and more. By making myself take a photo every single day, I hoped it would force me to get more comfortable with the whole process. And to make things interesting, I decided to take photos in as many different locations as possible. I love creeping on people’s houses in the background of their photos – I think most people do! So even if you don’t care about the Me Made May aspect of these photos, I hope you can appreciate the mini house tour!

Anyway, I think this year was very successful for me! I stuck with it for the entire month and took a photo every single day – even when I was traveling! And I allowed myself to repeat individual garments – and even full outfits! – which made the whole process less stressful. I thought it would be fun to share these here, since I know a lot of people don’t use Instagram and prefer to read blogs. So here you go! My Me Made May results from 2021 – only a few weeks late 🙂

1

Day 1: Masin Sicily Slip Dress + Alina Design Hampton Jean jacket  / This is my hallway! This photo also marks the first time I joined multiple (vaccinated) friends for a dinner party since COVID! In someone else’s house! What a rush!!

2

Day 2: (RTW) Elizabeth Suzann Florence pants (I did alter these to have narrower legs and a more cropped length, FYI) + True Bias Ogden Cami + Grainline Studio Driftless cardigan / This is my living room! Obviously I really whooped it up the night before, so I spent my day relaxing on the couch and getting absolutely nothing done 🙂

3

Day 3: Grainline Studio Scout tee + Closet Core Patterns Ginger Jeans / This is my studio, and I spent most of my day in here!

4

Day 4: Cashmerette Concord tshirt + Deer & Doe Fumeterre Skirt (made with a rayon from Workroom Social!) / This is my bathroom! I was bound and determined to get a shot in here, but it is VERY small (as is my whole house LOL) so I had to improvise 🙂

5

Day 5: True Bias Nikko top + Closet Core Patterns Ginger Jeans (again!) / This is my kitchen! Fun fact: I bought wallpaper (to cover the soffits above the cabinets) immediately after taking this photo.

6

Day 6: (RTW) Skateboarding is Stupid tshirt (cropped + re-hemmed by me) + Closet Core Patterns Ginger Jeans / This is my dining room!

7

Day 7: Allie Olsen Elio Top + True Bias Lander Pants / This is my bedroom, and also here is an Amelia cameo!

8

Day 8: Tilly & the Buttons Rosa Shirt dress / Real talk: This is an exact duplicate of the dress in that post LOL I guess I’m a different size now, so I made a bigger one! And I rarely wore it, because it felt so… overwhelmingly denim and kind of heavy. So I cut the sleeves short right before taking this photo, and it feels so much better now!) Anyway, this is my patio!
9

Day 9: Grainline Studio Archer shirt (made with Spoonflower fabric!) + (RTW) Elizabeth Suzann Cecilia pants (altered by me!) (also discontinued – sorry! But they are super high waisted and super stretchy and really awesome!) / Just hanging out in my giant + empty back yard. I love that the blank canvas gives me the option to do anything I want back here, but also, it is a little intimidating to start from scratch! Eventually I’d like to landscape and add some small gardens and maybe a patio (and someday – a separate studio building!!! #dreams), but for now, I mainly use this space to take blanket naps in the sun haha

10

Day 10: (RTW) Handpainted denim jacket, Martine Sweater (originally knitted by me, then later overdyed by me!) + Closet Core Patterns Kalle Shirt + Closet Core Patterns Ginger Jeans (again!) / I ran out of rooms so I’m back in my living room, in front of one of my favorite pieces of art! I found this delightfully creepy piece a a thrift store about 10 years ago and it gets a lot of comments (both good and bad haha).

11

Day 11: Poison Grrls Beauty School sweater + Megan Nielsen Dawn jeans / Ok so this isn’t my house – I was on set (as a tailor!) for a tv shoot! It was a very busy day but I managed to squeeze in a quick bathroom mirror selfie 🙂

12

Day 12: True Bias Nikko Top + (RTW) Talbot’s Leopard Midi skirt (I changed out the waistband for a soft, wide elastic!) / Took these photos on my front porch to show up my SEXY NEW SECURITY DOOR (here is the one I got!). I’ve wanted this door since I originally bought my house, and it is everything I dreamed it would be! (ps if you think my legs look really airbrushed… they aren’t, it was just kind of cold so I have on skin-colored pantyhose LOL)
13

Day 13: Tilly & the Buttons Stella Hoodie (shortened into a top and then I added that sparkly cat patch!) + Vogue Patterns 2442 (the original Calvin Klein jeans!) / While I had the carpenter installing that front door, I also convinced him to re-hang the screen door on the side of my house! It’s original to the house, but the sellers took it down and stashed it in the crawl space because it looked “old fashioned.” So I had it re-hung and I love it! There!
14

Day 14: Megan Nielsen Eucalypt tank + True Bias Lander pants / Just hanging out with the peonies in my front yard! The previous homeowner planted them and I have never loved a flower more!

15

Day 15: Cashmerette Concord tshirt (again!) + (RTW) Maxi skirt that originally started out as a huge 80’s dress (I cut into a skirt and then later added a wide elastic waistband. Because elastic is super comfortable and I love myself LOL) / This is the other side of my kitchen! And if you peek into the living room behind me, you can see Amelia’s favorite toy – a horrible thing that looks exactly like vomit (brown, fuzzy, and it’s even the same SHAPE ugh)

16

Day 16: True Bias Rio Ringer tshirt (with an added CAT PATCH!) + True Bias Lander pants / Here’s another little corner of my studio – I painted the mural on the wall!

17

Day 17: Sophie Hines Axis Tank + ThreadyMade Sunburst Monroe skirt (this came as a kit but I sewed it together!) / Here is another corner of my kitchen, and at this point you can see I clearly ran out of spaces to shoot…

18

Day 18: True Bias Lander shorts + Closet Core Patterns Kalle shirt + (RTW) Black sweatshirt (that I added another cat patch to LOL) / Someone thoughtfully suggested I take a photo in the laundry area, so that’s what inspired this hahaha.

19

Day 19: Helen’s Closet Arden Pants + (RTW) vintage Duran Duran concert tshirt (shortened by me!) / This is another angle of my bedroom, taken while packing for a workshop at Pintuck & Purl.

20

Day 20: (RTW) Thrifted black tshirt (cut + hemmed into a crop top by me!) + (RTW) knit skirt (brand is A.L.C.) (I did take in the waist elastic to make it a little more fitted; otherwise it is essentially un-alterable due to how it is constructed) + leopard print silk chiffon scarf that is basically a really expensive piece of fabric (Alexander McQueen from Darrell Thomas Textiles) cut into a rectangle and then hemmed / Out of my house for the weekend, and in my temporary digs in Exeter NH while I teach a workshop at Pintuck & Purl! This AirBNB was the *cutest* little space!

21

Day 21: Cashmerette Appleton Dress / This was my birthday!! Maggie brought me a CAKE – it’s a little pair of jeans with a pincushion that matches my tattoo / blog header, I mean, COME ON.

22

Day 22: Sophie Hines Axis Tank + Grainline Studio Archer shirt + (RTW) thrifted Leopard bias skirt (hemmed by me) / Day 2 of my workshop at Pintuck & Purl! Also, 2020 was the year I discovered just how much I love wearing bias cut pieces. SO. COMFY. (yet so refined!)

23

Day 23: Tilly & the Buttons Rosa shirt dress (again!) + silk leopard scarf (again!) / Day 3 + a wrap for my second jeans workshop of the year! I loved wearing this dress so much that I decided to bring it with me and wear it again! Although in retrospect, it might not be the absolute best choice for teaching – the skirt is short, and gets dangerously shorter depending on how I sit. That’s a lot of leg!

24

Day 24: Poisongrrls Beauty School sweater (again!) + RTW A.L.C. knit skirt (again!) + leopard silk chiffon scarf (again!) / I was traveling all day and this was the best photo I could manage! Also, this whole outfit is repeats. Whatever! Amazingly, I did not vanish into a puff of smoke upon leaving the house LOL

25

Day 25: StyleArc Patterns Ariana dress + (RTW) Button-up (hand embroidery on the back done by me, and I also shortened it a little!) / Another angle of my living room! This last year I also discovered using button-up shirts as a light layer to wear in the summer. Breathable fabrics such as rayon, silk, linen, and lightweight cotton are perfect for warding off the chill of an aggressive A/C, and also look much more seasonably appropriate (I think!) than a big ol’ cardigan!

26

Day 26: Sew Over It Penny dress (made with a fabulous Dolce & Gabbana cotton from Darrell Thomas Textiles) / Went out for my birthday dinner (to House of Cards in Nashville which was SO AWESOME and I highly recommend!) and decided to wear an old birthday favorite! I never posted about this dress, but I made it a couple of years ago! Also, I’m standing with my (new to me) truck! This was my dad’s vehicle and my mom titled it over to me a couple of months ago. It’s been a few years since I drove a truck (my old truck was a Ford Ranger, too!) and I forgot how fun they are!

27

Day 27: Cashmerette Concord tshirt + (RTW) Talbots leopard skirt (again!) / My niece graduated high school this year so I spent the day celebrating with her! I cannot believe it has been 18 years since this little squirt was born. Where does the time go??

28

Day 28: True Bias Lander pants + (vintage/RTW) Sheer Embroidered top + Sophie Hines Axis tank (worn underneath) / Another side of my dining room. Can you tell I’m over the daily photos by this point? LOL

29

Day 29: Professor Meow sweater + Closet Core Patterns Ginger Jeans / It got suddenly cold again which meant another opportunity to bust out the sweater collection! Yeehaw! Also, this is the other view from my hallway!

30

Day 30: Closet Core Patterns Fiore skirt + True Bias Nikko top (again!) / When I made this skirt a couple of years ago, it felt a little risky to sew it in such a weird yellow. But it has ended up being a real workhorse in my wardrobe, and that strange shade of yellow-green matches most of my clothes! I also wasn’t sure how I’d feel about the slightly longer length, but I love it! Here is another side of my living room, and where Amelia spends most of her day when I’m home with the door open (there is a bird feeder hanging on the tree right outside).

31

Day 31: Closet Core Patterns Elodie wrap dress / Last day of May, finally!! I leashed up Amelia and took her out for a little photo walk! Of course, she’s a cat so our “walk” ended up with her flopping down on the ground, dramatically eating all the grass around her like it was her last meal. Oh well!

That’s all for Me Made May this year! Not putting any restrictions on my outfits (ex., allowing repeats, RTW, etc) made it a lot easier to get dressed and feel excited about what I was wearing! If you’re thinking that there are barely any repeats here as it is – you’d be correct, as May tends to flip-flop a lot weather-wise here in Nashville, with an equal amount of warm and chilly days. So I pretty much had double the options to choose from when it came to clothes!

The biggest improvement for me was narrowing down the colors I wear, and sticking mainly to warm colors with a slightly limited palette (including lots of leopard, obviously #leopardisaneutral). This made nearly all of my pieces effortlessly coordinate, which I love! I still need to do some work when it comes to silhouettes and proportions, but keeping track of everything for a month has been really helpful.

I’m also happy to report that there were only a couple of pieces I wore that I didn’t feel super excited about. I will be removing these pieces from rotation and seeing if there is something that can be altered to make them more appealing, or releasing them into the world for someone else to wear and love.

Did you participate in Me Made May this year? What were your takeaways?